I need some cute Easter decorations. I've been trying to think of something new and creative to make. I had a vision of a carrot seed packet. Easter makes me think of rabbits. Rabbits eat carrots. So..... Here's what I came up with.
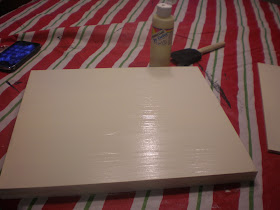
I started with a piece of 3/4 inch thick, birch plywood. This was a scrap piece of wood I found in our garage. It's 10 3/4" x 12 1/4". I painted it an antique white. While the paint was drying, I cut "Carrots" and "10 c" on my Silhouette. The font was "Tiranti Solid Letter". It was 162 pt. font. The dimensions were 2x6". I used the same font for 10c. It was 98 pt. font. I cut it on vinyl.
While I was working on my sign, my girls were painting signs of their own.
I lightly dry brush painted the sign with a dark brown.
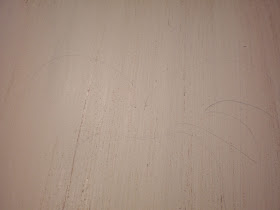
Using a pencil, I drew carrots on the board.
After I painted the carrots, I pulled the vinyl off of the paper. I used the vinyl as a stencil and painted it in with brown paint.
See how the vinyl makes a great stencil?
Here's the sign drying. The only step left is distressing it.
When it's dry, I get out my mouse sander and sand away.
This is my finished sign. It's a new Easter decoration! I had all the materials for this so it didn't cost me a thing. Plus, it didn't take long to make! My kind of craft: cheap and easy!


What a really cool idea!
ReplyDeleteThat really is super cute :)
ReplyDeleteShannon, that is such a darling sign! Thanks for stopping by my blog today:)
ReplyDeletewatched her do it; impressed, even cuter in real
ReplyDeleteThis is another cute idea. I love this sign!! Thanks for sharing it.
ReplyDeleteRuth
Serious cuteness, what a wonderful project!
ReplyDeleteLove the vintage look of the sign!
ReplyDeleteI am having a giveaway on my blog. $20 store credit from My Carrie Creations to get a backpack withyour kids favorite disney character. All you have to do is leave a comment.
http://houseonashwelllane.blogspot.com/2011/03/20-store-credit-from-my-carrie.html
These are SO cute!!! I would love for you to link it up over at What's in Your Garden :)
ReplyDeletehttp://my-gardenofeden.blogspot.com/2011/03/whats-in-your-gardenlinky-party-3.html
Thanks!
Abbi
This is so cute. great idea.
ReplyDeletemegan
craftycpa.blogspot.com
Thanks so much for the detailed tutorial! If you get a chance, I'd love for you to link this up to my Not "Baaad" (get it?) blog hop :)
ReplyDeleteADORABLE! Thanks for linking this up!
ReplyDeleteShannon-
ReplyDeleteThe distressing really gave the sign a ton of character...
Thanks for linking to Creative Juice Thursday...
I just LOVE it!!!
ReplyDeleteThanks for linking up to What's in Your Garden!!
Abbi
Thank you everyone! It was a truly fun project to make! Now, if I can just get my husband to cut some wood, I'll start creating more!
ReplyDeleteYou are being featured tomorrow!! :)
ReplyDelete