Welcome!
Thanks for visiting! Please leave us a comment as we love your feedback.
See where we are partying at the bottom and on the sidebar.
Showing posts with label Holiday. Show all posts

Friday, March 9, 2012

Cat in the Hat Crochet Hat & Bow

In case you didn't know, March 2 was Dr. Seuss's Birthday.  Ryan's (my oldest) elementary school was having a day filled with fun activities for the kids to celebrate Dr. Seuss and his birthday.  

One of the activities that occurred was a school parade.  Any child, teacher, or staff member who dressed as a Dr. Seuss character could walk in the parade.  Ryan begged and begged for me to help him dress like The Cat in the Hat.  He actually thought I would make him a whole tuxedo like outfit.  He was dreaming on that one.  I did however crochet him a hat and bow-tie that mimicked The Cat in the Hat's attire.  
Related Posts Plugin for WordPress, Blogger...

Thursday, March 1, 2012

St. Patrick's Day "Lucky Sign" -Copy Crafting

I saw this Lucky sign:  http://lindseyscraftlist.blogspot.com/2010/02/lucky-wood-board.html I wanted to make one of my own.
My husband is a wood worker.  In his home remodeling projects, I get lots of scrap wood.  GraciAnn and I found a piece we liked, and she went to work sanding it. This particular piece was oak.

We got green paint.  The color was "XMas Green".
We painted the entire board.

On my Silhouette, I cut the word Lucky and some stripey Shamrocks. I used a distressing ink pad and distressed the letters and the shamrock.

I put Mod Podge on the entire board.
I placed the letters and shamrock on the board and rubbed it down. I let it dry for about thirty minutes.


I mod podged over the top of the entire thing.

It dried.  I added embellishments-ribbons and buttons. I feel Lucky to have such a wonderful sign!
Related Posts Plugin for WordPress, Blogger...

Leprechaun Hat Pot-A Tutorial

Another repost!
The finished pot with a Shamrock in it!

Don't you love crafts that are completed in less than an hour?  I do.  Especially when I can get my kids involved!
You'll need a clay pot, green paint, a paintbrush, a large washer (metal), sandpaper, gold paint, black grosgrain ribbon, and a hot glue gun. (A cute cheerleader in the background never hurt anything either.)
Paint your pot green. (Or, have your assistant do it.)

We painted the inside rim of the pot so it would look finished.

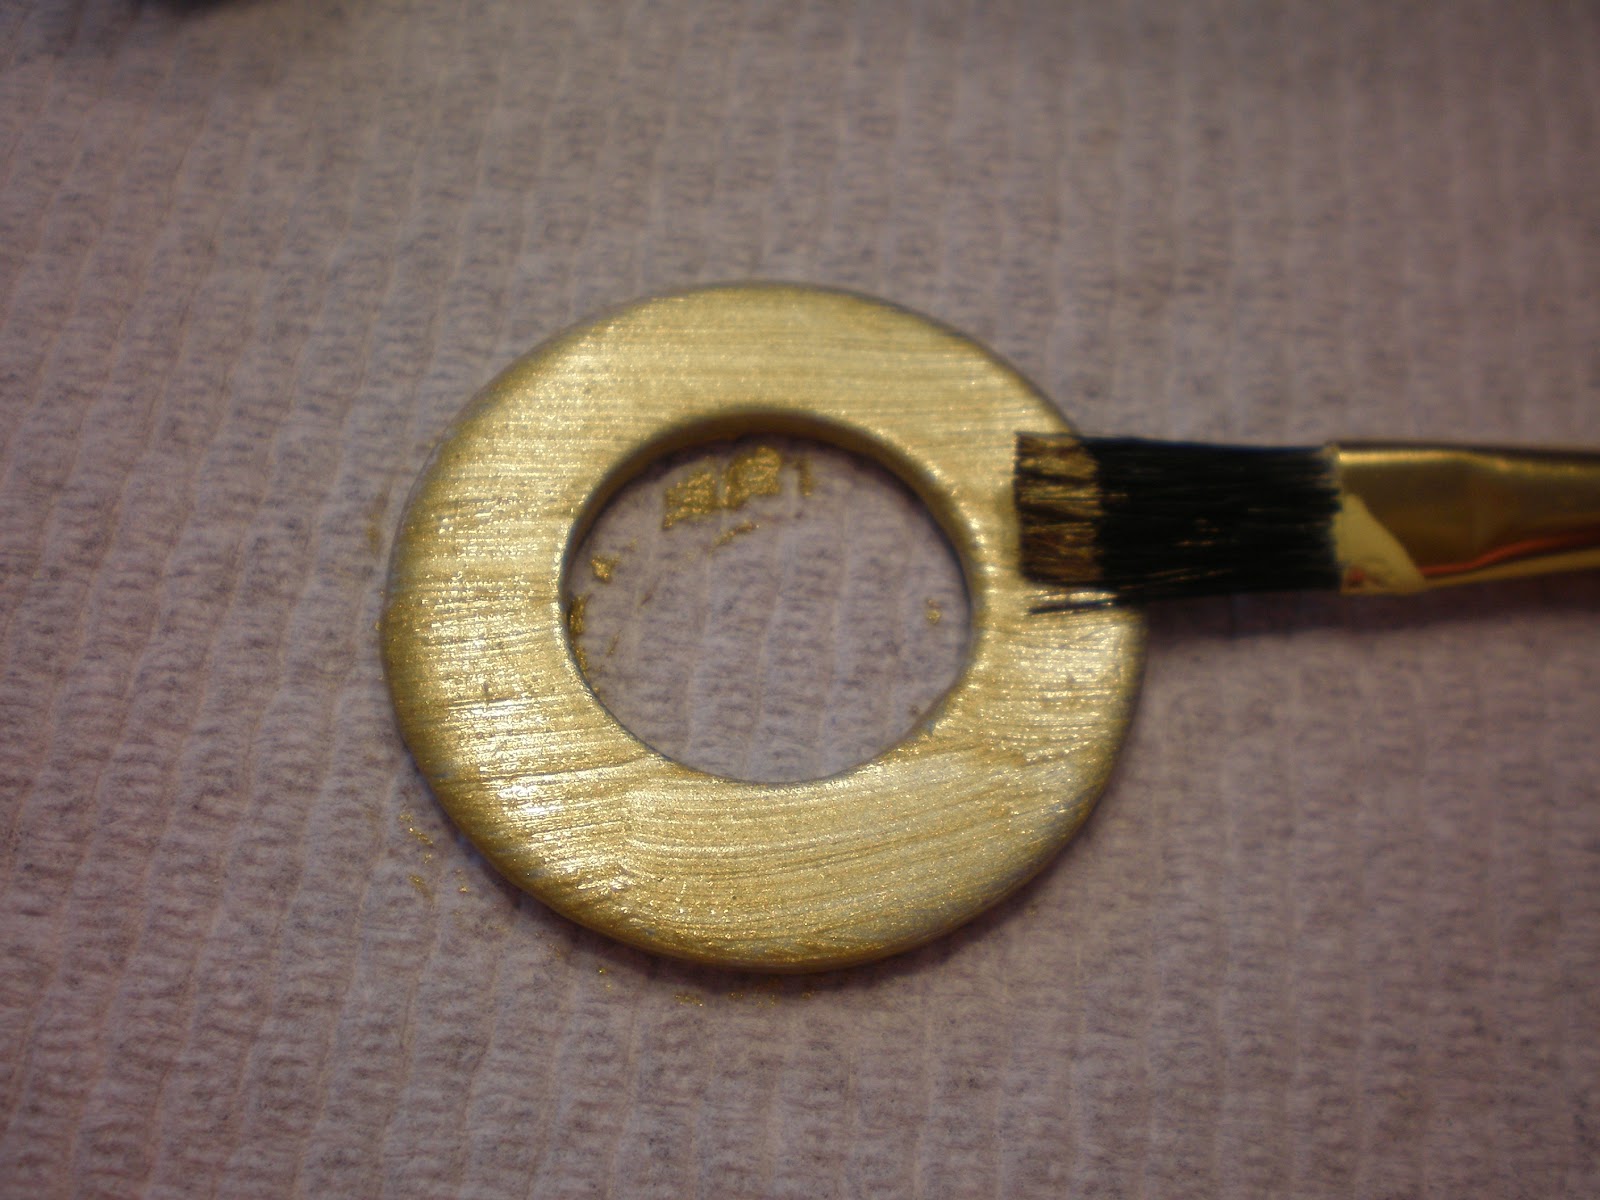
Now, we're ready to paint the washer.  (This is the buckle on the leprechaun hat.)

Sand it so paint will stick.

Paint it gold.  I like the look of the brush strokes.

When the washer and pot dry, assemble them.  (Wow, I forgot to take pics!) I hot glued the black ribbon around the pot. Then I hot glued the washer on top.

This is the mostly finished pot. I wanted to show it to you with a clover planted nicely inside.  Unfortunately, after trips to 5 different nurseries in search of one, and a scan of my yard, I gave up.  Apparently, they aren't in season yet.  I need to check sometime next month.  What!  Next month St. Patrick's Day will be over with and I won't want a clover in a Leprechaun hat as a decoration. With all this spring weather we're having, I'm hoping one will pop up in the yard any day now.

Does this remind you of the pilgrim hat planter I made? http://www.oursevendwarfs.com/2010/11/copycat-crafting-4.html
Related Posts Plugin for WordPress, Blogger...

Sunday, January 29, 2012

Last Year's Valentine's Day Post is Full of Great Ideas

It's Valentine's Day! I hope you all are having a wonderful one.  What does this mean to us?  Well, we're almost done with pink, red, and hearts and we'll be moving on to rainbows, leprechauns, and pots of gold.

I LOVE traditions.  I have many.  I really don't have any Valentine's Day traditions though.  Any suggestions?

I definitely try to spend the day letting others know how grateful I am for them. So, let me start with our followers.  I am so grateful for you.  You give our crafting addictions a purpose.

Speaking of crafting and cooking... I have a few more Valentine's Day things to share with you before we move on to the next holiday.


Do you remember the birthday door mat tutorial I did? http://www.oursevendwarfs.com/2011/01/happy-birthday-welcome-mat-tutorial.html Here's my Valentine's Day version.  We're conversation hearts.  I used regular acrylic paint on the mat and fabric paint to paint on our names.  I just free handed the hearts. Super easy and even cheaper.  This is one of those thirty minute crafts.  I LOVE quick crafting!
My friend Amy and I saw a great wreath on Oopsey Daisy http://oopsey-daisy.blogspot.com/2011/02/3-dimensional-heart-wreath.html.  We were inspired.  As always, when we copy craft, we take their thing and do our own thing to it.  So, instead of copying the entire wreath with the hearts, we did a partial cover. I'll be honest, there were three reasons we did this. First, we bought two stores out of hearts.  Secondly, that would have taken a lot more time.  Finally, we really liked the look of the satin ribbon on the wreath so we wanted ot show some of it.  This is my wreath above.

This is Amy's wreath.  Amy claims to be noncrafty.  She's a crafty chick in denial.  Her wreath is gorgeous.  Also, if I'm going to be completely honest.  She made all of my wreath too.  The only thing I did was arrange the hearts, hot glue them on, and get a huge blister to prove I used a hot glue gun! Thanks, Amy!


Here's my entry way with the wreath and doormat.


After crafting, I did some cooking. I made these amazing meringue cookies.  I got the recipe from http://www.thestoriesofa2z.com/2010/02/meringue-ice-cream-cone-valentines.html she made them into adorable ice cream cones.  I decided not to do that.  First, my kids don't eat the cones. Secondly, my kids don't eat cake, just icing, and thirdly, meringue cookies, even with M & Ms are pretty low fat.  I'm thinking that's a great dessert to make.  These are delicious.  I used 1T of freshly squeezed lemon juice.  The chocolate and lemon combination are surprisingly amazing.  I will make this recipe again and again.  YUM!

I also made these Martha Stewart cookies.  http://www.marthastewart.com/recipe/chocolate-cookie-cutouts-love-bug-cookies The first time I made these cookies was for my daughter's first birthday party.  It was ladybug themed and I made the cute ladybug cookies.  Well, this cookie base is simply delicious... cocoa and cinnamon...so good.  So, I've made them a couple of times since.  These aren't decorated yet but pretty soon they'll have Royal Icing and a varitey of sprinkles. 
...GraciAnn decorated these!  Cute, huh?

Then there's the homemade card I made my husband.  I used red felt to make the rosettes. http://www.oursevendwarfs.com/2011/02/valentines-day-celebrated-with-burlap.html Here's a tutorial for the rosettes I did on an earlier project.  It's simple, sweet, and special. I like it much better than any of the cards I looked at to buy.

Here's wishing you a lovely day on this Valentine's Day!
Related Posts Plugin for WordPress, Blogger...

Wednesday, January 25, 2012

More Valentine's Day Ideas

Here's another repost!

I've been busy!  Anyone who knows me knows I am ALWAYS busy.  My children and husband are a full time job!  My crafting is another job that's pretty much fulltime.  Luckily, I love my jobs. I  just wish I had more time for all of them.
I got this idea from the Idea Room.  I used an ancient frame I found in my husband's stuff.  It was an antique gold color. I  dry brushed it with white paint.  It toned down the gold.  I used a darker pink cardstock for the lettering.  I found that hot gluing the actual letters and then placing them on the scrapbook paper was the easiest way to go. It was a challenge to use the cardstock to make letters but the three dimensional effect is great!  Instead of crepe paper rosettes (oh, that's a story for another entry), I used a soft pink fleece to make a rosette (here's a tutorial for that: http://www.oursevendwarfs.com/2011/02/valentines-day-celebrated-with-burlap.html?utm_source=BP_recent). It was so easy and so sweet.  I really like the way this turned out and appreciate the Idea Room's idea!

Jill and I are getting into making hair clippies.  You may remember the Christmas tree clippies I made for one of our giveaways.  Then we gave away some Valentine's Day clippies.  http://www.oursevendwarfs.com/2011/01/weve-reached-over-100-facebook-friends.html 
I've also started making cupcake clippies.  Here's one I made for my friend Aubrey.  She turned 2.
Here's the one I made for my daughter's second birthday. It matches her birthday shirt. I've got lots of clippie ideas! Stay tuned for some neat ones!
My friend Lesli made these treat bags, for her daughter's second birthday party.  They were filled with Hershey's kisses. The kids (and parents) loved them!  What a great idea!

Believe it or not, we still have many projects in the works. Stay tuned!

Related Posts Plugin for WordPress, Blogger...

Thursday, January 19, 2012

A Gorgeous Valentine's Day Wreath

I'm going to share some posts from last year that have wonderful Valentine's Day ideas. Here's the first one! 

I FINISHED IT!
Isn't it beautiful?

The pictures do not do it justice.  The felt is a great velvety red.

I've temporarily placed it on my mantle since it's too cold to go outside and put it on my door.

I LOVE my new heart wreath!

Do you want to make one?  Well, this was a copy craft. Let me give you a few pointers. There are more than 300 three inch circles on my wreath.  It took over a yard and a half of felt.  The original crafter said she used 3/4 of a yard.  I'm thinking I put my circles a little too close together.  Oh well.  I think it looks fantastic and the blisters on my scissor hand will heal soon.  Just kidding.  I didn't get blisters but that did make for a lot of cutting.  I did double up the felt so I was cutting two at a time.  That helps! Also, love all my friends and my Mommy but I won't be making anymore of these this year.  As glad as I am that I made it, I'm circled out.  This is not a mass crafting recommended project.

Here's the link to the creator: http://www.theidearoom.net/2010/01/felt-heart-wreath.html Kudos to her for creating such an amazingly beautiful wreath.

We're still facing freezing conditions and icy roads.  GraciAnn solved the dilemma of how to warm up after playing in the snow....

A BUBBLE BATH!

I'm so glad Jill shared her "recipe" for bath paints.  My girls adore bathtime and paint. We'll be making those soon.  So, since we're iced in again tomorrow, I'll be working on another project in the works, "THE PLAYROOM!"  Yikes!  Wish me luck!
Related Posts Plugin for WordPress, Blogger...

Monday, December 12, 2011

Christmas Gifts

Here's a post I did from last year. I thought you may be able to use some of the gift ideas.  Speaking of gift ideas, I'd better get busy creating.  Christmas is less than two weeks away.  YIKES!!!!

'Tis the season to be busy.  Busy, I have been!  I have played nurse, baked, blogged, shopped, crafted, cooked, cleaned, decorated, wrapped, and played hostess for the past month!  My oldest daughter had her tonsils, adenoids, and a lymph node removed on December 9th.  She did wonderfully!  She's a tough one!  Anyway, that's where the nurse role came on.  The rest, just goes with Christmas.

Jill and I started this blog during the busiest time of the year!  This year was certainly no exception with the two weddings I went to, out of state, at the end of November. Then, the giveaways.  They sounded like a great idea at the time, and we had fun doing them, but wow... that was just another addition to our overflowing plates. No worries.  We've already begun thinking about our giveaways for next Christmas.  Woah... I guess I should let you in on a little secret.  The giveaways will continue throughout the year... just not on a daily basis.  We'll do our best though.  Giveaways are great fun.  I won four puzzles for my girls, on a blog, this Christmas!

Anyway, I wanted to share some of the Christmas gifts, I managed to make this year.  Unfortunately, I forgot to take pictures of them all.  Have I mentioned my sleep deprivation?  I am not at my sharpest without sleep. Hopefully, I'll get those folks to send me pics and post them later.

Some of my gifts were copy crafting!

I made a pair of these for my mom and myself.  Notice I made my snowman one block taller.  I liked him better this way!
 http://undermypolkadotumbrella.blogspot.com/2010/11/2x4-snowman.html
Copy crafting at it's best http://undermypolkadotumbrella.blogspot.com/2010/11/photobucket.html

For teacher's gifts I attached clothespins on the back for their gift cards.  Such a cute presentation!

I made 10 of these for friends. You would have thought I would have taken some pictures of the unwrapped gift!
Here's the first one I made for our family.
It's a HowDoesShe craft. http://www.howdoesshe.com/2x4-to-birthday-boardtutorial


Then there's the wreath I copied from Jill.  I added some bells and a ribbon and voila I have the perfect UK wreath for my brother in law, Jim: a huge UK fan. http://www.oursevendwarfs.com/2010/12/sparkle-wreath-tutorial.html


Then, there are the coasters.  I made a set for my daughter's teachers, a set for my mom, and a set for my mother in law.  She's retired Navy so I made hers with great Navy scrapbook paper.  I just forgot to take a picture of them!  Grrr... Here's a tutorial Jill did on the coasters.  http://www.oursevendwarfs.com/2010/12/gift-idea-inexpensive-coasters-tutorial.html

And then folks, I got creative on my own....

For my daughter's teachers' gifts I put a few handmade items together to come up with:

A tshirt, four kinds of homemade treats, and coasters, all in a decorated, reusable, plastic bin.

Stay tuned for a tutorial on these easy shirts.

We'll do an embellishing with vinyl tutorial soon!

White candy bark and peppermint bark (recipes coming soon).


Then there were photo boards:
These things are so versatile and amazing.  Remember the "We Believe" one I did? http://www.oursevendwarfs.com/2010/12/making-photo-board-tutorial.html
I made some changes and a variety of gifts!

Another present for my UK loving brother in law.  Skeeter is his dog.

The glare so takes away from the cuteness of this.  My father in law is retired Navy so I thought this would be a great place for him to put Navy memorabilia.

This one is for my Daddy.

This is for my brother.  My girls will tell you, he is the best Uncle Ever!  They're right!

Here's another "We Believe" for my friend, Amy.


Remember the "Grateful" subway art?

I made this for my sweet, sweet, Aunt Esther.


Then there's this calendar creation I came up with. (I'll do a tutorial soon...)

For my Mother-In-Law.  Notice the Navy paper on the date blocks?  She's retired Navy, so fitting.  Then, to keep with the patriotic theme, I did white and red stripes.  It looks "flag-y" to me.

My brother's.  I used the same paper on his numbers that I did on his "We Love Uncle Darren" board. Matchy Matchy!  I also did themed paper for each month. 

My Dad's is sideways.  I still haven't learned how to flip pictures, sorry.


This was a gift to my daughters, from my friend, Lesli.  She got the idea from HowDoesShe.  So cute!http://www.howdoesshe.com/bucket-o%E2%80%99-chalk

Here's the inside of the bucket!

This is the burlap pillow Lesli made me.  I LOVE the font she chose.  Too cute!

As you can see, it's been a busy time for all of us crafty gals.  There's still pictures of my handmade gifts, I didn't post, because I forgot to take them.   Still, I hope you're inspired to get your crafts on!
Related Posts Plugin for WordPress, Blogger...
Ebates Coupons and Cash Back