
I'm very busy this summer making our rental house a home. In addition to that I have been sick with sinus infections and such for over a month. That has left me with little energy to blog. I apologize!
The other day I had enough energy to do some sewing while the kids played. Can I say how nice it is to have the sewing machine back out! I love how quickly you can accomplish a project when working at the sewing machine. A friend of my commented on Facebook about all that I was able to sew. She said, "Most people can live on bread and water, but not Jill, she needs her sewing machine as well!" I'm sure I am not the only one like that!
Today, I want to share with you my favorite way to make pillows. If any of you have kids or pets and your pillows get dirty, it is nice to be able to take off the fabric and wash it without having to wash the entire pillow. Another nice feature is you can change out your decor easily and not have to stuff another pillow and hand-sew the seam.
Showing posts with label Tutorial. Show all posts
Showing posts with label Tutorial. Show all posts
Tuesday, July 3, 2012
Tuesday, June 26, 2012
Photo Board Tutorial
As we tried to settle into our new house, I noticed that I had many walls that needed to be filled. I always like to display pictures. Not every picture can go in a frame though. That is why I like to make photo boards that match my decor.
Prior to our move, my husband's Uncle gave us a large black entertainment center to go in our family room. Since our family room and kitchen share space, I had to be selective with my decor items. I had a photo board that was in cobalt blue to match my kitchen and dining room. This doesn't match black, so I had to find a pretty fabric that would be a nice fit for our family room. I went to my go to store, Hobby Lobby, and found the perfect print. I also picked up some burgundy/red ribbon for holding the pictures.
Enough talking about the photo board, let me show you how to make one for yourself. Don't be scared by this project. It is very easy to make and you get to use a power tool (sort of).
Friday, January 27, 2012
Valentine's Day Celebrated with Burlap and Fleece-A Tutorial
I'm almost done reposting and can't wait to share some new things with you. Here's another one of my favorites from last Valentine's Day.
This was an inspired craft. Somewhere, on some blog, I saw a heart wreath made of red felt rosettes. The wreath was on a burlap background and it was in a frame. I have looked and looked for that inspiration piece but cannot find it. So, if you created it, or if you've seen it, please let me know. I want to give credit where credit is due.

Here's my finished piece. It's very different from the inspiration piece.

I wanted to make something similar to my inspiration piece, but didn't have a frame big enough. I didn't want to buy anything for this project... so, I went through my husband's stuff in the garage. I found this piece of wood and some foam. I added my cream burlap, some batting, got my staple gun and started working.

First I covered the board with the thin foam. I stapled the foam to the back of the board.
I wanted to give this project a "girly, plush" look.

I covered the foam with a layer of quilting batting to give it that extra fluff.
I stapled the batting to the back of the board.
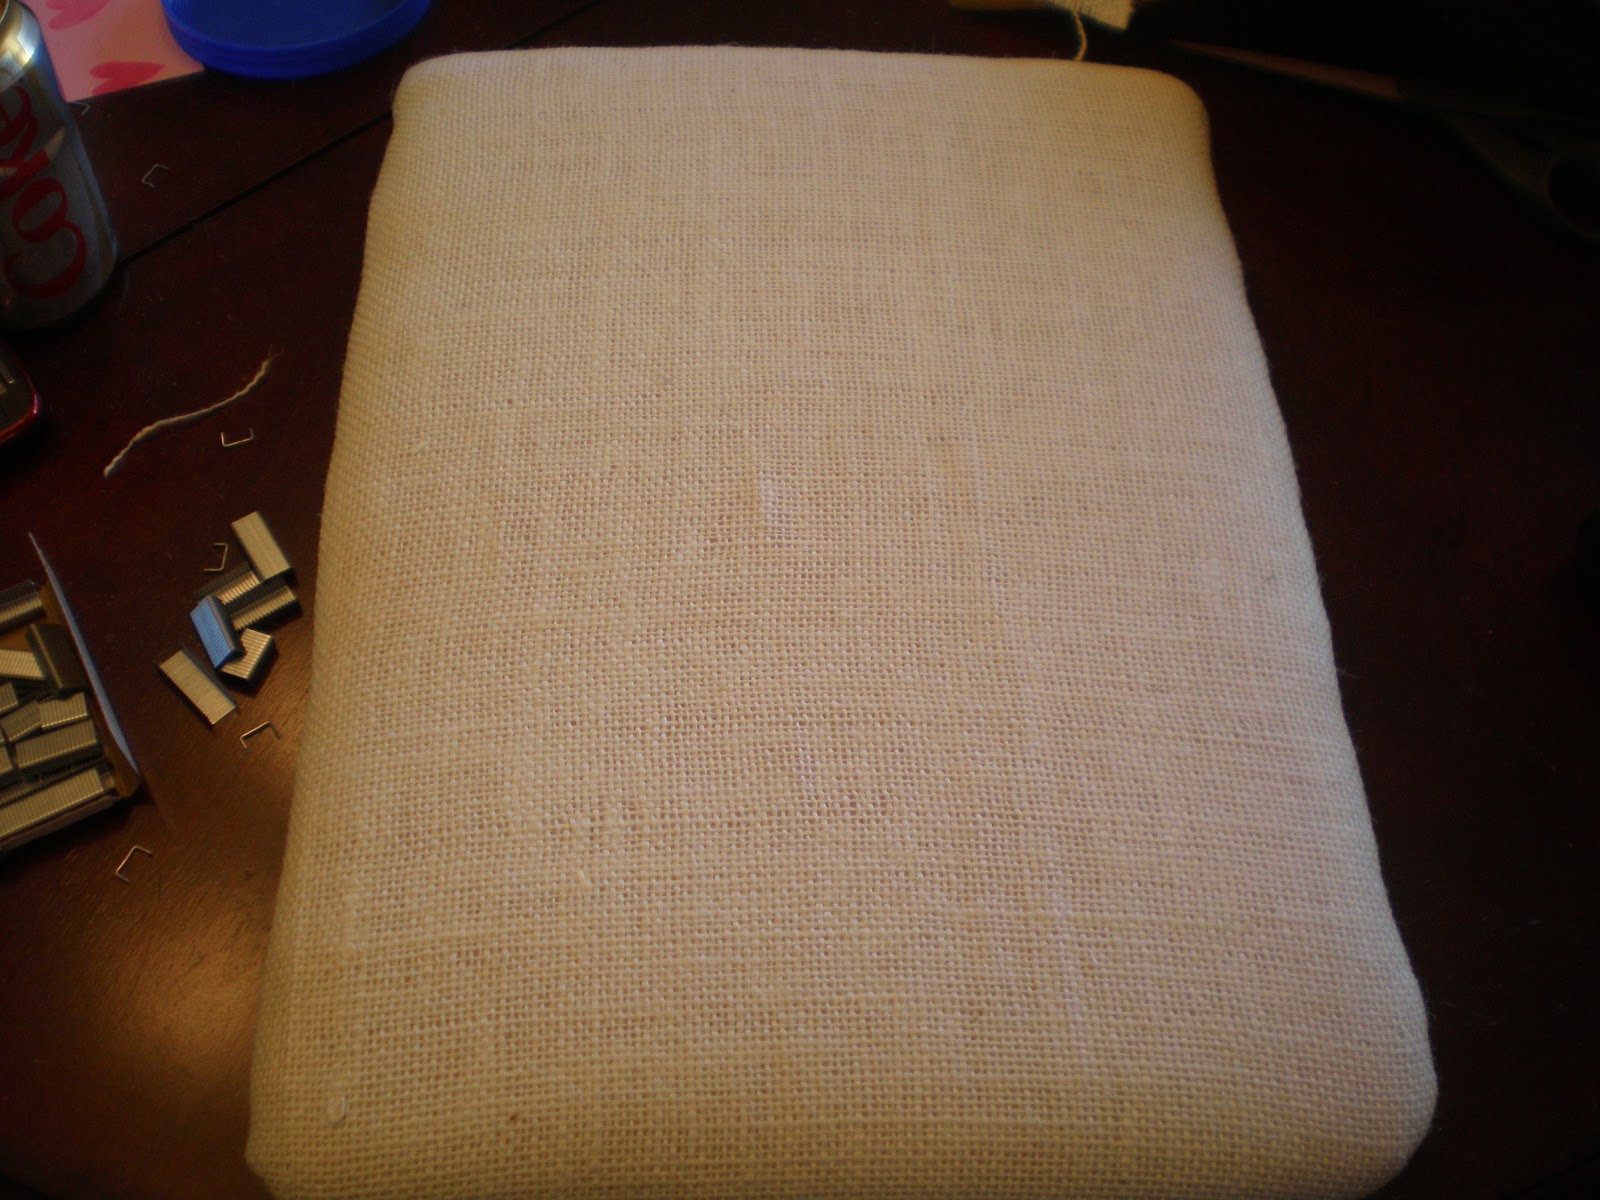
I covered the foam and batting with the burlap. I stapled the burlap to the back of the board.
It gave it a bit of a rugged look.

I made a heart template and positioned it on the board.

I traced the heart onto the burlap so I had a guide to work with.

I made a ton of circles. Seriously, there were a lot of them. I made them from a pretty pink fleece.
I didn't use a template. I just cut them freehand.

I cut each circle into a spiral. I left a circle at the end of each spriral.
It becomes the base of the rosette.

I took the slim end and rolled. I used hot glue every now and then to secure the rosette.

A little hot glue and a little more rolling.

Here's what the rosette looks like at the end. See the base?

I plopped a lot of hot glue on the base.
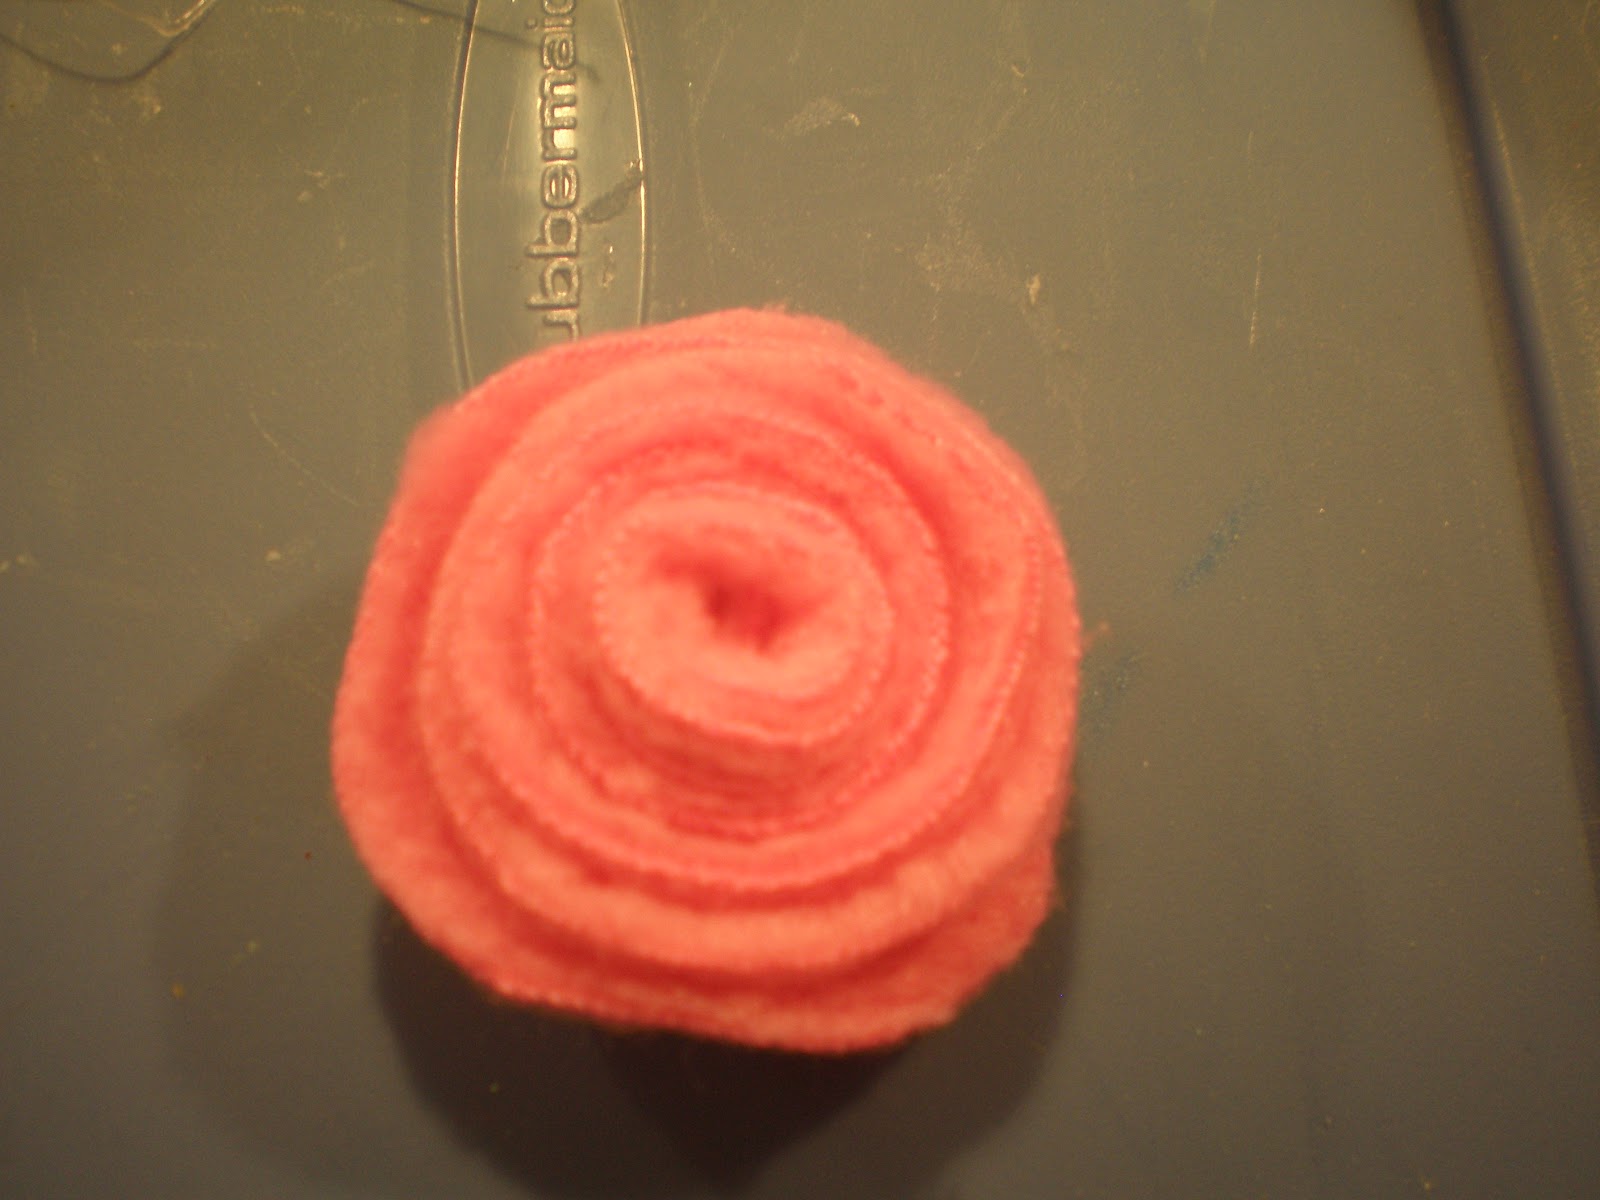
I then pressed the flower to the base. This is how they turned out. Cute, huh?
I glued a zillion of these on to the burlap base. I used the heart I traced as my guide.

I then hot glued trim around the entire project and put a bow in each corner.
The bow adds a little femininity and hides the awkward turn on each corner.

...and it's done.

I love it! I didn't buy anything for this project. YEAH!

GraciAnn used a rosette and a white satin ribbon to make a necklace. It was really cute!

Monday, January 23, 2012
A "Love" Sign-A Tutorial
This is something I created last year. I just love it! It's a perfect post for today because today's my youngest daughter's third birthday. Happy birthday, Sweet Mariella!
I needed a craft fix. I wanted to do something that I could finish in a reasonable amount of time (Something I could finish in a night!). I wanted to do something I hadn't seen before. Finally, I wanted another Valentine's Day decoration. I love what I came up with!


I needed a craft fix. I wanted to do something that I could finish in a reasonable amount of time (Something I could finish in a night!). I wanted to do something I hadn't seen before. Finally, I wanted another Valentine's Day decoration. I love what I came up with!

I got a black from at WalMart for $3. It was for 2-4x6" photos. I used a piece of red scrapbooking paper. It says LOVE on it. I got some flowers from a scrapbook store that look like they were made from pages out of a book. I used distressing ink and a blender stamp. I had black fuzzy vinyl and transfer tape. My tools were my paper cutter, a glue gun, and my Silhouette.

First, I cut the scrapbook paper to fit the entire frame.

Then I cut, "Daughters" out of my black fuzzy vinyl. I used the font, "Waterfalls" 170pt. I pulled away the excess vinyl so I was left only with the word I needed.
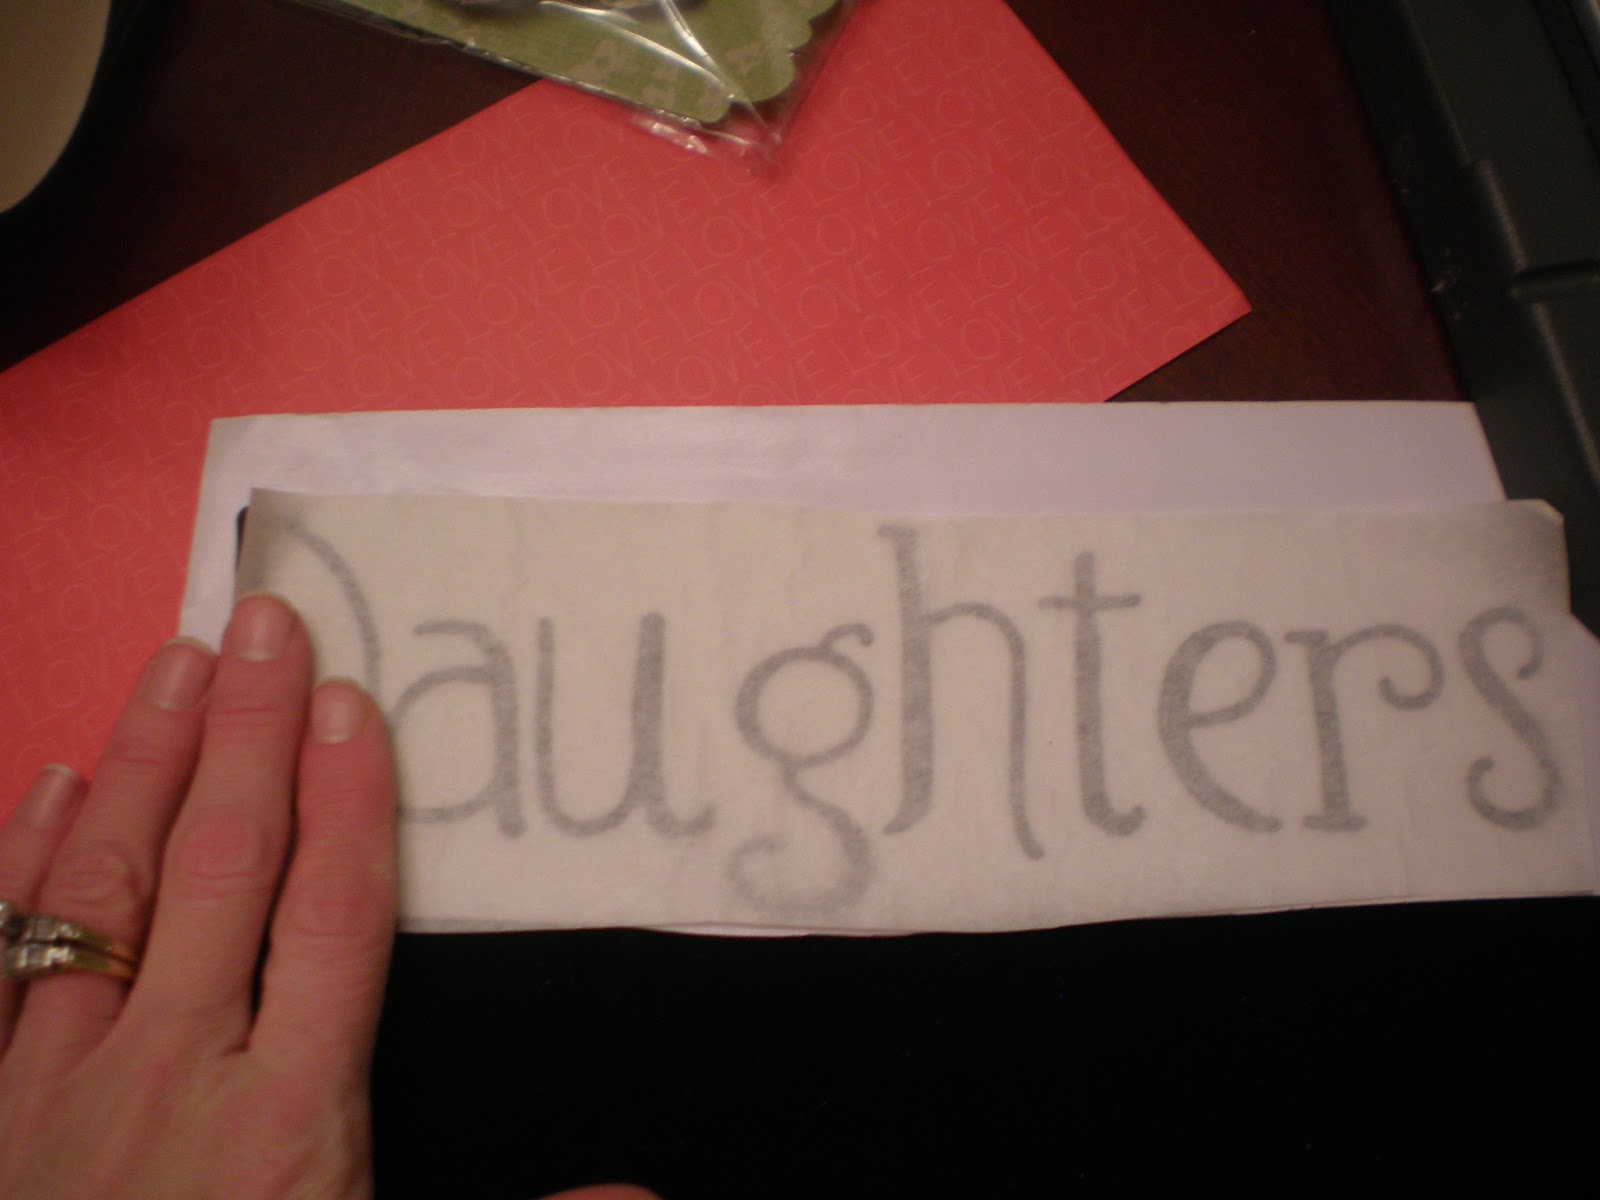
I used transfer tape to lift the vinyl. This does not work as well with fuzzy vinyl.

I placed the transfer tape, in position, on the scrapbook paper and peeled it away. The letters were attached to the scrapbook paper.

Here's a close up of the print on the scrapbook paper.

I went around the edges of the paper with the distress ink. I put the ink on with the blender pad and lightly distressed it.

I put the paper in the frame. I just discarded the mat that was included with the frame. I hot glued 2 flowers directly on the frame.

It's done! My daughters make me think of love so it's all relevant to me! I love it!
Tuesday, November 22, 2011
Easy and Cheap Decorating with Branches - A Tutorial
I am all about making seasonal decorating easy and cheap. I have a Lenox vase that I've had for years and have had no idea what to do with it. It's neutral so very practical. This spring, inspired by my blooming cherry tree, I decided to get some branches and glue cardstock leaves and pink blossoms to them. It looked fabulous! I've decided to make it a habit to seasonally change the vase. It's fall... so guess what... I have leaves, in fall colors, hot glued to branches.
1. First, I gathered branches, from my yard. The best thing about this is they were free!
2. Then, I took 6 different pieces of cardstock in Autumn colors.
 3. I found a variety of leaves in the online Silhouette store and added it to my library.
4. I cut the leaves.
 5. I hot glued them on to the branches.
6. I added the branches to the vase.
 This was an easy, quick project. Now, I realize that my branches are very unrealistic. I know one branch doesn't have 6 different leaves. I just liked the way it looked so I went with it. If you want to be my naturally correct, keep the same kinds of leaves on each separate branch. I am already thinking about the branches for my winter vase! Holly maybe?
1. First, I gathered branches, from my yard. The best thing about this is they were free!
2. Then, I took 6 different pieces of cardstock in Autumn colors.

4. I cut the leaves.

6. I added the branches to the vase.

Friday, November 18, 2011
Thanksgiving Subway Art-Tutorial
What do you think of this Thanksgiving decoration? It was another one I was glad to see, after having it in storage almost a year!
Making Subway Art-A Tutorial
Making Subway Art-A Tutorial
Monday, September 26, 2011
Monogrammed Picture Frame Tutorial
I am still in the process of changing out much of the artwork in my living room. It has been almost 10 years with all the same stuff. Most of the artwork were lighthouses. We had one picture that was a lighthouse and then everyone added to our collection and we were overwhelmed with lighthouses!
The first thing I switched out was a long frame that had pictures of lighthouses in it. I found a beautiful collage family picture frame from Hobby Lobby to replace it. I then used that long frame and made my Pray Picture Frame, which replaced another lighthouse decoration.
This past week, I replaced a lighthouse wall hanging with this Monogrammed Picture Frame that I have been wanting to make for a long time.
Tuesday, September 13, 2011
Pray Picture Frame Tutorial
The other day while browsing Pinterest, I found a great metal board that had "Pray" on it. I loved the idea so I decided to come up with something similar that used up some of my on hand items. Here is what I made.


Friday, September 2, 2011
All about Pinterest & Mini-tutorial
I am completely addicted to Pinterest. I know that some of you might not know much about Pinterest, so let me share some details with you.

Pinterest is a pictorial bookmarking system. Instead of having many bookmarks on your web browser, you can "pin" (or bookmark) pictures onto your pinterest board. You can have limitless boards, which allow you to organize all your pins in a place that is easy to find.
Pinterest is a pictorial bookmarking system. Instead of having many bookmarks on your web browser, you can "pin" (or bookmark) pictures onto your pinterest board. You can have limitless boards, which allow you to organize all your pins in a place that is easy to find.
Friday, July 8, 2011
Baby Sling Tutorial
When I had Evan, I found it increasingly hard to carry him, tend to Ryan and do anything else. A friend of mine (who also showed me the nursing cover) was carrying her son in a sling. I loved the idea of the sling as it was much easier to get your child in and out of versus one of those fancier contraptions.
The only thing I didn't like about the sling was the cost. When I looked on the internet, most slings were at least $30-50. That was way out of my price range. After examining her sling, I knew I could figure out how to make one especially with a bit of google research.
Now that I've had another child, the sling is an essential and I have perfected how I make them. This is a very simple tutorial and will get you a sling for the cost of 2 yards of fabric and some matching thread!
I made this one for my friend, Henri and her precious baby girl, McCall. Here she is modeling it for me. Thanks for the picture, Henri!

Baby Sling Tutorial
Supplies Needed:
2. Unfold your fabric and cut it lengthwise. It will measure 2 yards by 22 inches. Put one piece aside for future use or another sling.

3. Fold your fabric lengthwise once. Then fold it in half widthwise. Make sure the open sides are facing up and to the right. See picture below.

4. On the top, open side, measure from the fold to your hip to shoulder measurement. Henri is a petite little lady so her measurement 22 inches. You want to add a 1/2 inch to this measurement. Therefore, this top measurement is 22.5 inches. Mark this with a pen.
Now measure along the bottom from the fold to the next measurement (keep reading) and mark. Take the original measurement and adding three inches to it. In Henri's case that is 25 inches (22 plus 3). See picture below.

5. After marking both measurements, you will want to cut from the bottom to the top with a curve. See picture below.

6. Unfold your fabric and heat up your iron. It time to use that dreaded iron and do some finishing details. Measure a 1/4 of an inch fold using your measuring gauge on the length of your fabric. Iron this fold down on both sides.

7. Fold this over again and iron down an additional 1/4 of an inch on both sides.

8. Sew down the fold on top and bottom.

9. With the sides sewn and finished, fold the fabric in half widthwise with the right side of the fabric facing up. Make sure your adjust your stitch width to a tight stitch. This will increase the strength of the seam. Sew along the curve a 1/4 of inch in.

10. Turn the sling inside out. You are going to sew along the curve above the seam you just made. This will encase the previous seam. Make sure you sew above the previous raw fabric or it will stick out the bottom of the sling (learn from my oops). This is double protection from the seams opening up.
 11. Open up the sling and sew down this encased seam to the front or back of the fabric. This makes a nice finish and you don't have the encased seam sticking out.
That's it. A simple sew for an awesome sling! Here is my finished sling.

I hope this tutorial helped you. If you are new to baby-wearing and need help utilizing a sling. Here is an excellent guide to the different wearing positions.
This is also an excellent gift to make for a little girl. It is equally as fun to carry your baby dolls around in a sling. I am sure I will be making one for my sweet Anna one day.
I hope you or a friend enjoys a new sling!
Happy Crafting!

The only thing I didn't like about the sling was the cost. When I looked on the internet, most slings were at least $30-50. That was way out of my price range. After examining her sling, I knew I could figure out how to make one especially with a bit of google research.
Now that I've had another child, the sling is an essential and I have perfected how I make them. This is a very simple tutorial and will get you a sling for the cost of 2 yards of fabric and some matching thread!
I made this one for my friend, Henri and her precious baby girl, McCall. Here she is modeling it for me. Thanks for the picture, Henri!

Baby Sling Tutorial
Supplies Needed:
- 2 yards of fabric of choice (width should be at least 44 inches)
- Matching thread
- Sewing machine
- Measuring tape and/or measurement gauge
- Fabric Marking pen (or light pen to mark small measurements)
- Iron
- Scissors
2. Unfold your fabric and cut it lengthwise. It will measure 2 yards by 22 inches. Put one piece aside for future use or another sling.

3. Fold your fabric lengthwise once. Then fold it in half widthwise. Make sure the open sides are facing up and to the right. See picture below.

4. On the top, open side, measure from the fold to your hip to shoulder measurement. Henri is a petite little lady so her measurement 22 inches. You want to add a 1/2 inch to this measurement. Therefore, this top measurement is 22.5 inches. Mark this with a pen.
Now measure along the bottom from the fold to the next measurement (keep reading) and mark. Take the original measurement and adding three inches to it. In Henri's case that is 25 inches (22 plus 3). See picture below.


6. Unfold your fabric and heat up your iron. It time to use that dreaded iron and do some finishing details. Measure a 1/4 of an inch fold using your measuring gauge on the length of your fabric. Iron this fold down on both sides.

7. Fold this over again and iron down an additional 1/4 of an inch on both sides.

8. Sew down the fold on top and bottom.

9. With the sides sewn and finished, fold the fabric in half widthwise with the right side of the fabric facing up. Make sure your adjust your stitch width to a tight stitch. This will increase the strength of the seam. Sew along the curve a 1/4 of inch in.

10. Turn the sling inside out. You are going to sew along the curve above the seam you just made. This will encase the previous seam. Make sure you sew above the previous raw fabric or it will stick out the bottom of the sling (learn from my oops). This is double protection from the seams opening up.

That's it. A simple sew for an awesome sling! Here is my finished sling.

I hope this tutorial helped you. If you are new to baby-wearing and need help utilizing a sling. Here is an excellent guide to the different wearing positions.
This is also an excellent gift to make for a little girl. It is equally as fun to carry your baby dolls around in a sling. I am sure I will be making one for my sweet Anna one day.
I hope you or a friend enjoys a new sling!
Happy Crafting!
Tuesday, July 5, 2011
My first Tutu & Tutorial
Well, I did it! I made my first tutu! My friend Henri, sent me an easy tutu tutorial video (see below) awhile back, so I thought it would perfect for a birthday gift. Check it out!

I made this for sweet Antonia's Princess Birthday party. Here are some pictures of beautiful Antonia in her tutu. Thanks for the pictures, Karla!


 Isn't she just precious? I hug and squeeze her every time I see her!
I was very happy with how my first tut turned out! It was very simple to make.
Here is what you will need:
I did the slip knot technique and I used at least 60 strips for this 4T/5T tutu. I used every bit of the two rolls of tulle. I like how full the tutu turned out. Once I put on all the tulle, I tied on a ribbon and made a pretty bow.
I think my first tutu was a success!
Be on the lookout for my next tutu. I am making a ladybug tutu for my sweet Anna's first birthday!
Happy Crafting!

I made this for sweet Antonia's Princess Birthday party. Here are some pictures of beautiful Antonia in her tutu. Thanks for the pictures, Karla!


I was very happy with how my first tut turned out! It was very simple to make.
Here is what you will need:
- 2 rolls of 6 inch by 25" tulle of either one or two colors
- 3/4 inch Elastic for waist band
- Scissor or rotary cutter/cutting mat
- ruler or measuring tape
- needle and thread or a sewing machine to make it super fast
- coordinating ribbon to the colors of the tulle
- roll of paper towels and pins (this is to hold the elastic as you tie on the tulle
I did the slip knot technique and I used at least 60 strips for this 4T/5T tutu. I used every bit of the two rolls of tulle. I like how full the tutu turned out. Once I put on all the tulle, I tied on a ribbon and made a pretty bow.
I think my first tutu was a success!
Be on the lookout for my next tutu. I am making a ladybug tutu for my sweet Anna's first birthday!
Happy Crafting!
Subscribe to:
Posts (Atom)


