Welcome!
Thanks for visiting! Please leave us a comment as we love your feedback.
See where we are partying at the bottom and on the sidebar.

Friday, January 7, 2011

A Busy Day Crafting-A Tutorial, Sort of....

My Goal Today:  Make 6 Photo Boards and 2 Subway Art Boards...
This is what I started with.

Then there's this.... my little cling on!

All right, so I've begun. I picked out my papers for each board. Picking out papers is always time consuming for me.  To be honest, I picked out the papers last week.  This project just got pushed back due to me being distracted by a daunting paint job: my girls' playroom.  It's a scary room to paint.  (More on that soon!)

My cute, little entertainer!

And the board painting begins. I stain/paint the backs of the board, the sides, and the edges of the front.

Mariella's thinking, "There must be something more entertaining outside.  Mommy's boring me today!"

All 8 boards are painted or stained. Here are the fronts...

...and backs.
At this point in the process, crafting comes to a screeching hault!  I have to pick GraciAnn up from school.  Then, I have to get the girls down for their not naps.  Then, John comes home and he offers to help finish painting the playroom... I'm not turning that down.  So, off I go to paint.  Get the girls up from their not naps, make dinner, clean up after dinner, work on laundry, play with kids, attempt to clean playroom, get stuff ready for baths, give baths, and get girls in bed.

The girls are in bed and I'm back!  I cut the paper slightly smaller than the boards.  This makes the paper blend nicely into the board. (My boards measure 12"x18" so I'm trimming off maybe 1/16" maybe 1/8")

Because the boards are 18" wide, my 12" scrapbook paper doesn't fit. So, I have to add another piece.  I like making this transition by tearing the paper.  I turn the paper over and tear it toward me.  This gives a really nice effect.  Some papers are easy to match up and you can make a seam that blends in unnoticeably, but I've found most don't work that easily so, I either tear or clean cut.

All my paper is placed on the board that was painted or stained to match it.

Now comes the mod podge.  I pour some on.

Now, I spread it out using a foam brush.  I make an even layer.  When you mod podge, make sure you cover the entire surface with the mod podge. It should be a nice even layer, not too thin, not too thick. Put your paper on, and smooth it out with a roller or your hands.

Phew... all 8 boards have the paper mod podged to them.  Unfortunately, bubbles occur.  I haven't found a way to avoid them.  I have noticed that the lighter weight papers bubble a lot more than the heavy papers.  Honestly, the bubbles, which make the paper appear wrinkled, look neat on many of the boards.  If you're making them, and trying to stay away from the bubbles, choose heavier papers.

After letting the first layer of mod podge (between the board and back of the paper) dry about 30 minutes (or more), apply an even coat of mod podge to the entire surface of the paper that covers the board.  Again, not too thin or too thick.

You will see a white film over the paper until it dries.

All 8 boards are completely mod podged... it's 9:30 pm and I'm done crafting for the day!

Sadly, I did not reach my crafting goal today.  Happily.... our playroom is completely painted... woohoo! Tomorrow, I will finish these boards... I think I can.  I think I can.  I know I will!  I've just got to.  I have too many projects to do. Something has to be checked off my crafting list!

Tune in for the completed projects tomorrow!  Exciting stuff!
Related Posts Plugin for WordPress, Blogger...

Wednesday, January 5, 2011

Sourdough Bread Starter & Bread Recipe

I wish you could smell my house right now.  Oh, it smells SO good!  Fresh sourdough bread from the oven is cooling on the counter-top.  My kids and I already cut a small slice off the end to enjoy.  We just couldn't resist!

A friend had given me Sourdough Bread starter over 7 years ago and I remember how delicious it was.  We made many loaves before our tummies began to show the effects of too much yummy bread.  I never had the starter recipe but I have looked all over.  After much research, I recently came across one.  Now that I have tried it, I know that it is almost the same as the one from years ago.  After a few tweaks, (I just can't let a recipe be), I feel it is perfect.  You can't keep yummy bread like this to yourself, therefore, I am sharing it with you!  Doesn't it just look delicious!

If you have some patience, this will become a family favorite recipe!  Here are the recipes:

Sourdough Bread Starter

Ingredients:
3 tablespoons instant mashed potato flakes
3 tablespoons white sugar
1 cup warm water
2 1/4 teaspoons active dry yeast

Directions:
1.  Combine instant potatoes, sugar, water, and yeast in a covered container with a tight lid.  Let the starter sit on a counter for 5 days, stirring daily with a wooden spoon.  Do not use a metal bowl or metal spoon as it effects the yeast.
2. On the morning of the fifth day, feed the starter with 3 tablespoons instant potatoes, 3/4 cup sugar, and 1 cup warm water.  In the evening, take out 1 cup of the starter to use in a sourdough recipe.  Refrigerate the remaining starter.

3. Every five days, feed the starter 3 tablespoons instant potatoes, 3/4 cup sugar and 1 cup warm water. If starter is to be used in a recipe, let the fed starter rest at room temperature 6 hours before use. If starter is not being used in a recipe, keep refrigerated and discard 1 cup of starter after each feeding.  You can always pass along the 1 cup to a friend if you don't want to make some bread.  They will just need to let it sit for 5 days in order to have their own starter. Dispose of or make bread with one cup of starter 12 hours after every feeding.

Sourdough Bread Recipe
1 cup sourdough starter
1 1/2 cups warm water
1 1/2 teaspoons salt           
1/2 cup white sugar
1/2 cup vegetable oil
6 cups bread flour
4 tablespoons melted butter (optional)

Directions:
1. Mix sugar, vegetable oil, salt, water, and 1 cup of sourdough starter together in a large bowl.  Add flour to the mixture. Grease or oil the dough. Place the dough in an oiled bowl, cover, and let rise overnight. (Before and after pictured below).
2. The next day, knead the dough for a few minutes. Divide in half, and place into two greased 4 x 8 inch bread pans.  (I used my Pampered Chef Bread stoneware). Allow the dough to double in size. (Pictures of before and after dough doubling).
3. Optional:  Pour 2 tablespoons melted butter on top of each bread loaf.

4. Bake at 350 degrees F for 40 to 45 minutes, or until bread is light golden brown. You can use a cake tester or toothpick to test that it is cooked thoroughly. Turn out to cool on wire racks.
This is a delicious bread recipe for both any meal from breakfast to dinner (or dessert).  You can also use the dough recipe in your favorite cinnamon roll recipe or any recipe that calls for a yeast based dough.  I may even try this as our pizza crust one night.  Yummy!

If you try this, please leave me a comment on how it turned out for you!  I love hearing from our readers!

Please check our linky parties to see all the places we are linking up to today!

Related Posts Plugin for WordPress, Blogger...

Tuesday, January 4, 2011

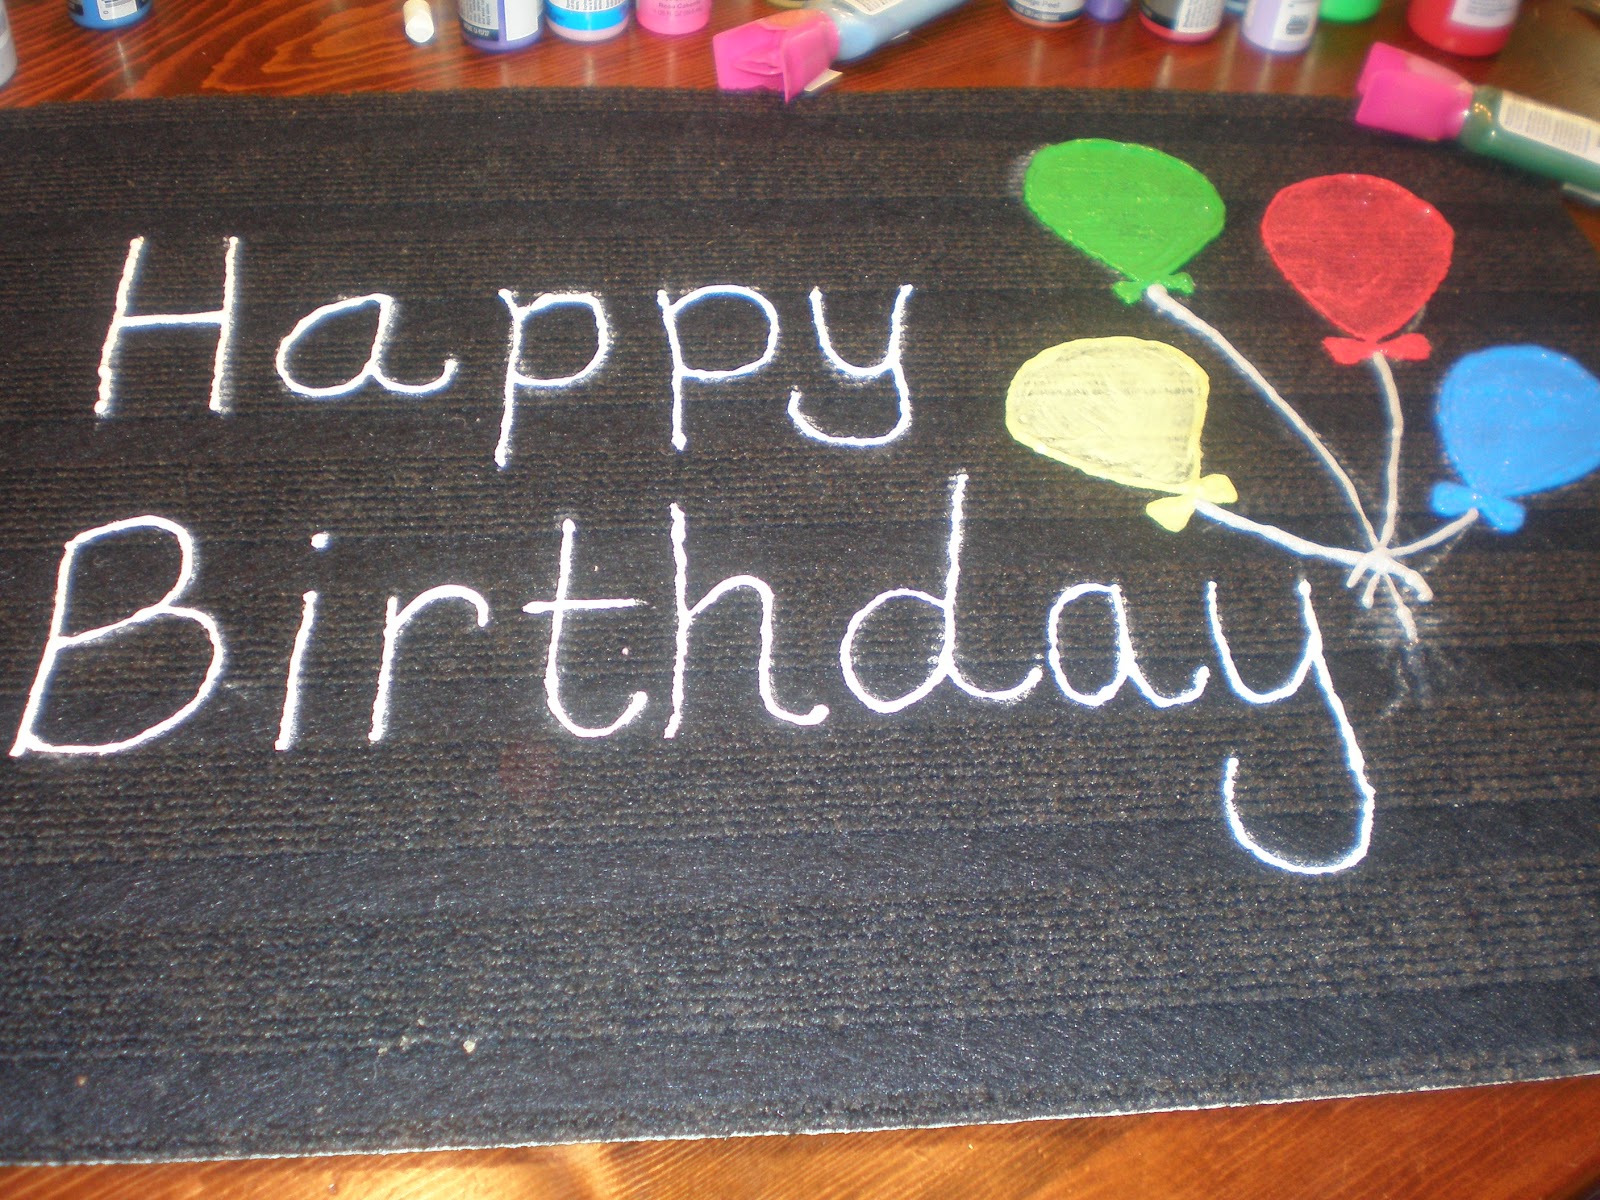
"Happy Birthday", Welcome Mat-A Tutorial

What can you do with a door mat that cost $1?


This was so easy!
Materials Needed:
A doormat-I bought mine at IKEA for $1, seriously!  I bought a few so be on the lookout for some more mats.
Paint-I used fabric paint because I thought it would be more durable
A piece of chalk-any color that will show up on the mat
Paintbrushes


Step 1-Using your chalk, draw whatever images and words you'd like on your mat.

Step 2-Using your paint, paint over the images you drew.

I used paint that was easy to squirt out of the bottle so I could literally write with the paint.

For the balloons, I painted a thick ridge on the outside, but smoothed out the paint on the inside.

I like the dimension the outer ridge gives the balloon.

All four balloons are done.

Well, almost.  I had to paint in the strings.

As soon as the paint dries, I'll dust off the extra chalk, beneath the balloon strings, and set it out with the rest of the birthday decorations, to prepare for my baby's 2nd birthday on January 23rd.

I'm sort of guessing, you'll see a couple more of these doormats, in the future!
Related Posts Plugin for WordPress, Blogger...

Menu Planning: Determining your Menu

Hopefully, you have followed my steps so far on Menu Planning (Setting up a Food Inventory, Making the most of your cookbooks,  and organizing your menu).  Now you are ready to determine your menu and then go shopping!

Using your basic food list, organized cookbooks, budget, grocery ads and a calendar or a fun Menu Board, let's determine this week's menu!

Determine your Menu
  • Looking at a week at a time, choose a meal for each day.  Write these on your calendar or Menu Board.
  • Don't forget to include side dishes, breads and dessert (if you choose). 
  • If you have a day that is particular busy, make it a Crock-pot meal.
  • Include a leftover meal if you don't use those up for lunches.
  • Remember if the week gets hectic, switch meals around!
Here is my menu plan for this week:

Sunday:  Mom's Beef Barbecue on buns, leftover sides
Monday:  Grilled Kielbasa, seasoned noodles, green beans
Tuesday:  Henri's Crock-pot Beef Roast with mushrooms served on egg noodles, broccoli, homemade sourdough bread (rising as I write)
Wednesday:  BBQ Chicken Pizza leftovers from freezer (it's just the kids and I for dinner)
Thursday:  Chicken Fried Rice with peas & carrots mixed in
Friday:  Ham slice, macaroni and cheese, peas, cornbread
Saturday:  Easy Teriyaki Chicken with oriental vegetables and pineapple over rice

Go Grocery Shopping:
  • Make your list and stick to it!  All those extras that aren't needed will bust your budget.  It is okay to buy items for stocking up, just make sure you plan on those before going!
Enjoy a week filled with meals that are planned and save you money!

I hope you enjoyed this series on menu planning.  Share your thoughts, tips and this week's menu!  We love hearing from our readers!   

Happy Menu Planning!

Related Posts Plugin for WordPress, Blogger...

Menu Planning: Organizing your Menu

The cost of food is probably one of the most expensive items on your monthly budget.  You can drastically cut the cost of your food budget by Menu Planning.

Menu Planning should be fun and easy.  It is a chance to make your favorite foods or try out some new recipes.  If you take the steps I have provided (setting up a Food Inventory and making the most of your cookbooks), then the next steps will be an easy process.

Before we get started, grab some supplies:  paper, pencil or pen, calendar, your food inventory list, your recipe files and a couple of cookbooks.

If this is your first time organizing a menu, then I highly suggest you start with just one week.  Don't try to make a menu for the whole month.  It will seem like an insurmountable task.  Start small and go from there.

Basic Meal list
  • On your paper, jot down basic meals that your family frequently eats, i.e (Spaghetti, grilled chicken, soups, etc).  Don't forget to include side dishes and desserts (if you like).  Having a list of basic meals will be your starting point.
Meeting your budget needs
  • If you are on a tight budget, I suggest that you try to eat out of your food on hand.  This is where your Food Inventory can really come in handy.  Choose meals that use up as much of your pantry, refrigerator and freezer items.
  • If money isn't an issue this month, stock up on items that you use frequently (cream of mushroom or chicken, soups, baking goods, rice, assortment of noodles, etc).  
  • Buy in bulk.  I use a Foodsaver and buy my meats in bulk.  The Foodsaver helps me store my food flat in the freezer (huge space saver) and keep it fresh longer.
  • Plan meals based on what is on sale.  Check the grocery ads before making your menu plan for the week.  This will save you money and allow you to stock up on inexpensive items.
Determine your food budget
  • Look at your grocery bills from last month.  Add them all up and then divide them by 4.  You can estimate that cost per week for this month.
  • Choose a set amount per week and stick to it!  Use cash, you will spend less and when the money is gone so is the opportunity to buy more that week.
  • Reward yourself for going under your food budget.  If you have money leftover at the end of the week, you can put it towards next week,  use it for something fun like craft supplies or save up for something you want in the future.
Planning the menu
  • Start small.  Just plan your dinners for one week.  If you need to plan breakfast and lunch meals add those the following week, after you've had a successful week.
  • Utilize leftovers.  I put leftovers on the menu for at least one night or for a lunch. If you have enough for another meal, freeze it for another week's menu.  I group all our leftovers and make another meal of the combination.  This is a great meal for a busy day when you don't feel like cooking.  If you don't want another dinner of leftovers, use them up for lunch throughout the week. Putting leftovers in the garbage is throwing away your money!
  • Don't be afraid to move around your meals throughout the week.  You aren't stuck making soup on Tuesday if it is a warmer day.  Switch it for another day.
  • Plan ahead.  If you are making something that a meat needs to be thawed, put it in the refrigerator the night before or early in the morning.  Nothing deters cooking more than not having your supplies ready.
  • Make a menu board.   You can write all your meals on this and it will be in an easy place to remind you.  Plus, it's just pretty! This can be hung on the wall or put in a pretty wrought iron holder. 
     
    On to Determining your Menu...

Related Posts Plugin for WordPress, Blogger...

Monday, January 3, 2011

Healthy Eating is Living Green-A Guest Post

My cousin, Jennifer, writes a blog about living green: journeytoagreenlife.blogspot.com.  I am really impressed with all she's shared through her blog. Her blog includes great tips for living a healthier life.  I was especially interested in her post about green household cleaners.  They are safer and cheap!

I asked Jennifer if she would be willing to write a guest post for our site.  I know many of us our looking to make healthy changes as our New Year Resolutions.  Jennifer has offered some great suggestions to head us in the right direction. 

After reading this post, remember to head on over to journeytoagreenlife.blogspot.com to get more great suggestions!  Thanks again, Jennifer!

Shannon

Healthy Eating is Living Green, Recipes Included!!

I have been experimenting with only home cooked foods and I am going to share some of my ideas with you. My goal is to not buy anything in a package other than the staples and some hard to produce items.

I have been on a journey to living a more green life. In this journey I have begun changing the eating habits of my family. My interest is piqued any time there is a new health news report on foods or eating habits. Having a son with multiple food allergies has also raised my awareness of the ingredients in the prepackaged foods we purchase. I have found the only way to feed my family the best and control the exact ingredients in the food we eat is to make it myself.
My son Eli was allergic to dairy and soy for the first year and a half of his life (I say "was" because he has since outgrown the soy allergy). He is also allergic to eggs, nuts, and a few other foods. There was only one brand of frozen French baguette's that he could eat because they did not contain any dairy, egg, or soy. This began my "basic foods" home cooking. I started making my own pizza crusts, rolls, and bread so that Eli could enjoy some of what the rest of us were eating. I realized that it was not only easy to bake these basic foods myself but it really didn't take much time either. The taste was unbelievable! It is unnerving the amount of ingredients and preservatives that are in some basic foods such as bread and pizza dough. Anyways this started my experimenting and opened my eyes to some healthy alternatives to pre-packaged foods.

When I grocery shop I pretty much buy the basic staples and anything that I cannot create myself within a reasonable budget and time frame. Anything I buy prepackaged I always check the ingredients to make sure there are not lots of fillers or unneccessary ingredients. Here is a great site you can find info on all those hard to pronounce ingredients and what to look for and avoid:
http://www.webmd.com/food-recipes/features/healthy-ingredients
Some of the things I have started making from scratch are tortillas, bread, waffles, pizza crusts, sweets like cookies and pies, and seasonings like chili and taco seasoning. My shopping lists usually consist of staples like flour, sugar, sunbutter, rice, meats, eggs, milk, spices, nuts and seeds and apple juice(this is something I have not found a way to produce better or more efficiently than the manufacturers). I try to buy my produce from local produce stands or farms to keep it green. I have found that in doing this my grocery bill has decreased and the amount of money we spend on eating out. These savings are a great way to buy some organic products that typically cost more.

My next big recipe will be making fresh cheeses. I haven't done so yet but my mindset is "if it can be done, I can do it myself". I am currently looking for somewhere to purchase unpasturized goats milk so that I can make some that the entire family can enjoy. Below you can find some of my recipes and try them out yourself. I do most of my baking dairy and egg free so you can always substitute real eggs and dairy where I use egg substitute and soy or rice milk. I have found that this way of cooking and preparing meals it great for a budget and your health. You will find you can be very satisfied with your meals and at the same time be consuming less calories and sodium than if you were using prepackaged foods or eating out and consuming no nitrates. I even sneak in fresh spinach in my brownies and anywhere else I can hide the vibrant color from my older kids. I always use fresh veggies as my fillers in homemade breads, sauces, soups, and even meatloaf. This is a great way to get picky kid to eat their share of veggies sometimes without even knowing:) Enjoy!

Fresh Salsa
3 fresh tomatoes
1/2 medium onion
1 green chili
1 1/2 tsp salt
1/4 tsp pepper
1/2 tsp sugar
1 tbsp vinegar
Blend all ingredients in a food processor and serve

Homemade Hamburger Buns
2 tbsp dry active yeast
1 cup plus 2 tbsp warm water
1/3 cup olive oil
1/4 cup sugar
1 egg replacer
2 cups all-purpose flour
1 3/4 cups whole wheat flour
1 tsp salt
1/2 to 1 cup of fresh chopped spinach
Dissolve yeast in warm water, stir in oil and sugar - let stand 5 minutes. Add egg replacer, salt, white flour, and 1/2 cup of wheat flour as needed to prevent dough from sticking to your hands. Fold in spinach. Knead 5 minutes. Divide into 8 pieces, shape into a disc. Let rest for 10 minutes. Bake at 425 for 10-12 minutes.

Turkey Chili
1 lb. ground turkey
1 green pepper chopped
1 onion chopped
1 zucchini chopped
1 yellow squash chopped
3 tomatoes chopped
1 can tomato paste (you can substitute tomato soup for a healthier option or homemade tomato sauce))
homemade chili seasoning to taste (recipe below)
Saute turkey and veggies in a dash of olive oil. When cooked thoroughly add tomatoes, and tomato sauce and season. Simmer for at least an hour to let all the flavors meld.


Homemade Chili Seasoning
1 tbsp paprika
2 1/2 tsp salt
1 tsp onion powder
1 tsp garlic powder
1 tsp ground cayenne pepper
1 tsp seasoned pepper
1/2 tsp dried thyme
1/2 tsp dried oregano
Store in an airtight container and season chili to taste. You can double or triple the recipe to save on time and have a larger amount on hand.

Pizza Crust
1 cup warm water
3 tbsp sugar
1 1/2 tsp salt
3 tbsp olive oil
3 cups flour
1 pack quick rise yeast
Top with favorite pizza topping and bake at 425 until browned.

Zucchini Lime Carrot Bread
1 1/2 cups flour
1 tsp ground cinnamon
1/2 tsp baking soda
1/4 tsp salt
1/4 tsp baking powder
1/4 tsp ground nutmeg
1 cup sugar
1 cup finely shredded unpeeled zucchini
1 cup finely shredded carrot
1/4 cup olive oil
1 egg substitute
1/2 tsp lime zest
Im a mixing bowl combine flour, cinnamon, baking soda, sal, baking powder, and nutmeg. In another bowl combine sugar, shredded zucchini and carrots, olive oil, egg substitute, and lime zest and mix well. Add flour mixture and stir until combined.
Pour batter into a 8x4x2 inch loaf pan and bake at 350 for 55 to 60 minutes or until a toothpick inserted comes out clean. Great for a healthy breakfast alternative to pancakes or poptarts.

We would like to thank Jennifer for sharing her wisdom and expertise.  If you have something you'd like to guest blog about, please let us know!

Related Posts Plugin for WordPress, Blogger...

Toys: Divide and Conquer!
My husband has been complaining lately that the kids have too many toys and that toys are everywhere.  I don't want to get rid of toys as I know that Anna will play with them as she gets older.  Since I am on "Mission Organization" at our house, I thought I would tackle all the toys.

I went to the store with everyone else on a craze to get re-organized and bought three huge bins. I was smart and got the ones with the wheels!
I put them in the basement all in a row, so that I could easily put toys in them.  I gathered all the toys from upstairs, minus the new Christmas toys and piled them in laundry baskets.  I took the laundry baskets downstairs and started dividing up the toys. 

I made sure to each child had toys to play with in each bin.  Once the laundry baskets were empty, I started tackling the playroom.  This was a chore, but I knew it would be worth it.  First, I took toys off their shelving unit.  I kept only the toys I wanted them to play with for the next month.  All the rest of the toys were divided among the bins.

I continued around the room until I had the room organized and all three bins filled.  Then I tucked away the bins in our storage area. Now the kids have a smaller selection of toys to play with for this month. 

Next month I plan to grab a new bin, empty it into the playroom and fill it with the toys they have been playing with.  Hopefully, this will keep the kids entertained with the toys they have and also make them feel like Christmas at the beginning of each month.

Our playroom isn't as cluttered and I have a happy husband who isn't overwhelmed with toys.  That makes me happy as well!

Have you tried this before?  If so, did it work well? 

In what ways are you organizing your house for the New Year?

Related Posts Plugin for WordPress, Blogger...

Sunday, January 2, 2011

Thank you to two nice blogs! Don't forget to vote!

We just wanted to send a big Thank you out to I heart Naptime and Somewhat Simple for the opportunities for free advertising!

You will see our button the month of January at


Photobucket


Then in December 2011, we have free advertising at

somewhat simple button


Thank you so much ladies!  Please visit these blogs as they are fantastic!

Also, don't forget to vote for our blog. We are moving up in popularity quickly. You can vote once each day! Just click on the button below and it automatically votes for us!


Thank you to all who are helping our blog get noticed. We really appreciate it!

Related Posts Plugin for WordPress, Blogger...
Ebates Coupons and Cash Back