Welcome!
Thanks for visiting! Please leave us a comment as we love your feedback.
See where we are partying at the bottom and on the sidebar.

Wednesday, January 26, 2011

A Baby Gift-A Baby Food Jar Cake-A Tutorial

I have made many diaper cakes for baby showers I've hosted and attended.  They are great decorations, are fun, and better yet, very practical!  Our friend was having her second baby. Because she was having another boy, we decided to throw her a themed shower. A "food" theme was selected. So, we focused on all things to do with feeding babies.

I wanted to make her a special gift.  She is a very special friend. I decided to make a baby food jar cake.
I needed a round cake board. You can buy these anywhere. I picked these up at WalMart in a 5 pack.  I bought 24 jars of baby food. I had a glue gun, a plastic wrapping bag, and ribbon.


I arranged 14 jars into a circle and hot glued them to the cake board.

I glued 7 more jars on top of the first layer.

Here's a top down view.

I glued the final three jars on top of the second layer.

Another view from the top.

Here's the plastic wrapping bag I used.  I put the entire baby jar cake in it.


I then tied a big blue bow on it and added a pack of spoons for a little extra touch.

This was a fun twist on a traditional item.  The mother to be loved it!
Related Posts Plugin for WordPress, Blogger...

In case you missed it!

I have two things I wanted to share with you! 

First,  we had a hiccup with out email subscription on Tuesday and two posts didn't make it to you!  Thankfully, it is fixed now, but we don't want you to miss out on what was made.  Shannon gave the recipe for her Easy, safe, not messy, homemade playdough
This stuff is amazing!  It smells so good as it is made with koolaid and it is super soft!

Plus, Shannon showed off her Birthday Treat Buckets.
 These were a huge hit with all the kids at Mariella's brithday party.  Go check these two posts out!  I didn't want you to miss out on them!

Second, you might have noticed a new row of pictures at the top of our blog.  I added this so you could see the last 6 to 8 items we worked on.  Click on any picture to be taken to that post.  Hopefully, this will help you as you navigate our blog as well.

Thank you to all our new followers!  We are honored that you are part of our new blog family!


Related Posts Plugin for WordPress, Blogger...

Tuesday, January 25, 2011

Making a Memo Board-A Tutorial

This is the board, I made for my older daughter's room. 
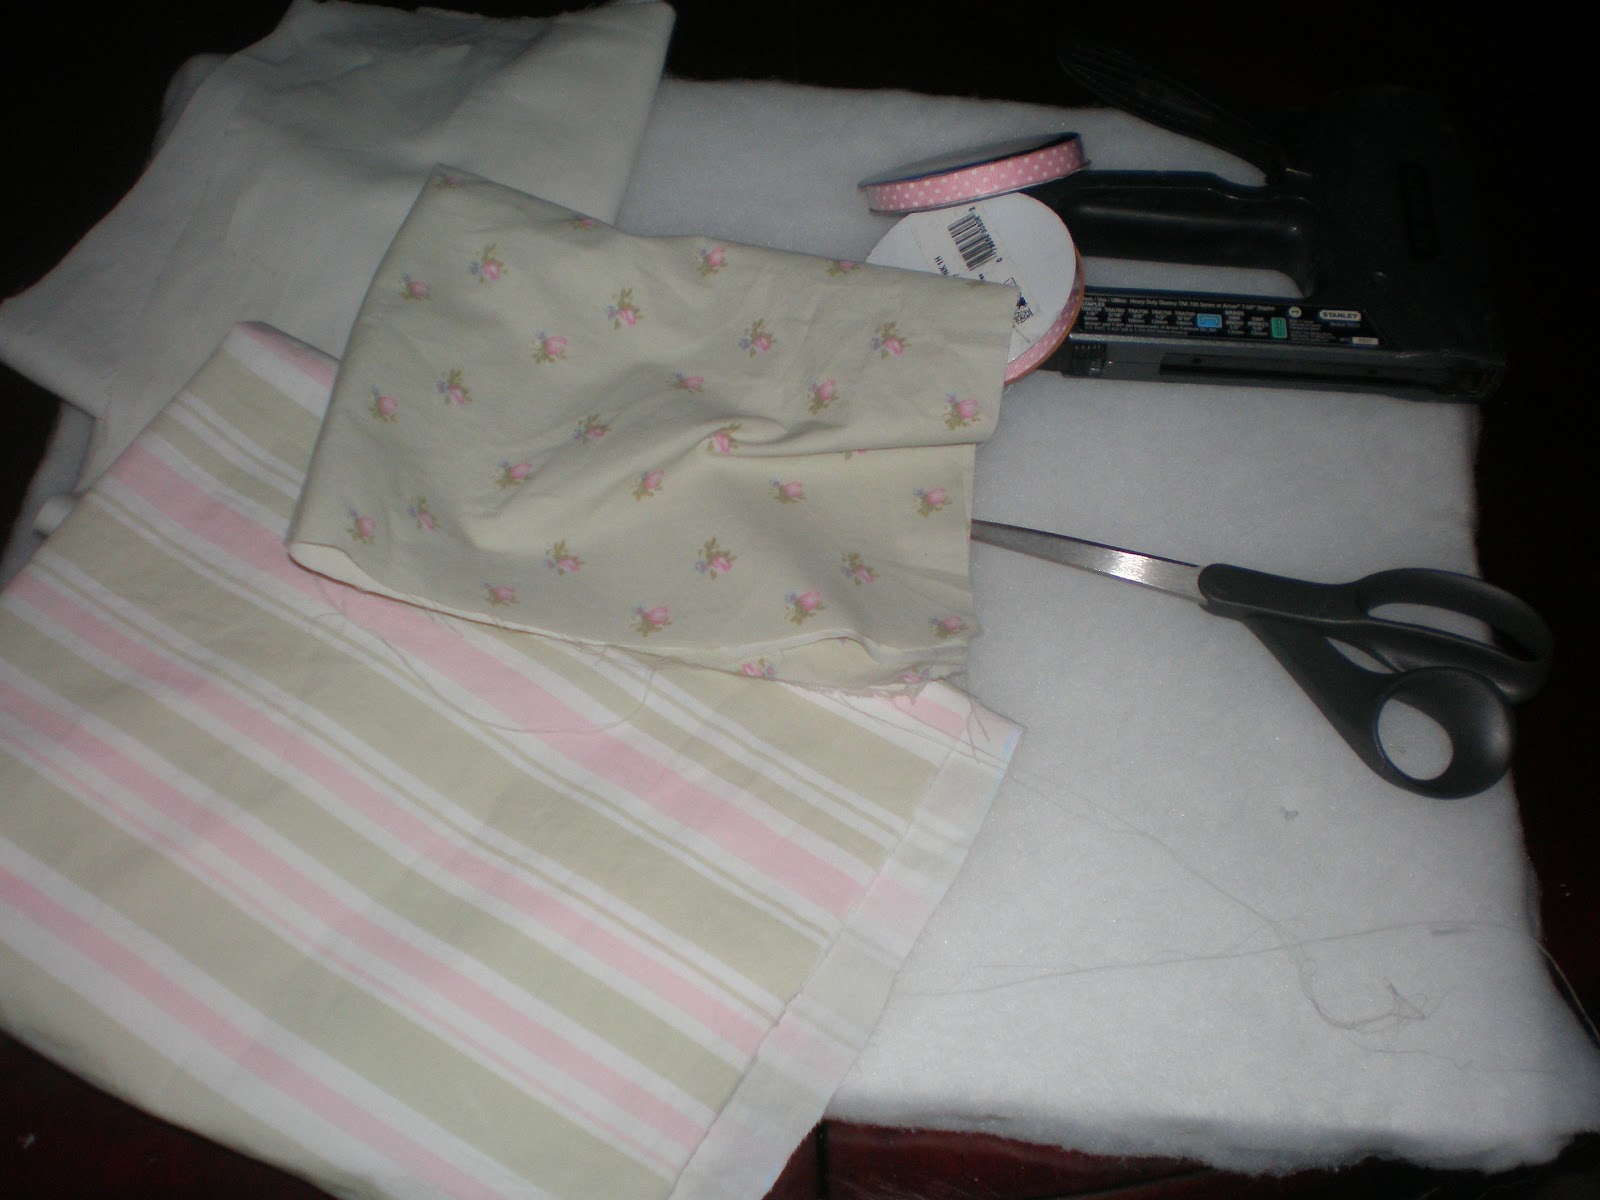
I started with a canvas, like a painter would use.  I had batting, fabric, fabric scissors, a needle and thread, ribbon, buttons, and a loaded staple gun.

I cut the batting to size and stapled it on the canvas.

I then wrapped the covered canvas with the fabric.  I stapled it to the wooden part of the canvas.

I laid out the ribbon and stapled it to the wooden part of the canvas. (The staple gun got a workout.)

I took a coordinating fabric and covered buttons with it.  I bought these buttons at Walmart but I think you can find them at almost all craft stores. They really help put the finishing touches on a project.

I cut strips of ribbon to make bows at the places the ribbon intersected. I made the bows by looping and sewing so the dotted ribbon would show.

I sewed the bows down.  The makes a little indention in the board to give it a "puckered" effect.

I then sewed a button in the center of each ribbon.

This is the finished board.  GraciAnn loves it.  It's a great place for her to hang things she wants to display without hurting her walls. It looks fantastic on her light pink walls and was a simple project to make!
Related Posts Plugin for WordPress, Blogger...

Monday, January 24, 2011

Birthday Treat Buckets-A Practical Alternative to "Goody Bags"

One of the fourteen treat buckets I made.

My baby did it.  She graduated out of the baby stage.  She's an official two year old! It's amazing how fast two years goes by.

Mariella

We had her birthday party at a wonderful place in Gainesville, GA called: INK. http://www.inkfun.org/ If you live nearby or are ever in the area, this is a wonderful place to bring kids!  Anyway, since her party was at a museum, of sorts, we didn't have a real "theme".  Mariella LOVES Minnie Mouse.  I think it's because we got her this incredibly soft, stuffed Minnie, when we went to Disney last time.

I wanted to cut vinyl Minnies and Mickeys on my Silhouette for the buckets, but that bad thing called, "Lack of Time", took control and I didn't get that done.  I also wanted to put hand crafted Minnie bows in the girls' buckets, but, well you know my excuse! (I will share pictures of those bows soon!)  So, I'll tell you what I did do.

Since she adores Minnie, I got her a Minnie themed birthday cake.  I tried to tie the treat buckets(I got at The Dollar Tree) into the theme.  Using my Silhouette, I cut the guests' names with the Disney font, Waltograph (it can be downloaded for free!). I used pink vinyl for the girls and blue for the boys.  I gave family treat buckets, as opposed to individual ones, simply because I ran out of time.

Each bucket had homemade Playdough in it. http://www.oursevendwarfs.com/2011/01/easy-safe-not-as-messy-homemade.html I made five different colors.  Since we were at a museum that didn't serve or sell food, I worried that our guests would get hungry.  So, I put popcorn, fruit snacks, and rice krispy treats in the buckets as well.  I topped each bucket with coordinating tissue paper. Although they weren't exactly what I wanted, they were cute and the buckets can be used again and again! 

I'll admit, these treat buckets were a bit time consuming but I didn't send my friends home with a lot of junky stuff for their kids.  I also didn't spend a ton of money on them. I think the guests really liked them and I was happy with how they turned out. 

This is just another example of how you can turn something blah into tada with a little vinyl and a Silhouette!

Happy 2nd Birthday, My Sweet, Sweet Mariella!
 
Related Posts Plugin for WordPress, Blogger...

An Easy, Safe, Not as Messy, Homemade Playdough!

My Homemade Playdough

Face it, Playdough is crumbly and I think it stinks! Of course, I'm SUPER sensitive to smells (hence the reason I don't want to set foot (or even drive thru McDonalds).

My friend Lesli shared this wonderful Playdough recipe with me.  She got it from her daughters' school.

Play Dough
1 ¼ cup flour
¼ cup salt
1 package of Kool Aid
1 cup boiling water
1 ½ Tablespoon oil
Mix dry ingredients. Mix liquid ingredients. Pour together in bowl. Knead into ball. Keep in Ziploc.

Of course, the color of Kool Aid dictates the color of your Playdough.  The only color that's a challenge to get is yellow.  I doubled the recipe, so I used two packs of yellow KoolAid and added a pack of orange KoolAid.  It was a close yellow.

I promise, this Playdough smells great.  If little hands put some in their mouths, no worries.  It will taste EXTREMELY salty but won't hurt them.  The oil keeps the Playdough from being crumbly. It's oh so soft. It lasts for months in a Ziploc bag. The best part is for about $5 you can make enough playdough for more than twenty kids!
Related Posts Plugin for WordPress, Blogger...

Saturday, January 22, 2011

Beautiful Yarn Rosette Wreath Tutorial

I have wanted a pretty wreath to hang on my mantle for awhile now.  Yarn wreaths seem to be very popular these days.  I can do yarn!  I also thought some pretty rosettes would be a fantastic addition.
Let me teach you how to make this beautiful wreath.

Necessary Supplies:
  • Yarns of your choice.  I used Caron Simply Soft in White and Autumn Red.  This is a great shiny and silky yarn.  I barely used a fourth of the 6 ounce skeins.
  • A small or large foam wreath.  I used a small wreath from the dollar store.
  • H/8 Crochet hook.  *If you don't know how to crochet, you could always make fabric flowers for this wreath.  Shannon did a tutorial of a fabric flower here and a burlap felt one here.  You have many options.
Start with your foam wreath.
Tie the yarn of your choice to the foam wreath.  Don't worry about the ends, you can cover those as you wrap the yarn.
Sit in a comfy chair and turn on a show you would like to catch up on.  Start wrapping your foam wreath.  I wrapped it four or five times and then bunched it tightly together.  Repeat this process until your foam wreath is fully covered.
Mine had a few imperfections, but that is where I placed my rosettes!

Now, I made three rosettes for this wreath. These rosettes were 3-4 inches wide.  I attached one by tying it to the wreath.  I made sure to bring the yarn up through the rosette on both sides so it would be tight.  Then I took the other two rosettes and tilted them up on the first rosette.  This made them look more cohesive versus just sitting in a row.  I didn't have ribbon to match the rosettes so I took 8 to 10 long pieces of yarn and wrapped them around  wreath and tied them together.  This gave me something to hang the wreath from.

Here is my finished wreath and a picture of it hanging on my mantle. 
For those of you who would like to make the crochet rosettes, here is the pattern:

I used the Caron Simply Soft and H/8 Hook.  If you choose another yarn, use the crochet hook suggested by the yarn manufacturer.
Symbols:  ch-chain, Dc-double crochet,
Ch 65. Dc in the 6th ch from the hook.
Ch 3, skip next ch, dc in next ch.  Repeat till end of ch.
Ch 3 (counts as first Dc), turn.  In first loop, dc, ch 3, 2 Dc and ch 1.
In every remaining loop, 2Dc, ch 3, 2Dc, ch 1 till the end.
Ch 3, turn.  *In your larger loop make 7 Dc. Slip stitch into the ch 1.* Repeat from
* to * to end of the row.
Fasten off and leave a 6-8 inch piece of yarn.
On the side without the long piece of yarn, start winding up the rose.  Start tightly for the center of the rose.  Continue wrapping until you come to the end.  Using the long piece of yarn, pull it up through all the layers with your crochet hook.  Then bring it back down through the other side.  Fasten off.  Use remaining yarn to attach to wreath, pin or headband of your choice.

Here is a picture of the rosette.  Sorry, I forgot to take a better picture before I put it on the wreath.
Yeah, I got another item on my to-do list accomplished.  Too bad, I still haven't completed that baby blanket.  Back on task I go!

Related Posts Plugin for WordPress, Blogger...

Friday, January 21, 2011

Dilemma: New dress but no shoes to match

Last Saturday night I picked out a new dress for my sweet little Anna to wear.  The problem was she didn't have any shoes to match.  What is a girl to do without cute shoes?

Until Anna was born, I have been a Boy-Mom. I've been used to blue, sports balls of all kinds and wrestling.  Thankfully,  I am quickly getting used to this Girl-Mom thing.  I think I like it too.  She's my baby doll to dress up and make look even prettier.  God has blessed me with a perfect little model that I get to accessorize!

I had to get creative and since I am on a big crocheting kick, why not whip up some cute little shoes.  Luckily, I had some patterns purchased from a few weeks before and I had the right color yarn.  Nothing like starting two pairs of baby girl shoes at 11 at night!  Some of you wonder how we get all our crafts accomplished, it's called lack of sleep and staying up late!  What we do for the love of crafting!

I started by making Anna a pair of boots.  They are called Warm Winter Booties.  These are precious.  I got the pattern from Tara of Mamachee on etsy.  She is one talented lady and also has a great blog.  I added cute little pink rosettes to give it an added touch.
Once I had them made, I started thinking about Anna's outfit.  She would be wearing white tights.  Hmmm, I think the cute boots will need to be worn another time.  I needed all pink.

I went to my other favorite pattern for cute little booties called the Ava Slipper.  I got this one from Mandy of Little Birdie Secrets.  She is also a very talented lady and makes all kinds of precious crocheted items.  I didn't have any buttons so I made the strap a bit shorter and attached it to the other side.
Now that Anna had cute shoes to wear, she needed a headband with a cute rose to match!  The things I do to make my little girl look even more precious!  I knew I could get this accomplished quickly as Anna has a headband with a flower in almost any color.  Luckily, I had the headband made, I just made a simple rose to attach.  Next time I plan to make a bigger one.  I will share the pattern for that one day soon. Check out my beautiful girl!
Here is a picture of her checking out her new shoes.
She looked beautiful and got lots of compliments from people at church.  Plus, I have items that can be passed on for years to come!

The next time you are in need of something special, why not try handmade.  Either make it yourself or get a gift that was lovingly made.  I plan on making more sweet gifts for my Anna and others.

If you see something we've made that you would like, just email us and we will work out a fair price.

Back to making some gifts for a baby shower on Sunday.  I will show those to you soon!

Related Posts Plugin for WordPress, Blogger...

Thursday, January 20, 2011

Crocheted Snowflake Garland

I have been busy crocheting lately.  I have many things to share with you over the next few days!  Plus, I procrastinated yet again and I'm scrambling to finish a another baby blanket!  I'm trying out another new pattern so it makes it much more fun to do!

I've had a pattern for snowflake garland for awhile and I wanted to make it for my January decorations.  It would have been ideal to have it finished right after Christmas.  Well, January is almost over and I just finished it!  I can check that off my list and get to other things.  After all,  I have Valentine's Day decorations I want to work on!

This was a quick and easy pattern.  The pattern itself says it is for an intermediate crocheter.  I don't agree.  I thought it was fairly easy.  If you know all the stitches, you can complete it fast!
There should be a beautiful coffee filter wreath hanging from the mirror, but it isn't finished yet.  I have issues focusing.  I have so many crafts I want to do that I have a few going at a time.  Hopefully, the wreath will be finished soon!
close-up of the snowflakes
The pattern is provided by Red Heart and can be downloaded here.  I added a piece to each end so that I would have something to hang it by.  Here are the details of that piece:  Chain 15.  Hdc in each st.  Sl st into third loop of last snowflake.  Sl st back into other side of chain.  Fasten off.  Repeat for other side.

I really like it!  I think it is a nice decoration to go with my other winter whites.  Valentine's Day is up next.  Wait till you see what I am working on for my mantle!

Related Posts Plugin for WordPress, Blogger...
Ebates Coupons and Cash Back