Welcome!
Thanks for visiting! Please leave us a comment as we love your feedback.
See where we are partying at the bottom and on the sidebar.

Saturday, January 29, 2011

What Can You Make With $1 Frame?

You know how Target has their $1 section?  I found a $1 frame.  It was plain white. It needed bling.  With a little effort, I have something I think is adorable!
I took the frame and hot glued dotted ribbon around each section.  I gave the ribbon some extra oomph by making little humps in it. I did this by putting a dot of hot glue on the frame and making a lump in the ribbon before I glued a piece down.  I love how it made it look a little ruffled.  I finished each mini frame off with a little bow.  So cute!  I only wish I bought more frames!  What a great gift and it was so easy.  I LOVE 30 minute craft projects.  I don't come across them often.


Related Posts Plugin for WordPress, Blogger...

Friday, January 28, 2011

Cloches from our Christmas giveaways

Shannon and I have been swamped with crafting since Christmas.  Our goal this last week is to finish up on all the remaining handmade and personalized items from our 12 days of Christmas giveaways.

My first items to finish up were two adorable cloches.  Andrea S was the winner of our crocheted headband with a flower.  She liked the cloche I had made for Anna for awhile and when she won she asked if she could upgrade to the cloche.  I was happy to oblige.  Andrea wanted a white cloche with a navy flower. Here is the cloche I made for Andrea's sweet Genevieve.  I have included a picture of her wearing it as well.  I am glad she likes it.  Aren't her little pigtails just precious?
The other cloche was won by Jessica C.  She doesn't have a little girl, but she has a friend who is having one soon.  She wanted to win it for her as a baby shower gift.  What a great friend to enter a giveaway to give a personalized gift!  Jessica choose to shades of pink and wanted the size to be larger so the little girl could wear it next winter.
I think it turned out very pretty!  I hope the new mom will like it as well.

I have some excited news to share with you in addition to these pretty cloches.  We are opening an online store in the coming weeks with many of our handmade items!  Personalized cloches are just one item you could purchase.  If there is something you have seen us make that you would like us to make available in our store, please leave us a comment or send us an email.

We look forward to making special personalized items in the future!


Related Posts Plugin for WordPress, Blogger...

Thursday, January 27, 2011

We've Reached Over 100 Facebook Friends-so...we're doing a special giveaway!


We promised our followers, we'd have surprise giveaways, so here we go... Visit us on FB, leave a comment, and you could win these adorable clippies!

Related Posts Plugin for WordPress, Blogger...

Wednesday, January 26, 2011

A Baby Gift-A Baby Food Jar Cake-A Tutorial

I have made many diaper cakes for baby showers I've hosted and attended.  They are great decorations, are fun, and better yet, very practical!  Our friend was having her second baby. Because she was having another boy, we decided to throw her a themed shower. A "food" theme was selected. So, we focused on all things to do with feeding babies.

I wanted to make her a special gift.  She is a very special friend. I decided to make a baby food jar cake.
I needed a round cake board. You can buy these anywhere. I picked these up at WalMart in a 5 pack.  I bought 24 jars of baby food. I had a glue gun, a plastic wrapping bag, and ribbon.


I arranged 14 jars into a circle and hot glued them to the cake board.

I glued 7 more jars on top of the first layer.

Here's a top down view.

I glued the final three jars on top of the second layer.

Another view from the top.

Here's the plastic wrapping bag I used.  I put the entire baby jar cake in it.


I then tied a big blue bow on it and added a pack of spoons for a little extra touch.

This was a fun twist on a traditional item.  The mother to be loved it!
Related Posts Plugin for WordPress, Blogger...

In case you missed it!

I have two things I wanted to share with you! 

First,  we had a hiccup with out email subscription on Tuesday and two posts didn't make it to you!  Thankfully, it is fixed now, but we don't want you to miss out on what was made.  Shannon gave the recipe for her Easy, safe, not messy, homemade playdough
This stuff is amazing!  It smells so good as it is made with koolaid and it is super soft!

Plus, Shannon showed off her Birthday Treat Buckets.
 These were a huge hit with all the kids at Mariella's brithday party.  Go check these two posts out!  I didn't want you to miss out on them!

Second, you might have noticed a new row of pictures at the top of our blog.  I added this so you could see the last 6 to 8 items we worked on.  Click on any picture to be taken to that post.  Hopefully, this will help you as you navigate our blog as well.

Thank you to all our new followers!  We are honored that you are part of our new blog family!


Related Posts Plugin for WordPress, Blogger...

Tuesday, January 25, 2011

Making a Memo Board-A Tutorial

This is the board, I made for my older daughter's room. 
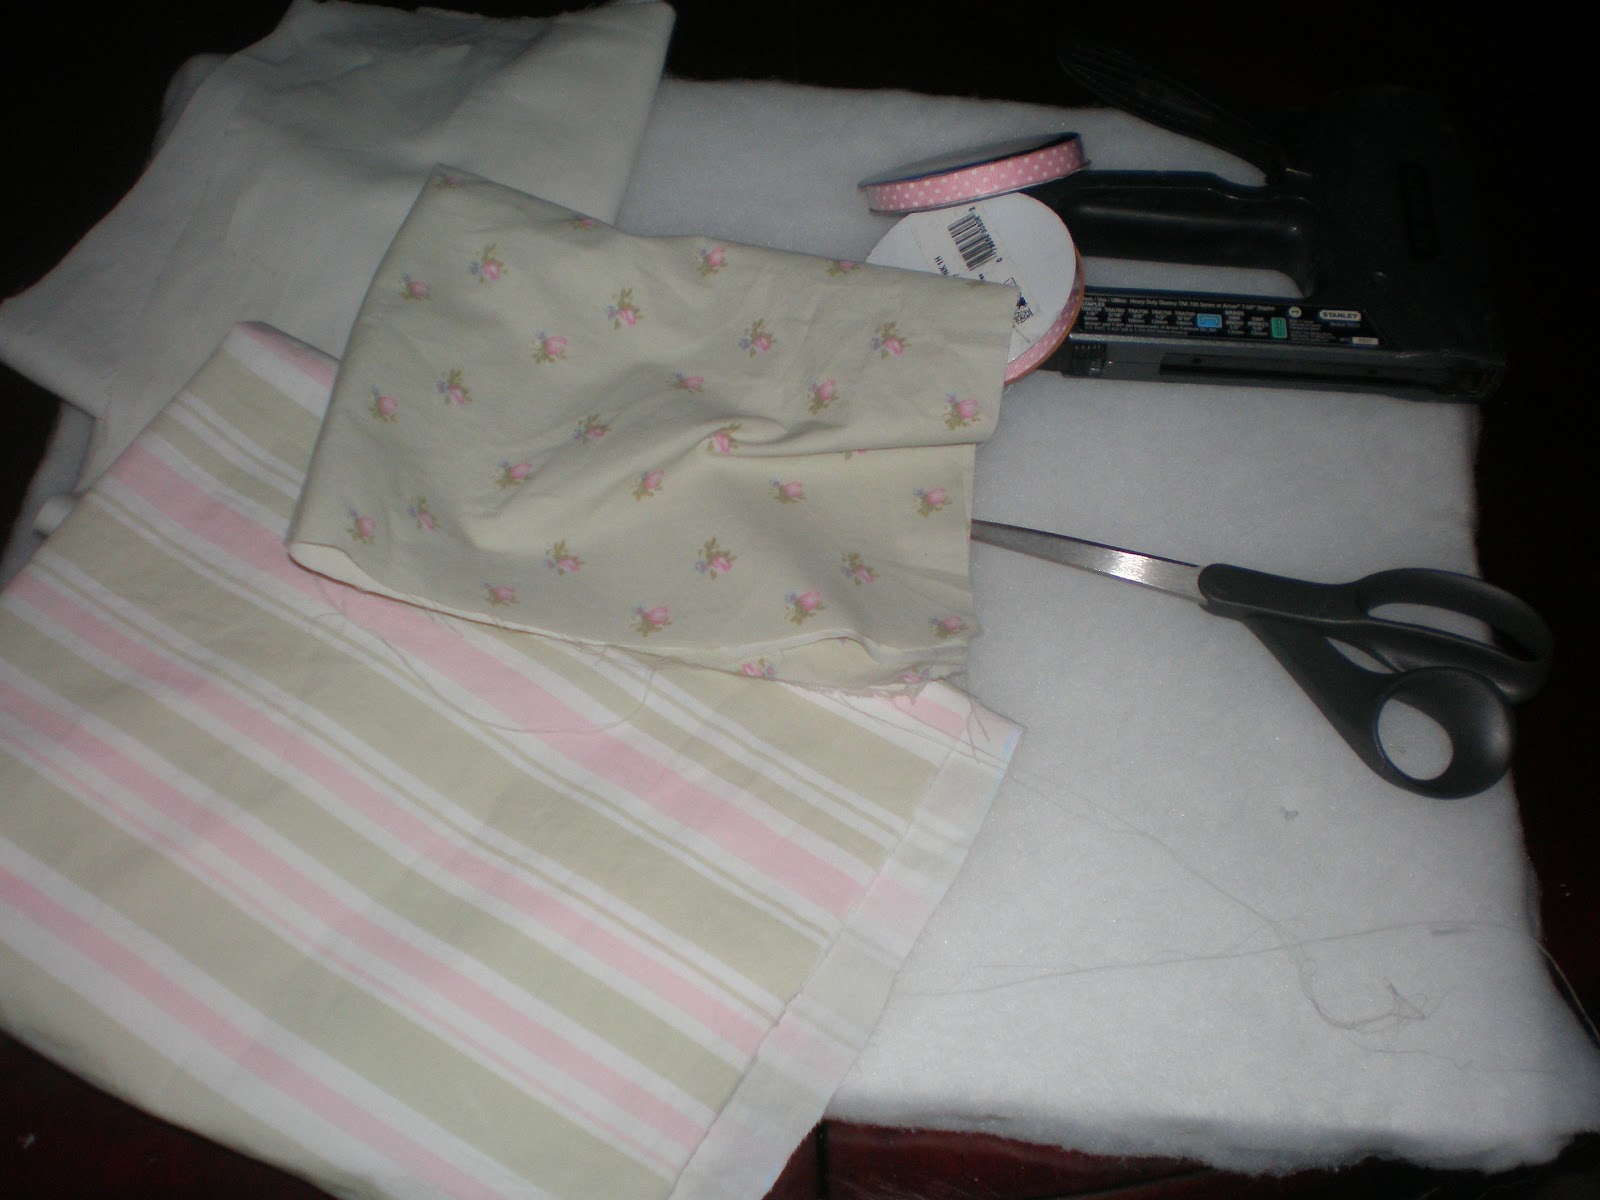
I started with a canvas, like a painter would use.  I had batting, fabric, fabric scissors, a needle and thread, ribbon, buttons, and a loaded staple gun.

I cut the batting to size and stapled it on the canvas.

I then wrapped the covered canvas with the fabric.  I stapled it to the wooden part of the canvas.

I laid out the ribbon and stapled it to the wooden part of the canvas. (The staple gun got a workout.)

I took a coordinating fabric and covered buttons with it.  I bought these buttons at Walmart but I think you can find them at almost all craft stores. They really help put the finishing touches on a project.

I cut strips of ribbon to make bows at the places the ribbon intersected. I made the bows by looping and sewing so the dotted ribbon would show.

I sewed the bows down.  The makes a little indention in the board to give it a "puckered" effect.

I then sewed a button in the center of each ribbon.

This is the finished board.  GraciAnn loves it.  It's a great place for her to hang things she wants to display without hurting her walls. It looks fantastic on her light pink walls and was a simple project to make!
Related Posts Plugin for WordPress, Blogger...

Monday, January 24, 2011

Birthday Treat Buckets-A Practical Alternative to "Goody Bags"

One of the fourteen treat buckets I made.

My baby did it.  She graduated out of the baby stage.  She's an official two year old! It's amazing how fast two years goes by.

Mariella

We had her birthday party at a wonderful place in Gainesville, GA called: INK. http://www.inkfun.org/ If you live nearby or are ever in the area, this is a wonderful place to bring kids!  Anyway, since her party was at a museum, of sorts, we didn't have a real "theme".  Mariella LOVES Minnie Mouse.  I think it's because we got her this incredibly soft, stuffed Minnie, when we went to Disney last time.

I wanted to cut vinyl Minnies and Mickeys on my Silhouette for the buckets, but that bad thing called, "Lack of Time", took control and I didn't get that done.  I also wanted to put hand crafted Minnie bows in the girls' buckets, but, well you know my excuse! (I will share pictures of those bows soon!)  So, I'll tell you what I did do.

Since she adores Minnie, I got her a Minnie themed birthday cake.  I tried to tie the treat buckets(I got at The Dollar Tree) into the theme.  Using my Silhouette, I cut the guests' names with the Disney font, Waltograph (it can be downloaded for free!). I used pink vinyl for the girls and blue for the boys.  I gave family treat buckets, as opposed to individual ones, simply because I ran out of time.

Each bucket had homemade Playdough in it. http://www.oursevendwarfs.com/2011/01/easy-safe-not-as-messy-homemade.html I made five different colors.  Since we were at a museum that didn't serve or sell food, I worried that our guests would get hungry.  So, I put popcorn, fruit snacks, and rice krispy treats in the buckets as well.  I topped each bucket with coordinating tissue paper. Although they weren't exactly what I wanted, they were cute and the buckets can be used again and again! 

I'll admit, these treat buckets were a bit time consuming but I didn't send my friends home with a lot of junky stuff for their kids.  I also didn't spend a ton of money on them. I think the guests really liked them and I was happy with how they turned out. 

This is just another example of how you can turn something blah into tada with a little vinyl and a Silhouette!

Happy 2nd Birthday, My Sweet, Sweet Mariella!

 
Related Posts Plugin for WordPress, Blogger...

An Easy, Safe, Not as Messy, Homemade Playdough!

My Homemade Playdough

Face it, Playdough is crumbly and I think it stinks! Of course, I'm SUPER sensitive to smells (hence the reason I don't want to set foot (or even drive thru McDonalds).

My friend Lesli shared this wonderful Playdough recipe with me.  She got it from her daughters' school.

Play Dough
1 ¼ cup flour
¼ cup salt
1 package of Kool Aid
1 cup boiling water
1 ½ Tablespoon oil
Mix dry ingredients. Mix liquid ingredients. Pour together in bowl. Knead into ball. Keep in Ziploc.

Of course, the color of Kool Aid dictates the color of your Playdough.  The only color that's a challenge to get is yellow.  I doubled the recipe, so I used two packs of yellow KoolAid and added a pack of orange KoolAid.  It was a close yellow.

I promise, this Playdough smells great.  If little hands put some in their mouths, no worries.  It will taste EXTREMELY salty but won't hurt them.  The oil keeps the Playdough from being crumbly. It's oh so soft. It lasts for months in a Ziploc bag. The best part is for about $5 you can make enough playdough for more than twenty kids!
Related Posts Plugin for WordPress, Blogger...
Ebates Coupons and Cash Back