Welcome!
Thanks for visiting! Please leave us a comment as we love your feedback.
See where we are partying at the bottom and on the sidebar.

Saturday, June 11, 2011

Nursing Cover Tutorial

Before I had my first child, I knew I wanted to try to breastfeed him.  I was not aware how uncomfortable I would feel if I was out in public and needed to do so.  A blanket can help hide what you are doing, but it can be hot and babies learn to pull at it and destroy your sense of modesty.

Right after I had Ryan, a friend of mine who just had a baby as well came over and she got out her nursing cover when it was time for her to feed her son.  I asked her what she was using and where I could get one.  She told me she got it online and that it was about $40.  I was deflated.  I could not swing spending $40 on a nursing cover when I just quit my job to stay home with Ryan.  I asked my friend if I could look at her nursing cover.  After closer inspection, I found that nursing covers are very simple and would be easy to make.

Even if you use fancy fabric, it shouldn't cost more then $10 to make.  The first one I made cost less than $4 with some inexpensive fabric. Below is my handsome little man Evan being a good sport and modeling one I made.


Let me share with you how easy it is to make a nursing cover for yourself or as a gift.

Supplies Needed:
  • 1 yard of fabric (the lighter weight the better to be breathable, just make sure it isn't see through)
  • 1/2 yard of terry cloth for inside corners (optional, but nice to wipe up any spit up)
  • 1 foot of boning (like what is used in corsets) see below
  • Two D-clips.  (These usually come in a four pack).
  • scissors
  • iron
  • sewing machine
  • matching thread
1.  Unfold your yard of fabric.  Cut a 3 inch strip of fabric off the bottom of your fabric lengthwise.  This will be your strap and strap holder.

2.  Fold your 3 inch strip in half with the right side of the fabric inside.  Iron it down to give it a crisp edge.
3.  Sew along the edge of three side of this strap, leave one of the small ends open.

4.  Now cut off a 4 to 5 inch piece from the end that is not sew up.  This will become the portion that you will add the D-rings to.  See picture (ignore fabric below it).

5.  Take the both strap pieces and work them inside out so that the right side of the fabric is showing.

6.  String two D-rings onto the small piece and fold over.

7.  Sew a line directly below the D-rings so they don't move when the nursing cover is being used.

8.  Put both of these straps to the side for now.

9.  Take your remaining big piece of fabric and fold the two shorter sides and one longer side in a 1/4 of an inch and press with the iron.  Then fold it in another 1/4 of an inch and press with the iron again.  This will give a clean edge to the inside.


10.  Cut a 4 to 5 inch square out of the terry cloth.  The larger you make the square the larger your corner pockets will be.  Then fold over each square.  Check to make sure they fit well in the corners you just pressed down.  If they do, place them inside the corner, with the finished folded edge overlapping the terry cloth. (see below).


11.  Pin the terry cloth to the fabric edges and sew up the each of the folded edges to include the terry cloth triangles.

12.  Now to finish up the remaining long edge.  Fold over this edge a 1/4 of an inch or larger depending on the width of your boning.  Press with the iron.  Fold it another 1/4 of an inch and press with the iron again, then unfold this portion back.

13.  Place the boning under this folded edge in the center of the fabric, with the curve facing down. (This will allow the curve to face in toward the person when finished).  Pin the boning to the fabric.  Sew the portion where the boning is to attach the boning to the fabric.

14.  Fold over the fabric another 1/4 of an inch (you previously ironed it to this point).  Place your rough edge of your strap to the side of the boning and pin down.

15.  Place the small strap with the D-rings on the other side of the boning and pin down.
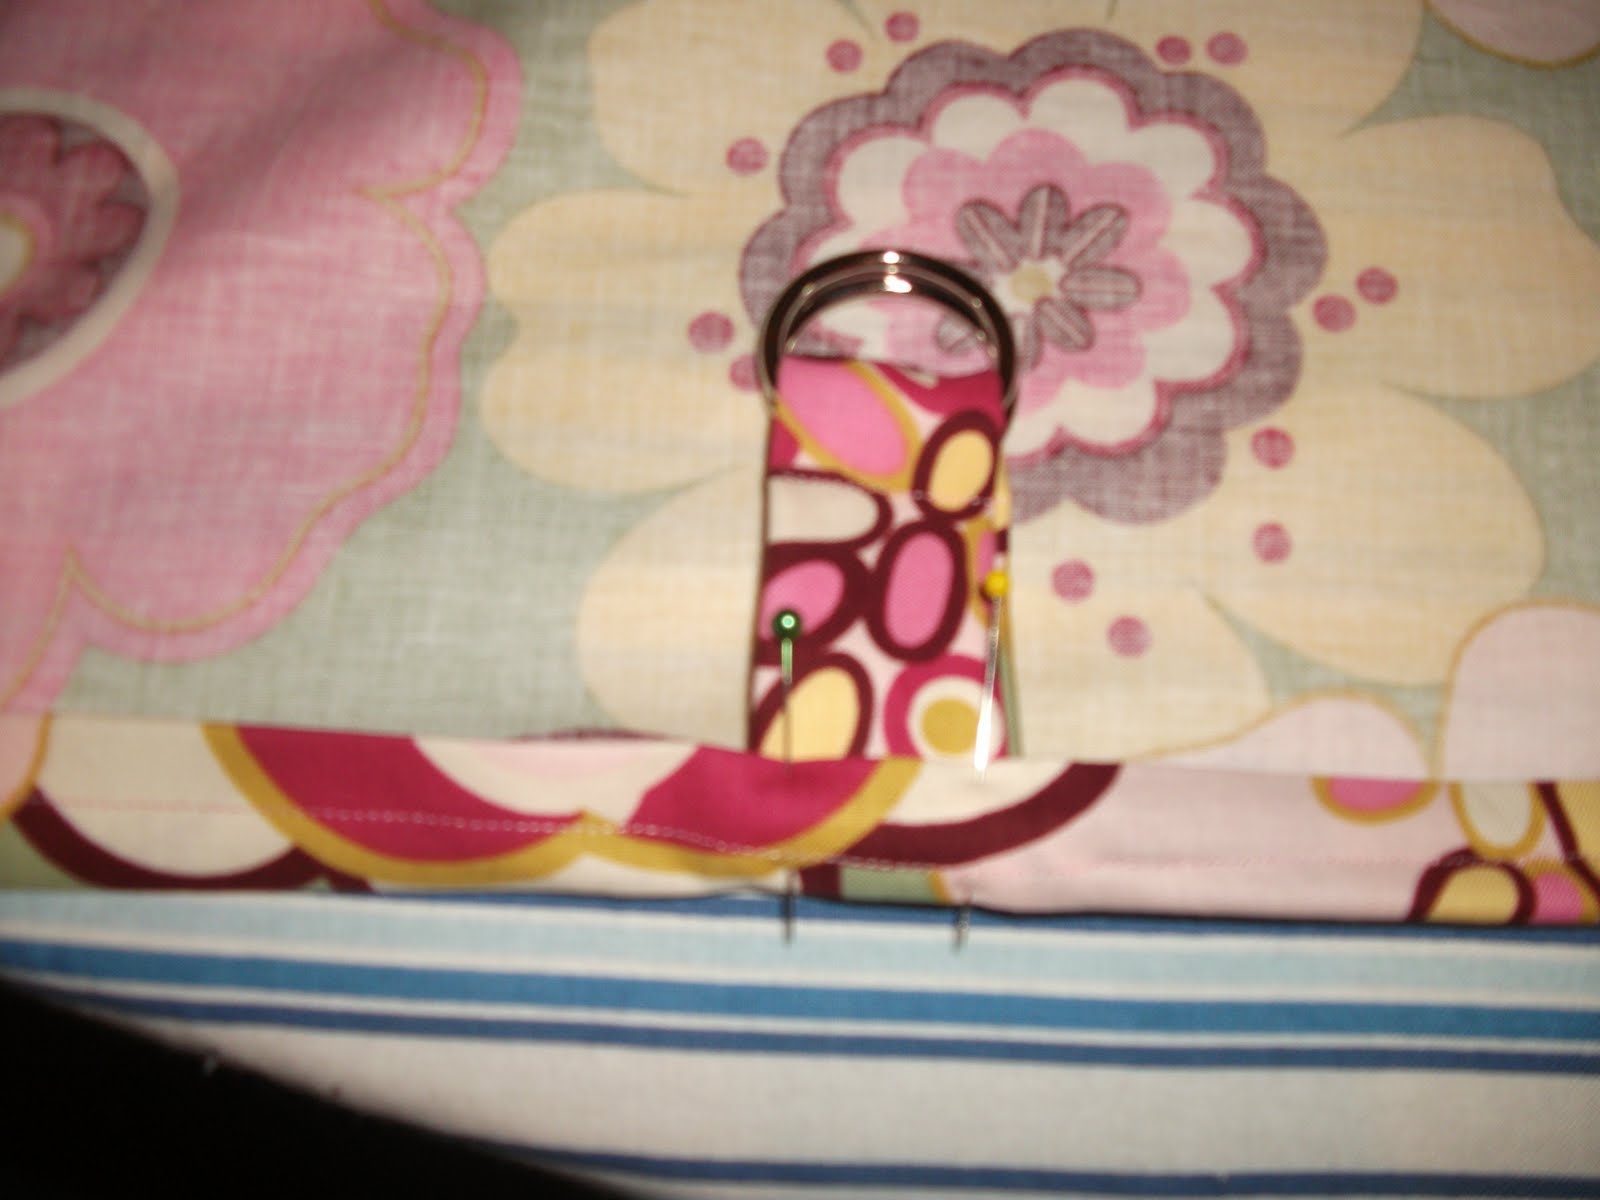
16.  Sew the length of the fabric to secure the final edge.  Make sure that both straps are securely sew into the edge.

17.  Fold over both straps and sew again so they are facing up when the nursing cover is worn.


It may seem like a ton of steps, but a nursing cover is very easy to make.  I wanted to be thorough and not leave out anything for even the most novice of seamstress.  The terry cloth corners are a nice touch to the nursing covers as you can use it as a pocket to tuck a tissue or bra pad.  Plus, it is nice to have something close to wipe the baby's mouth.  

I'm sorry I don't have a better picture, my model was asleep and I forgot to take another picture before I gave it as a present.

In a few days, I will have one more easy sew baby gift to share with you, but I need to make it first so that I have pictures for the step-by-step tutorial.  If you've ever wanted to make a baby sling, you won't want to miss that tutorial.

Related Posts Plugin for WordPress, Blogger...

Friday, June 10, 2011

Fancy Burp Cloths Tutorial

Every new Mom needs a stash of burp cloths.  Burp cloths have come a long way.  You can now purchase ones that are different colors and have little sayings on them.  I am old school though and find the cloth diapers are the best burp cloths known to man.  That being said, it is time to update those plain white cloth diapers. Wouldn't some nice fabric added to it make cleaning up the baby spit up and slobber a prettier process?


If you can sew even the tiniest bit, you can make these and impress a new Mom or soon to be Mom.

Supplies Needed:
  • package of cloth diapers (found in baby section of major super stores)
  • leftover fabric of different colors-approximately half a yard for 2-3 burp cloths
  • optional embellishments: ribbon, decorative lace, ric rack for edges, etc
  • matching thread for fabric and white thread
  • sewing machine
  • iron
1.  This is the most important step of all!  Wash the cloth diapers and the fabric you will use prior to doing this project.  Notice the picture below.  The left is the pre-washed cloth diaper and the right is the washed.  These will shrink.  If you don't wash the cloth diapers and the fabric first, they will shrink and bunch and not look so pretty.  All your work will be a waste and you don't want that.
2.  Take your cloth diaper and measure the inside portion that is thicker.  Measure both the width and length.  I am not providing these measurements as yours will differ depending on the level that the cloth diapers shrink.  

3.  Now cut at least 1/4 of an inch larger for both the width and length (on all sides) of your fabric. Notice below how much the diaper shrunk from the first time I prepared my fabric prior to washing.  Don't make that mistake!

4.  With your fabric right side down, fold in a 1/4 of an inch or 1/2 inch (in my case) on all sides of your fabric.  Press with your iron to get a straight firm edge.

5.  Check that your measurements are accurate on each cloth diaper and make any adjustments by folding in or out and re-ironing.  See picture below.

6.  Flip your fabric so that it is right side facing up. Place any embellishments under the fabric, such as ric rack or ribbon under the edges.  I didn't have these on hand so I didn't add them. Pin the embellishments and fabric to your cloth diaper or be lazy like I am and tweak it as it goes.

7.I start at one corner and go to the next corner.  Keep your needle down at the corner stop sewing, release the footer tension and turn your fabric and cloth diaper.  Then drop the footer and sew to the next corner.  Do this all the way around and you will only need to cut thread at your starting/finishing point.  This also gives a more polished look to the burp cloth.

When you are finished you have a beautiful burp cloth to give as a gift or add to your diaper bag.  A package of cloth diapers has twelve in it, therefore you can make a couple for a gift or a ton for yourself.

I made two of each for each of my friends who were pregnant.  Here is the stack of them.


I hope this tutorial helps you whip up some easy baby shower gifts.  Let me know what embellishments you added, if any, to make these gifts even more special.

Related Posts Plugin for WordPress, Blogger...

Thursday, June 9, 2011

Dressed Up Wipe Cases Tutorial

Over the last year, I have been surrounded by pregnant friends.  There is a major baby boom going on, I am sure of it.  With all the Moms to be, there was a need to make some gifts.  I love making my crocheted baby blankets, but I also like trying out some new items.

In the next few posts, I want to share with you how to make Dressed Up Wipe Cases, Fancy Burp Cloths and Nursing Covers.  These are all items I was oblivious to prior to having children and now I wouldn't know what to do without them.  Of course, you can do without these, but they sure make life a bit easier and prettier!

Last year, I came across someone with a wipe case that was all dressed up.  I immediately thought, "I can do that!"  Off I went to test it out.  Well, let me tell you the first time was a huge fail.  My glue gun left huge clumps of hot glue all over the fabric and case, it was horrible.  The next time I took more care so that the case would look great.  Let me share with you how to make these cute little gifts.  Here is a preview of mine:

Supplies Needed:
  • wipe cases (found in the baby section of any store practically, very inexpensive)
  • quilt batting or felt  (small amount or leftover from other projects)
  • pretty fabric (great way to use up some leftover pieces)
  • ribbons, buttons, flowers and in other embellishments
  • glue gun
  • glue sticks
  • scissors
1.  Get your glue gun heating up.  While you wait empty the wipe case of the wipes.  You will want to open up the case to work with it easier.
2.  Cut two pieces of batting or felt to about 9 by 5 (check that these are the dimensions of your case).  It doesn't have to be perfectly cut as long as it covers the top of the case.
3.  Glue down the batting to the case with your glue gun.  Squiggles, lines, doesn't matter how you get it to stick.  Do this for the top and bottom.  Trim any excess it makes it hard for the fabric to adhere to the case otherwise.  You just want the exterior to have an added softness.

4.  Cut two pieces of fabric to approximately 9 by 5.  Once again check to make sure your case has the same dimensions as mine.  Perfection isn't needed again as we will trim and cover with ribbon.

5.  Position the fabric on one side of your box.  Make sure that it is centered to adequately cover all sides.  Glue the fabric to the batting.  Then apply a strip of glue directly to the edge of the wipe case (every 3 to 4 inches) and press down the fabric.  Trim any excess that goes over the closing of the case.  Repeat this process all the way around on both top and bottom.  Here is what your case will look like afterward.
6.  Now it's time to add some pretty to your case.  You can get as creative as you like here with embellishments.  I used a 1 inch ribbon on top.  Measure out your ribbon to fit the case from side to side. Center it on the case and glue from the middle out.  Glue on the edges as well.
7.  I bought a matching ribbon that was 3/8 of an inch (I think) and glued it to the edge of the top and bottom to cover up my fabric edges.  Start this at the back of your case and work around.  Either fold under your finished ribbon at the seam or use a lighter to seal the edges of the ribbon and glue down.

I didn't have buttons or a flower to add, but I liked just the touch of ribbon.  Here is how your case should look when you are finished.

There you have it.  A simple gift that makes changing a diaper a bit more enjoyable.  I made three for friends and since I was making them, I needed one for myself as well.

I hope you find this tutorial helpful.  I would love to hear what embellishments you would add to your cases and see your pictures!


Related Posts Plugin for WordPress, Blogger...

Wednesday, June 8, 2011

Easy Enchiladas


My friend, Cindy, makes wonderful enchiladas.  She shared her easy recipe with me.  This would be a great meal to take to a friend!

Ingredients:
1 1b. lean ground beef
1 package of taco seasoning
1 large can of enchilada sauce
2 cups of shredded cheddar cheese
corn tortillas
sour cream (optional)

Preheat oven to 350 degrees.

Brown the ground beef in a large skillet.  Drain any remaining fat off the beef.  Add the taco seasoning mix and 1/2 cup of water. Mix in about 1/2 cup of cheddar cheese.

Spray a 9x13" pan with non stick cooking spray.

Pour 1/3 of the enchilada sauce on the bottom of the pan.

Fill a tortilla shell with the meat mixture.  Fold the edges of the shell in and place it, edges down, in the pan.  Repeat until all of the meat mixture is gone.  Pour the remaining enchilada sauce on top of the enchiladas.  Top with the remaining shredded cheese.  Bake on 350 degrees for 30 mins. or until the top is melted and bubbly.

Serve with a dollop of sour cream on top.

Enjoy!
Related Posts Plugin for WordPress, Blogger...

Tuesday, June 7, 2011

Oriental Chicken Salad

I have a new salad to share with you that is perfect for summer.  A lady from church passed this along to me and it is a favorite of our family now.  What is nice is you can dress this up if you want all the ingredients or just use what you have on hand for a delicious salad either way!


When I make this salad, I typically don't have the sesame seed, almonds or even green onions on hand.  It doesn't matter though.  It still tastes great with the remaining ingredients!

Pam's Oriental Chicken Salad

1/4 cup sesame seed, toasted
1/4 cup sliced almonds, toasted
1 large head of lettuce (or chopped romaine-what I use), cut into bite size pieces
4 to 5 green onions sliced
3-4 chicken breasts, cooked and chopped (I usually grill it on the George Foreman and then slice it)
2 packages of fried noodles from a Chinese Restaurant (usually less than a buck each) OR fry wonton noodles that you have cut into fourths.


Dressing:
6 TBSP sugar
2 TBSP soy sauce
6 tsp.  red or white wine vinegar
½ c. vegetable or canola oil
¼ tsp. pepper
Sprinkle of ginger

Cook chicken and slice into bite size pieces.  In a large bowl, combine toasted almonds, sesame seeds, green onions and lettuce.  Combine all ingredients of dressing and stir (or shake in a container) well.  Add chicken, fried noodles, and dressing to salad right before serving (warm chicken will wilt the lettuce and you don't want the noodles to get soggy).  

Enjoy this fresh and light salad!


Related Posts Plugin for WordPress, Blogger...

Monday, June 6, 2011

A Great Thing-Little Me Tea-A Giveaway with 6 winners!

Little Me Tea is a GREAT THING!
It's a drink, for children, that's caffeine free, all organic, with no added sugar. I know we're not used to buying "Tea" for our children; but, just look at the benefits and you may just change your ways.

Little Me Tea has two flavors of tea. Julia's Tropical Tea is a unique combination of organic, caffeine-free white and Rooibos teas  blended with hibiscus and chamomile, then sweetened with organic tropical fruit juices and vegetable juices. Zane's Grape Tea is unique combination of organic, caffeine-free white and Rooibos teas blended with hibiscus and chamomile, then kicked up with organic red grape juice and vegetable juices.

The chart above shows how Little Me Tea compares to other available children's drinks.  It's amazingly clear that this tea is a GREAT THING!

It's such a GREAT THING that not only will your child's health benefit from drinking Little Me Tea, your child will enjoy it. It's tasty!

Would you like to try it for your child or for yourself as so many adults have been reporting how much they like it and the benefits they're seeing from drinking it?  Little Me Tea is shipping 6 of our followers a winning prize pack. Each prize pack contains a carton of Julia's Tropical Tea and Zane's Grape Tea.  This one is easy to enter and you have great odds!

Here's what you need to do to enter.  Remember, leave a separate comment for each entry!

Comment 1: Are you an email subscriber to Our Seven Dwarfs? Leave a comment telling us you are or subscribe and leave us a comment telling us you are a new subscriber.
Comment 2: Do you follow Our Seven Dwarfs on blogger? (see sidebar under Follow us) Leave us a comment telling us you do or become a new follower and leave us a comment telling us you follow OSD now.
Comment 3: Do you like Our Seven Dwarfs on Facebook? Leave us a comment and tell us you do or like us and tell us you did.
Comment 4: Visit Little Me Tea's website  and leave a comment about the benefits of tea.
Comment 5: Like Little Me Tea on facebook and leave a comment telling us you do.
Comment 6: Follow Little Me Tea on twitter (it's under Big Organic Life) and leave a comment telling us you do.
Comment 7: This is the bonus comment: look at the comparison chart above and leave us a comment telling us what impresses you the most about this chart.

You will have until Saturday, June 11th at 11:59 pm EST to enter. We will announce the winners, that's right 6 WINNERS on Sunday, June 12th.

Good Luck!
Related Posts Plugin for WordPress, Blogger...
Ebates Coupons and Cash Back













