Welcome!
Thanks for visiting! Please leave us a comment as we love your feedback.
See where we are partying at the bottom and on the sidebar.

Saturday, July 2, 2011

Dr. Oz's Green Tea Recipe-A Metabolism Booster

I saw this on Dr. Oz.  I think it's worth a try.  This comes straight from his website:

For a powerful metabolism-boosting drink, try Dr. Oz’s Tangerine Weight-Orade. It contains: green tea, shown to boost metabolism 12% by drinking just one cup; tangerine, with a chemical composition that increases sensitivity to insulin and stimulates genes that help to burn fat; and mint, a calorie-free flavor enhancer.

Tangerine Weight-Orade
In a large pitcher, combine:
  • 8 cups of brewed green tea
  • 1 tangerine, sliced
  • A handful of mint leaves
Stir this delicious concoction up at night so all the flavors fuse together. Drink 1 pitcher daily for maximum metabolism-boosting results.

So, I've been making the tea and really like it. I add a little agave nectar to sweeten it... not much though. I haven't been drinking a pitcher a day but I'm drinking it instead of Diet Coke. I'm sure it's healthier. I hardly ever get a chance to see Dr. Oz but I did see this.  I thought I'd share the info, just incase!
Related Posts Plugin for WordPress, Blogger...

Friday, July 1, 2011

Freezer Paper Stenciled Birthday Shirts

A few weeks ago, I sent this feature on Freezer Paper Stencil T-shirts to my friend over at Sarahndipities.  Sarah just had her fifth child and needed some guest posts while she was recovering.  I was more than happy to help her out and hopefully make some new friends for our blog.  Welcome to any new followers from Sarahndipities.  Our followers should check out her blog as well.  She has super cute crafts and crochet items!

Today, I will be sharing a tutorial for a Freezer Paper Stencil T-shirts.

Two of my children are having birthdays coming up.  Since I learned how to do freezer paper stenciling, I love to make personalized shirts for my kids.  They love showing off their age and/or their name and it is much cheaper than embroidery! Here is a picture of what I will be teaching you to make.


Needed Supplies:
  • A T-shirt
  • Fabric paint
  • Foam paint brushes
  • Freezer paper (found in the plastic wrap/foil aisle of any grocery store)
  • Exacto knife
  • Self-healing cutting mat
  • Iron
  • Pencil to trace number and circle
  • Printed number and circle in your choice of font (I made a circle with the draw feature in Word).
Shannon and I both have a Silhouette and we love it!  Unfortunately, not everyone has a Silhouette, so I want to give you the tutorial for either way.  You can easily cut your letters on freezer paper using the Silhouette as well.  Shannon has done this many times and suggests selecting "Vellum" speed 3, thickness 25.  Make sure to use a mat that has plenty of stickiness left to it.  Rub the freezer paper down well to avoid any bubbles, which could cause the paper to tear.

If you don't have a Silhouette, here is the tutorial for you!

1.  Print off your number and circle or any design that you want to use.  Cut a piece of freezer paper larger than the size of your design.  With the waxy side down, trace your number or design.  

 2.  Here are all my designs ready to be cut out.  If you make the freezer paper too small don't worry, you can add more freezer paper to the shirt so that you don't get paint where it shouldn't go.    Also, don't stress if your tracing isn't perfect.  You can fix that when you cut it out.


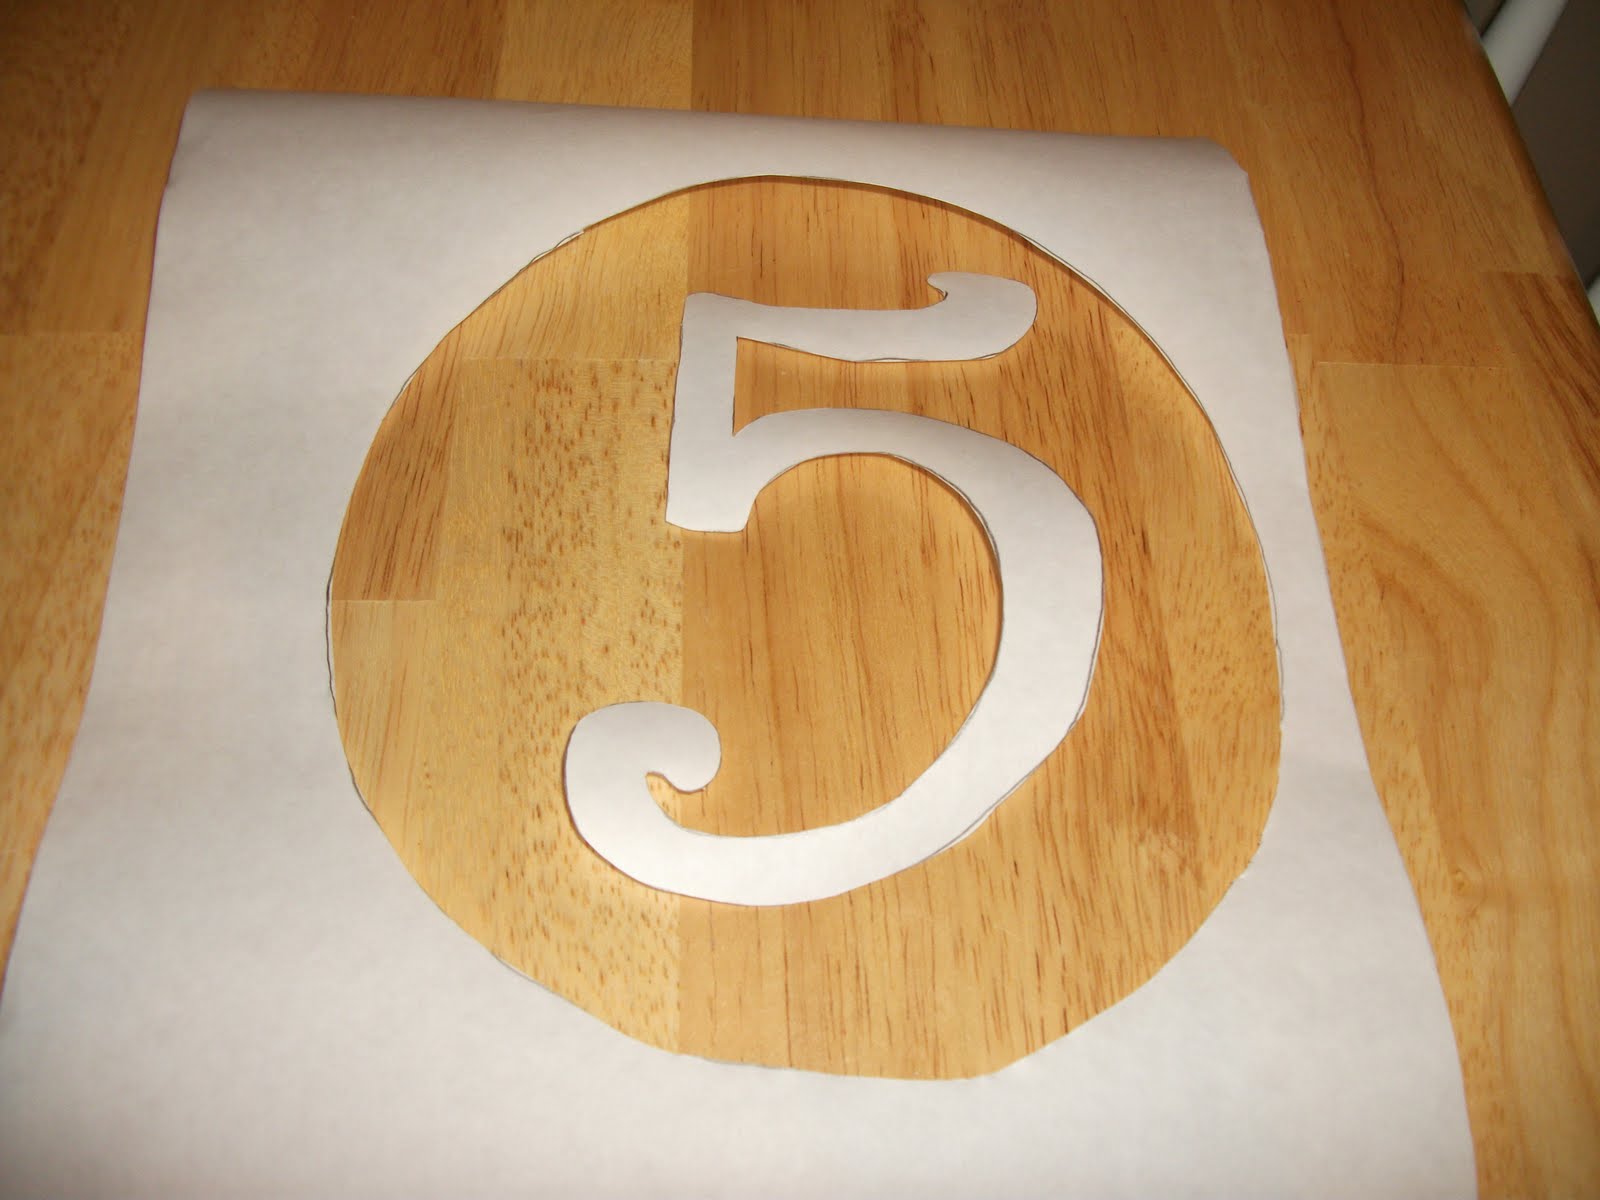
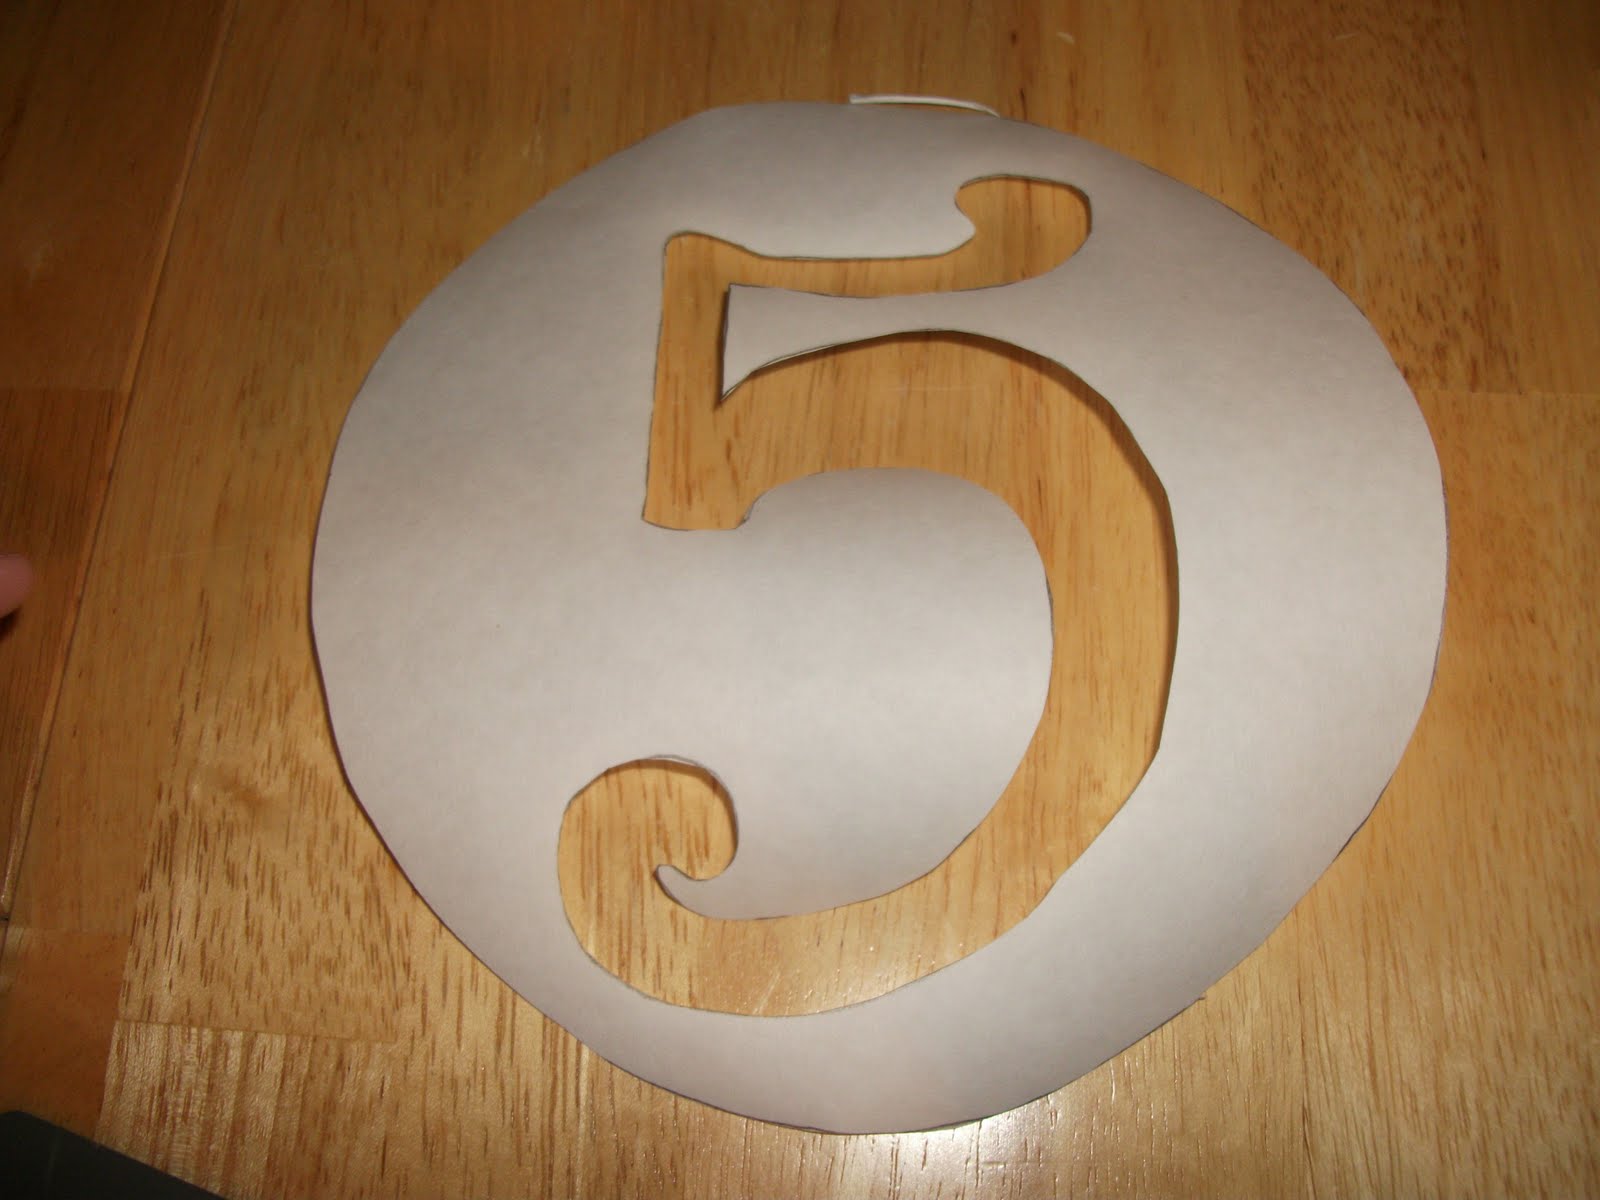
3.  Now take your exacto knife and cut out the number and the circle.  Notice that I will need to add more paper to the five as I didn't center my 5 appropriately.


Here are the two designs I was working on.


I won't need the interior of the circle.  I am keeping this though as you never know what you might want to put a 5 on, right?


4.  Heat up your iron to the cotton setting.  Turn off any steam settings. Iron your t-shirt.  Then cut out a large piece of freezer paper that will fit the inside of your t-shirt. You want this piece to cover the entire inside so that you don't have paint bleed through.  Place the freezer paper waxy side up and iron your t-shirt again.  This will help the freezer paper to adhere to the inside.


5. Grab your circle.  Center the circle in the middle of the t-shirt.  Iron it down making sure it is flat and without any bubbles.  Then center the freezer paper with your number and iron it down too.
 I cut another strip of freezer paper as my one side was thin and I didn't want paint to bleed off the edge.

 Here is the shirt ready to add paint.

This is how your circle should look if you gave yourself plenty of space on both sides.  I did it right for the #3 shirt.

6.  Use a foam brush and fabric paint to paint your design.  Make sure not to use too much paint as it might cause the freezer paper to bubble and paint to bleed underneath.  Try to go with the lines of the shirt as well, not against the lines.  White paint is takes more than one coat to show up properly.  Most other colors can get away with one or two light coats. I did three coats for this design.  You can use a hair dryer to speed up the process if you get impatient between coats.  Just make sure that the first coat is completely dry before painting the second coat.
 After first coat of paint.

After second coat of paint.

After third coat of paint.  Notice the number has almost disappeared.

7. Again, allow the paint to fully dry.  Learn from my mistake on a previous project and let the paint dry for at least 24 hours before you machine wash.

8.  Peel off the freezer paper.  If you have any difficulty, use your exacto knife to get under the freezer paper.  You won't hurt the paint that is attached to the shirt.  Here are the finished shirts.

My little man Ryan loved his shirt and wore it proudly the day of his birthday.  He will wear it many more times throughout the year.  You can machine wash and dry without any problems.  Here is Ryan showing off his #5 shirt.  The second picture is of my little man Evan who turned 3 yesterday.  This was perfect timing to share the tutorial with everyone!


Shannon and I have made many gifts and other projects using freezer paper.  If you would like to see more, click here. Freezer paper stencils are fantastic and let you make inexpensive personalized gifts.  If you have any questions, please let me know!

Happy Crafting!

Related Posts Plugin for WordPress, Blogger...

Thursday, June 30, 2011

Pacifier Clip Tutorial

Whether you approve of pacifiers or not, this isn't the issue.  The issue is saving yourself or another parent from picking up a pacifier continually or having to go on the great pacifier hunt.

  I have three kids and of those three, two loved having a pacifier.  My sweet little Anna loves her pacifier.  Since I am getting used to a girl and all the needs to accessorize, I had to make Anna some pretty pacifier clips to go with her outfits.  I also made a few boy's clips for a friend.

Without further ado...

Pacifier Clip Tutorial

Supplies Needed:

Suspender/Mitten clips:  You can purchase just the clips at a craft store, but they can be expensive ($4 for two).  If you are lucky to hit the winter items before they are gone, purchase some regular mitten clips.  Typically, you get 4 in a set.  I bought some at regular price for $2 and caught them a few weeks later for $0.50!  That is quite the savings.  These are colored, but you could always spray paint or even paint them with fingernail polish.


Ribbon:  Measure your mitten clip opening to insure that your ribbon will fit well.  Most of these are 3/4 of an inch or an inch.

Thread: Pick your thread to match your ribbon

Sewable Velcro

Sewing machine or by hand if you so choose


Scissors


Directions:


1.  Cut your ribbon to the size that you would like for the child.  Typically 6 to 8 inches.  You don't want it too loose as it could become a danger for the child.

2.  Put both sides of the velcro together and cut it to fit your ribbon.  It doesn't need to be a large piece, just enough to catch and keep the ribbon attached.

3.  Fold over one in the ribbon.  String the ribbon through the mitten clip with the fold on the backside.  Fold over the clip and sew together.


4. Fold over the other end of the ribbon. Place one side of the velcro over the fold. Sew around the velcro to secure.  Space the second piece of velcro about an inch down from the ribbon and sew it to the ribbon as well.


There you have it.  A simple pacifier clip that you can whip up very quickly as a gift or for one of your little ones.  Here the ones that I have made recently.

Happy Crafting!

PS.  Happy Third Birthday to my little man Evan!  Thanks for always making us laugh and for your sweet platypus type kisses! Stop growing up on Mommy!

Related Posts Plugin for WordPress, Blogger...

Wednesday, June 29, 2011

Amy's Post-An Awesome, Interchangeable Wreath, ready for the 4th of July


Our dear friend Amy made an incredible wreath and we've encouraged her to do a guest blog about it! Amy's inspiration was from  here . I saw this wreath and thought it was precious.  So, I shared it with Amy and then forgot about it.  Well, she didn't forget... read on and see how she turned this into her own masterpiece. Thank you, Amy!  We're glad you're a fellow crafter!

I cut a 2" strip of burlap, from a huge piece. I'm not sure how long the strip ended up being.

I wrapped it around a straw wreath that was still wrapped in plastic. I used my glue gun to secure the bitter end to the wreath and started wrapping, slightly overlapping the edges, trying to keep the edges parallel...(that's my OCD coming out...)

I picked out these two scrapbook papers and 3 different sized stars at Hobby Lobby. I traced the stars on the back of the scrapbook paper and cut them out.

 I like using the "gloss-lustre" Mod Podge.

I used it to "glue" the scrapbook paper to the wooden stars. Then when it dried, I painted on a nice thick coat, until it almost looked white.  I found that the thickness of the Mod-Podge kind of helped save my wreath, as I had it hanging on my front door during several of our crazy thunder storms! 

Using my glue gun and Scotch Velcro tape, I created 3 clusters of stars.
Again, the OCD kicking in, I did a pattern with the stars & stripes patterns.
First, I stacked & hot glued the stars in their 3 clusters.
Once they were dry I positioned them on the wreath to space the clusters out.

Next I cut 1" strips of the Velcro tape. I glue gunned the hook&loop piece onto the back of each star cluster & then I glued it's catch piece onto the wreath. 
The great thing about using the Velcro tape is that now I can make other clusters and change out the theme for the wreath as the seasons change!

Here are some patterned paper and flowers for a future wreath!

I traced the pattern on the backside of the paper.

...and cut the shape out... you know the drill... next comes the Mod Podge and gluing the shapes in clusters.  Fun stuff!

Happy 4th of July!
Amy
 
Related Posts Plugin for WordPress, Blogger...

Tuesday, June 28, 2011

Birthday Decorations

It's birthday week at our house!  My husband's big day is right around the corner.  I get our birthday decorations out a week before each birthday. Here are the decorations I have, so far... I'm always on the lookout for more to add to my collection!
This is a photoboard I created. I'll stick birthday pictures, of the birthday person, on the board the week of their birthday.
Here's a tutorial for making a photoboard:

Here's the balloon wreath I created last year, thanks to HowDoesShe! I have no idea how they made their beautiful wreath with only 144 balloons. I used more than twice that.
Here's the tutorial for the birthday wreath:


This is another HowDoesShe birthday decoration. It's a countdown to the birthday board. You simply pop a balloon for each day before the birthday.  As a bonus, you add a slip of paper to each balloon, with a special treat for the day. For example: a stop at the ice cream shop.
Here's the tutorial for the birthday board:

Yet another great HowDoesShe birthday decoration. This is a fantastic way to celebrate your birthday all week!
Here's their tutorial:

Here's a door mat I made with a 99 cent IKEA door mat.
This is the simple tutorial:

Birthdays are BIG deals that should be celebrated as such.  If you have any fabulous birthday ideas, please share them with us!
Related Posts Plugin for WordPress, Blogger...

Saturday, June 25, 2011

Strawberry Slippers

Check out the new strawberry slippers I have been making.  I'm on my third pair.  I made one for someone special (it's a surprise, hopefully she will get them soon), Shannon and myself.


These slippers came from two of my favorite people! The slipper pattern is called the Oma House Slipper from one of our sponsors, Mamachee Crochet Patterns.  I got the idea of the strawberry effect from one of our followers, Amanda of Sugar Mama's Sweet Bowtique.  I am a huge fan of her shop.  Amanda is very talented and takes great patterns and goes beyond them.  Thanks for the great idea, Amanda!

Related Posts Plugin for WordPress, Blogger...
Ebates Coupons and Cash Back