Welcome!
Thanks for visiting! Please leave us a comment as we love your feedback.
See where we are partying at the bottom and on the sidebar.

Thursday, March 1, 2012

The Leprechaun Visits: Our St. Patrick's Day Traditions

The Leprechaun Visits:
Since my oldest daughter was one, we've had an annual visit from the Leprechaun.  He's a funny guy.  He comes to our house, leaves Shamrock stickers all over, and even uses our potty and forgets to flush!  Did you know a Leprechaun pees green? (Thanks to some green food coloring!) The Leprechaun also leaves green treats, gold coins, and a present (or a couple of small gifts) wrapped in green.  It's great fun to have the Leprechaun visit.

St. Patrick's Day Decorations:
This is the first year I've decorated our house for St. Patrick's Day.  Being a part of blogland inspires me to decorate for all holidays.  Having two little kids, that seem to appreciate the decorations keeps me going too.  Well, I think most of the decorations are done.

My front door wreath.

A mantle sign.

Another mantle decoration.

The mantle tree branch.

Our welcome mat. 

Another mantle decoration.

St. Patrick's Day Photoboard
A Leprechaun pot by the front door.

St. Patrick's Day Clothing:
We definitely wear green on St. Patrick's Day.  Who wants to be pinched?
This is St. Patrick's Day 2009.  They are so itty bitty!


These are this year's tshirts.

I still have plans to make Shamrock clippies for the girls.  Stay tuned for those.

St. Patrick's Day Food:
We always have the traditional corned beef for St. Patrick's Day.  I go light on the potatoes (we're not huge fans) and heavy on the carrots (we love carrots). We also add cabbage.  Believe it or not, my girls usually eat it. Great drink options are green limeade, adding green food coloring to lemonade, sprite, or water. Dessert options can include mint chocolate chip ice cream, lime sherbert, pistachio pudding, cake made green with food coloring, rainbow cakes http://familyfun.go.com/recipes/catch-a-rainbow-cake-687429/ or cupcakes http://familyfun.go.com/recipes/taste-a-rainbow-cupcakes-842128/.  I think we'll try my mom's recipe for green jello this year.

Here it is.  It's delicious!

JELLO SURPRISE
2 small boxes lime jello
1 #2 can crushed pineapple drained (save juice)
Make jello with the pineapple.  Chill.  When firm:
Prepare 2 envelopes of Dream Whip as directed.  Add 8 ozs cream cheese and spread over thickened jello. 
Pineapple Sauce
pineapple juice, add water to make one cup liquid
1 Tablespoon lemon juice
3/4 cup sugar
2 Tablespoon flour
2 eggs beaten
Mix dry ingredients and then slowly add liquid and eggs.   Cook over low heat until thickened.  Cool.  Spread over cream cheese and sprinkle with pecan pieces. 

St. Patrick's Treats:
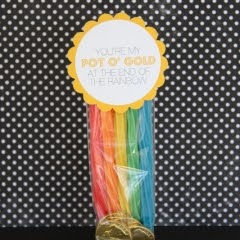
If you enjoy giving little gifts on St. Patrick's Day, here's an adorable, inexpensive idea. http://thecraftingchicks.com/2011/02/little-gifts-for-st-patricks-day-free-downloads.html

If you have any great traditions you want to share with us, please do!  We're always open to new ideas.

Related Posts Plugin for WordPress, Blogger...

Shamrock Clippies-A Tutorial

Here's another last year repost!

Happy St. Patrick's Day.  I hope you're enjoying the green around you.  I finally made the hair clips to go with my daughters' St. Patrick's Day shirts.  They were relatively easy to make. Here's a picture of one of the six clips I made.
This one has pink dots on the green ribbon.  I kind of like it.

All you need to make these clips are: a lighter, scissors, grosgrain ribbon, alligator clips, and a glue gun.

First, I cut 6 pieces of ribbon into approx. 2.5" lengths.

Using a lighter, I "melted" each edge of the ribbon, to keep it from fraying. This just takes a second and you can see the ribbon edge get a little shiny, letting you know it's done.

I hot glued 2 pieces of ribbon together making 3 "Ls".

I took the ribbon that was the over piece, and made put it under the other piece of ribbon.

I hot glued it in place.  Now it looks like a lowercase b or a foot.

I took the other piece of ribbon and wove it under, then over the first piece of ribbon.  I hot glued it on top.  It makes a heart shape. Each clippie needs three hearts.  So, repeat.  Repeat.

I then cut a piece of ribbon about 4.5 inches long. I "heated" the edges of the ribbon with the lighter.

I hot glued the ribbon to the back of the clip starting at the top.

I then hot glued the ribbon to the "mouth" of the clip.

I continued to hot glue the ribbon to the top of the clip.

I hot glued the rest of the ribbon to the inside of the clip. Only a back section is left exposed.
So, now I have three hearts, a covered clip, and a little pink bow.  It's almost ready for final assembly.

With the "mouth" of the clip down, I hot glued the first heart to the top part of the clip.

I then hot glued the other two hearts to either side.

Then I attached the bow in the middle.  I think this turned out super cute.  Now I know why my daughter calls shamrocks, "hearts". They do look like they have hearts in them!

Related Posts Plugin for WordPress, Blogger...

St. Patrick's Day Gifts for Around $1-A Tutorial

This is the St. Patrick's Day gift I'm giving and it costs about $1 to make!

I love to give special people, special gifts, on special days.  With St. Patrick's Day right around the corner, I've been looking around for great ideas.  I saw a couple I really liked:


The crafting chicks said they got their cute little buckets at the Dollar Tree.  So, off I went!  Well, our Dollar Tree didn't have those adorable little buckets. They did have these adorable terra cotta pots.  They were 3 for $1.  Score!
I painted the pots with black, enamel, acrylic, indoor/outdoor paint.
I painted them on the outside, top half first.
I painted the inside.
The paint dries quickly so in about 30 minutes, I was able to paint the rest of the outside of the pots.

I bought Twizzlers, rainbow colored twists.  I lined them up in a rainbow pattern and wrapped them in Saran Wrap.

I put the rainbow in the pot.
I found this bag of Easter grass at the dollar store too. 
I stuffed it in the pot.
I added as many Rolos as I could safely jam in there.
I put a the pot in a cellophane bag and tied it with a green ribbon.
I printed the free printable, from
http://www.ishareprintables.com/po-o-gold  and cut it out with Fiskars, majestic edged scissors.  I punched a hole in the top, threaded the ribbon through, and made a bow.  I LOVE it.

Cost breakdown:
12 pots-$4 (33 cents a pot)
black paint-$2 (I used less than half a thing so 7 cents a pot)
Easter grass-$1 (there was more than enough for 12 pots) (8 cents a pot)
Twizzlers-$1.50/bag x 3 bags (each bag makes 5 rainbows) (30 cents a pot)
Rolos-$3/bag (1 bag made 12 gifts) (25 cents a pot)
Cellophane bags-$2 for 50 bags (5 cents a pot)
Ribbon-$2 a spool (18 cents a pot)
That's about $1.26 a pot.  That's less than a greeting card and this is so much tastier!

I hope you're inspired!

Don't forget to enter our latest giveaway.  The Vintage Pearl is giving a lucky follower a $50 gift card to their store!  Click here for more information. http://www.oursevendwarfs.com/2011/03/great-things-vintage-pearl-great.html
Related Posts Plugin for WordPress, Blogger...

A St. Patrick's Day Welcome Mat

Here's another $1 welcome mat. This one is for St. Patrick's Day.  I just used Acrylic paint on an IKEA doormat and voila!


Here are some of the other $1 welcome mats I've done.


Related Posts Plugin for WordPress, Blogger...

Lucky Scrabble Sign-A Tutorial

First I took a piece of wood and painted the edges XMas Green.

After the paint dried, I Mod Podged the top of the board with a thick layer.

I added a piece of cardstock on top and smoothed it down with a scraper. I then let it dry for about 30 mins.

While the first layer of Mod Podge was drying, I cut 4 shamrocks, on my Silhouette, and a piece of cardstock to go on top of the bottom layer, and distressed them with Distress Ink and a blender pad.


I painted the rose colored cardstock with a heavy layer of Mod Podge.  I put the striped cardstock, centered on the board, and smoothed it down with a scraper. I let this dry for at least thirty minutes. You know it's dry because the Mod Podge becomes completely clear and loses all the white color.

I heavily Mod Podged over the project again.  I carefully spaced the four Shamrocks and glued them down on top of the striped cardstock.  I smoothed them down with the eraser of a pencil so they would stick well.  I let them dry about 30 minutes.

I added another heavy layer of Mod Podge to the entire top surface of the project.  I let it dry for an hour.

Using the belt sander, I sanded the edges of the board.  I then used the Distressing ink to distress the edges to blend it together.

I measured out the letters.  I glued them using wood glue.

Tada!  I'm "Lucky" to have this great decoration.
Related Posts Plugin for WordPress, Blogger...
Ebates Coupons and Cash Back