Welcome!
Thanks for visiting! Please leave us a comment as we love your feedback.
See where we are partying at the bottom and on the sidebar.
Showing posts with label cards. Show all posts

Sunday, January 29, 2012

Last Year's Valentine's Day Post is Full of Great Ideas

It's Valentine's Day! I hope you all are having a wonderful one.  What does this mean to us?  Well, we're almost done with pink, red, and hearts and we'll be moving on to rainbows, leprechauns, and pots of gold.

I LOVE traditions.  I have many.  I really don't have any Valentine's Day traditions though.  Any suggestions?

I definitely try to spend the day letting others know how grateful I am for them. So, let me start with our followers.  I am so grateful for you.  You give our crafting addictions a purpose.

Speaking of crafting and cooking... I have a few more Valentine's Day things to share with you before we move on to the next holiday.


Do you remember the birthday door mat tutorial I did? http://www.oursevendwarfs.com/2011/01/happy-birthday-welcome-mat-tutorial.html Here's my Valentine's Day version.  We're conversation hearts.  I used regular acrylic paint on the mat and fabric paint to paint on our names.  I just free handed the hearts. Super easy and even cheaper.  This is one of those thirty minute crafts.  I LOVE quick crafting!
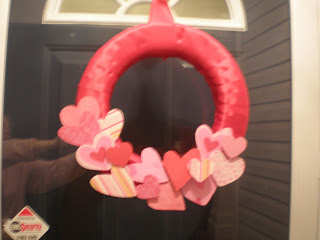
My friend Amy and I saw a great wreath on Oopsey Daisy http://oopsey-daisy.blogspot.com/2011/02/3-dimensional-heart-wreath.html.  We were inspired.  As always, when we copy craft, we take their thing and do our own thing to it.  So, instead of copying the entire wreath with the hearts, we did a partial cover. I'll be honest, there were three reasons we did this. First, we bought two stores out of hearts.  Secondly, that would have taken a lot more time.  Finally, we really liked the look of the satin ribbon on the wreath so we wanted ot show some of it.  This is my wreath above.

This is Amy's wreath.  Amy claims to be noncrafty.  She's a crafty chick in denial.  Her wreath is gorgeous.  Also, if I'm going to be completely honest.  She made all of my wreath too.  The only thing I did was arrange the hearts, hot glue them on, and get a huge blister to prove I used a hot glue gun! Thanks, Amy!


Here's my entry way with the wreath and doormat.


After crafting, I did some cooking. I made these amazing meringue cookies.  I got the recipe from http://www.thestoriesofa2z.com/2010/02/meringue-ice-cream-cone-valentines.html she made them into adorable ice cream cones.  I decided not to do that.  First, my kids don't eat the cones. Secondly, my kids don't eat cake, just icing, and thirdly, meringue cookies, even with M & Ms are pretty low fat.  I'm thinking that's a great dessert to make.  These are delicious.  I used 1T of freshly squeezed lemon juice.  The chocolate and lemon combination are surprisingly amazing.  I will make this recipe again and again.  YUM!

I also made these Martha Stewart cookies.  http://www.marthastewart.com/recipe/chocolate-cookie-cutouts-love-bug-cookies The first time I made these cookies was for my daughter's first birthday party.  It was ladybug themed and I made the cute ladybug cookies.  Well, this cookie base is simply delicious... cocoa and cinnamon...so good.  So, I've made them a couple of times since.  These aren't decorated yet but pretty soon they'll have Royal Icing and a varitey of sprinkles. 
...GraciAnn decorated these!  Cute, huh?

Then there's the homemade card I made my husband.  I used red felt to make the rosettes. http://www.oursevendwarfs.com/2011/02/valentines-day-celebrated-with-burlap.html Here's a tutorial for the rosettes I did on an earlier project.  It's simple, sweet, and special. I like it much better than any of the cards I looked at to buy.

Here's wishing you a lovely day on this Valentine's Day!
Related Posts Plugin for WordPress, Blogger...

Tuesday, February 15, 2011

Handmade Cards-Helpful Hints

Back in my single and prechildren days, I used to love to make cards.  I really got into stamping when one of my friends became a Stampin' Up representative.  She was really creative and would have a group of us over, every other week, to create.  Fun stuff!  Things sure have changed since those days.  I've gotten married, moved to another state, and have two little and one bigger reasons to stay home at night.  For one of our Christmas giveaways, I made cards.  It brought a lot of fun memories back. Except this time, I had a Silhouette too!

I am in no way a card making expert; however, if you are a beginning card maker, or would like to give it a try, I thought showing some of my examples would give you ideas.

Card 1:  A Valentine's Day Card


This card was made with a number of paper cutouts.  I used stamps to create background papers.  I used two colors of stamp pads to tie everything in.  The fuschia ink matches the paper and the gold ink matches the cording accent wrapped around the middle of the card.  I also decorated the flap of the envelope.

The front of the envelope was also decorated using a stamp on stamp effect.

Card 2: Another Valentine's Day Example.
I used a heart stamp and a light pink stamp pad create a patterned background on the white, linen cardstock. I also stamped the envelope with the heart stamp to tie it together.  I then wove two pieces of cardstock/patterned paper, together to make the heart on the front. I used the red patterned paper, from the heart, to line the envelope flap. (not pictured).  This gives it a really nice, finished look.

Card 3: Baby's Arrival 
I made these in a variety of colors: yellow, pink, and blue.  I chose the yellow, as an example, since it could be used to welcome a boy or a girl.  First, I cut the onesie pattern with my Silhouette.  This shape is available to purchase from the online store.  It actually makes a card.  I cut it from patterned paper and the plain cardstock.  I glued them together.  This gives the card a finished look and makes it easy to write a message inside.  I then used my embossing powder and embossing gun to emboss the duck on the onesie card and envelope.

Once again, I lined the envelope to tie it together.

 Card 4: Shamrock
I used the wavy blade for my Friskars cutter to cut the patterned paper and the edging on the cardstock for the lined envelope.  I cut the Shamrock on my Silhouette.  Cute and simple.

 Card 5: Birthday card
I stacked coordinating cardstock and patterned paper under a cake cut out I cut on the Silhouette.  I added a strip of cupcake ribbon for a little bling.

 Card 6: Tile Card
I stamped the image on a piece of white cardstock.  I colored in some of the blank areas of the stamp. I then cut the cardstock into tiles and spread them apart, gluing them to a coordinating cardstock (green).  This makes for a great everyday card.  I stamped the envelope to match.  When using a stamp that you'd like multicolored, I suggest you use a water color marker to color each part of the stamp a different color.  To moisten the ink, you can "huff" on it.

Another coordinating stamp on the flap.

Card 7: The Bird Card
I found the bird image and branch image on the Silhouette's online store.  I cut them.  I then used a distressing pad and blender pad to outline the bird. The patterned background paper ties in perfectly with the blue bird.  I used the deckle blade on my Fiskars paper cutter to get the ragged effect on the background paper.

Card 8: The Apple Card
The apple is a graphic from the Silhouette.  Once again, I used distressing ink. I also added a brown ribbon for dimension. I love how this turned out.

Card 9: A Holiday Greeting Card
This stamp was embossed and cut out. I colored the penguins with markers.  (The black is embossed) The middle penguin has a dimensional dot behind him to "stand out".

Card 10: Christmas Greeting Card-take 2
Here's the same stamp. This time, I didn't cut the penguins out; however, they are still embossed.  I used a corner cutter to attach the white cardstock to the silver background.

 Card 11: An Invitation
Here's the outside....

....and the inside...

This is how it opens.

 Card 12: An Elf Holiday Card
Here's a stamp on the envelope.

Here's one on the flap of the envelope.  I used a multicolor metallic stamp pad.

Here's the card.  There's an awful lot of layering.  I also used a corner rounder on the cardstock.  One of my favorite effects is the wire, attached to the tag.  It's always fun to have embellishments.

Card 13:  Everyday Greeting Card
I love tearing the paper and dabbing it with distressing ink.  It gives an old time effect.  Cutting out stamps and gluing them on gives great dimension.

Adding a bookmark to match gives the recipient a small gift that's easily mailed.
 Card 14: A Bird's Nest

Real feathers give a great effect.  The eggs are all cut out for a semi 3D effect.  I used a brown stamp pad but added some color to the eggs and nest with a blue gray marker. The envelope was trimmed with the deckle blade and the edge rubbed against the brown stamp pad.
The inside of the card has a deckle edged piece of light cardstock.  Since the card is such a dark color, the lighter cardstock makes it easier to write a message inside.

 Card 15: Simple and Sweet
I used a black stamp pad to stamp this image on the envelope. I then colored in the stamp with markers.

The matching card is just plain cream cardstock.  I rounded the edges.

The inside of this easy card.

 Card 16: The Lion
I cut a circle (using my circle template) from a black card. I stamped a lion on a piece of tan cardstock.  I stamped green fern on cream cardstock and cut out around the fern.  I hot glued some rafia to the fern. You can see the lion peeking through.

Here's the inside.  I used a clear envelope since it looks really neat to mail.  You just need to use labels to write the address and the return address.

 Card 17: Snowman card
This was my friend's Christmas card. She stamped the flap of the envelope.

She stamped the snowman and colored him in.


Here's the card.  I love how she cut with the wavy pattern.

Here's the card's inside.  She even signed in silver ink!

Card making is fun. It can be as simple as complex as you want it.  I hope you find some ideas and inspiration from what I've shown you.  I'm longing for a card making buddy!


Related Posts Plugin for WordPress, Blogger...

Saturday, February 12, 2011

Happy 100th Day of Our Seven Dwarfs!

Today is our 100th day of Blogging!

We are so grateful for our 107 (verified) email subscribers, 138 Facebook friends, and 94 blog followers.

We have shared crafts, recipes, and stories.

We are constantly working to make our blog educational and entertaining.

We share.  In our first ninety-six days of blogging we had 15 giveaways! Just in case you missed any of them, here is a review:

Giveaway 1-A Freezer paper snowman tshirt.  Winner-Jamie N.

Giveaway 2-Treats for Santa-plate-Winner Elizabeth G.

Giveaway 3-A Pair of Christmas Tree Clippies-Winner Jenny S.

Giveaway 4-Christmas Sparkle Wreath-Winner-Lisa M.

Giveaway 5-8 handcrafted, all occasion greeting cards-Winner-Kristen J.

Giveaway 6-Crocheted Cloche-Winner Andrea S.

Giveaway 7-Family Subway Art-Winner-Jessica C.

Giveaway Day 8-We Believe Photoboard-Winner-Amy R.

Giveaway 9-Flocked Christmas Tree Shirt-Winner-Cari L.

Giveaway 10-Christmas Coasters-Winner-Mary M.

Giveaway 11-Crocheted Cloche-Winner-Jessica C.

Giveaway 12-Subway Art-Winner-Dana M.

Giveaway 13-Subway Art-Winner-(through Somewhat Simple) Jennifer I.

Giveaway 14-Heart Clippies-Winner-Leslie S.

Giveaway 15-A "Love" Sign-Winner-Amy R.

Thank you to all of our followers. You've made it all possible.  The possibilities are endless. Stick with us!  There are more great things to come! (Including another giveaway very soon.)


Please vote for us!
Related Posts Plugin for WordPress, Blogger...
Ebates Coupons and Cash Back