Welcome!
Thanks for visiting! Please leave us a comment as we love your feedback.
See where we are partying at the bottom and on the sidebar.
Showing posts with label wood crafting. Show all posts

Thursday, March 1, 2012

Lucky Scrabble Sign-A Tutorial

First I took a piece of wood and painted the edges XMas Green.

After the paint dried, I Mod Podged the top of the board with a thick layer.

I added a piece of cardstock on top and smoothed it down with a scraper. I then let it dry for about 30 mins.

While the first layer of Mod Podge was drying, I cut 4 shamrocks, on my Silhouette, and a piece of cardstock to go on top of the bottom layer, and distressed them with Distress Ink and a blender pad.


I painted the rose colored cardstock with a heavy layer of Mod Podge.  I put the striped cardstock, centered on the board, and smoothed it down with a scraper. I let this dry for at least thirty minutes. You know it's dry because the Mod Podge becomes completely clear and loses all the white color.

I heavily Mod Podged over the project again.  I carefully spaced the four Shamrocks and glued them down on top of the striped cardstock.  I smoothed them down with the eraser of a pencil so they would stick well.  I let them dry about 30 minutes.

I added another heavy layer of Mod Podge to the entire top surface of the project.  I let it dry for an hour.

Using the belt sander, I sanded the edges of the board.  I then used the Distressing ink to distress the edges to blend it together.

I measured out the letters.  I glued them using wood glue.

Tada!  I'm "Lucky" to have this great decoration.
Related Posts Plugin for WordPress, Blogger...

St. Patrick's Day-Shamrock Tree-Copy Craft

I found this great project here: http://lindseyscraftlist.blogspot.com/2010/03/shamrock-tree-with-tutorial.html


This was my inspirational piece.

I didn't have a picture frame and didn't want to go buy anything. I hit John's wood scrap pile and found this piece of poplar.

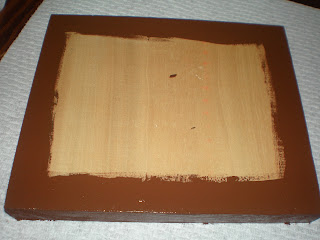
I painted the edges brown.

I cut a piece of cardstock to fit the board and distressed it.  I mod podged the paper to the wood and let it dry, completely.  I then used a belt sander to blend the edges.
I drew a tree trunk on the back of a piece of wood grained, brown cardstock.  I cut it out. 
I painted the entire cardstock with Mod Podge and added the tree trunk, shamrocks (that I cut using my Silhouette), and letters that spell "LUCK" also cut on my Silhouette.  I added a piece of brown ric rac.

After the mod podge was completely dry, I added a heavy layer of mod podge over the entire project.

I glued a button to the end of the ric rack.

Here's the finished project.  Thank you, Lindsey at Inspiring Creations. You inspired me!
Related Posts Plugin for WordPress, Blogger...

St. Patrick's Day "Lucky Sign" -Copy Crafting

I saw this Lucky sign:  http://lindseyscraftlist.blogspot.com/2010/02/lucky-wood-board.html I wanted to make one of my own.
My husband is a wood worker.  In his home remodeling projects, I get lots of scrap wood.  GraciAnn and I found a piece we liked, and she went to work sanding it. This particular piece was oak.

We got green paint.  The color was "XMas Green".
We painted the entire board.

On my Silhouette, I cut the word Lucky and some stripey Shamrocks. I used a distressing ink pad and distressed the letters and the shamrock.

I put Mod Podge on the entire board.
I placed the letters and shamrock on the board and rubbed it down. I let it dry for about thirty minutes.


I mod podged over the top of the entire thing.

It dried.  I added embellishments-ribbons and buttons. I feel Lucky to have such a wonderful sign!
Related Posts Plugin for WordPress, Blogger...

Wednesday, February 8, 2012

"Bee Mine" Valentine's Day Photo/Gift Card Holder

I love the way this photo holder turned out.
Believe it or not, it was SUPER easy to make.
Related Posts Plugin for WordPress, Blogger...

Monday, February 6, 2012

A Valentine's Day Decoration Using Scraps

This Valentine's Day craft was made entirely of scraps!

Here's a quick tutorial:
Related Posts Plugin for WordPress, Blogger...

Friday, January 27, 2012

Valentine's Day Celebrated with Burlap and Fleece-A Tutorial

I'm almost done reposting and can't wait to share some new things with you. Here's another one of my favorites from last Valentine's Day.

This was an inspired craft.  Somewhere, on some blog, I saw a heart wreath made of red felt rosettes. The wreath was on a burlap background and it was in a frame. I have looked and looked for that inspiration piece but cannot find it. So, if you created it, or if you've seen it, please let me know.  I want to give credit where credit is due.

Here's my finished piece.  It's very different from the inspiration piece.

I wanted to make something similar to my inspiration piece, but didn't have a frame big enough. I didn't want to buy anything for this project... so, I went through my husband's stuff in the garage. I found this piece of wood and some foam. I added my cream burlap, some batting, got my staple gun and started working.

First I covered the board with the thin foam. I stapled the foam to the back of the board.
 I wanted to give this project a "girly, plush" look.

I covered the foam with a layer of quilting batting to give it that extra fluff.
I stapled the batting to the back of the board.
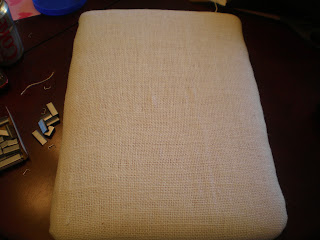
I covered the foam and batting with the burlap. I stapled the burlap to the back of the board.
 It gave it a bit of a rugged look. 
I made a heart template and positioned it on the board.
I traced the heart onto the burlap so I had a guide to work with.
I made a ton of circles.  Seriously, there were a lot of them.  I made them from a pretty pink fleece. 
I didn't use a template.  I just cut them freehand.

I cut each circle into a spiral. I left a circle at the end of each spriral. 
It becomes the base of the rosette.

I took the slim end and rolled.  I used hot glue every now and then to secure the rosette.
A little hot glue and a little more rolling.
Here's what the rosette looks like at the end.  See the base?
I plopped a lot of hot glue on the base.
I then pressed the flower to the base. This is how they turned out.  Cute, huh?
I glued a zillion of these on to the burlap base. I used the heart I traced as my guide.

I then hot glued trim around the entire project and put a bow in each corner. 
The bow adds a little femininity and hides the awkward turn on each corner.

...and it's done.
I love it!  I didn't buy anything for this project.  YEAH!
GraciAnn used a rosette and a white satin ribbon to make a necklace.  It was really cute!

Related Posts Plugin for WordPress, Blogger...
Ebates Coupons and Cash Back