Welcome!
Thanks for visiting! Please leave us a comment as we love your feedback.
See where we are partying at the bottom and on the sidebar.
Showing posts with label decorating. Show all posts

Thursday, March 1, 2012

Leprechaun Hat Pot-A Tutorial

Another repost!
The finished pot with a Shamrock in it!

Don't you love crafts that are completed in less than an hour?  I do.  Especially when I can get my kids involved!
You'll need a clay pot, green paint, a paintbrush, a large washer (metal), sandpaper, gold paint, black grosgrain ribbon, and a hot glue gun. (A cute cheerleader in the background never hurt anything either.)
Paint your pot green. (Or, have your assistant do it.)

We painted the inside rim of the pot so it would look finished.

Now, we're ready to paint the washer.  (This is the buckle on the leprechaun hat.)

Sand it so paint will stick.

Paint it gold.  I like the look of the brush strokes.

When the washer and pot dry, assemble them.  (Wow, I forgot to take pics!) I hot glued the black ribbon around the pot. Then I hot glued the washer on top.

This is the mostly finished pot. I wanted to show it to you with a clover planted nicely inside.  Unfortunately, after trips to 5 different nurseries in search of one, and a scan of my yard, I gave up.  Apparently, they aren't in season yet.  I need to check sometime next month.  What!  Next month St. Patrick's Day will be over with and I won't want a clover in a Leprechaun hat as a decoration. With all this spring weather we're having, I'm hoping one will pop up in the yard any day now.

Does this remind you of the pilgrim hat planter I made? http://www.oursevendwarfs.com/2010/11/copycat-crafting-4.html
Related Posts Plugin for WordPress, Blogger...

Friday, January 27, 2012

Valentine's Day Celebrated with Burlap and Fleece-A Tutorial

I'm almost done reposting and can't wait to share some new things with you. Here's another one of my favorites from last Valentine's Day.

This was an inspired craft.  Somewhere, on some blog, I saw a heart wreath made of red felt rosettes. The wreath was on a burlap background and it was in a frame. I have looked and looked for that inspiration piece but cannot find it. So, if you created it, or if you've seen it, please let me know.  I want to give credit where credit is due.

Here's my finished piece.  It's very different from the inspiration piece.

I wanted to make something similar to my inspiration piece, but didn't have a frame big enough. I didn't want to buy anything for this project... so, I went through my husband's stuff in the garage. I found this piece of wood and some foam. I added my cream burlap, some batting, got my staple gun and started working.

First I covered the board with the thin foam. I stapled the foam to the back of the board.
 I wanted to give this project a "girly, plush" look.

I covered the foam with a layer of quilting batting to give it that extra fluff.
I stapled the batting to the back of the board.
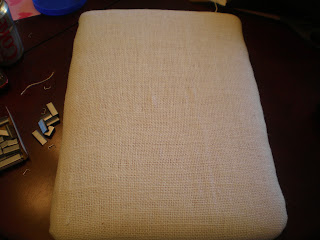
I covered the foam and batting with the burlap. I stapled the burlap to the back of the board.
 It gave it a bit of a rugged look. 
I made a heart template and positioned it on the board.
I traced the heart onto the burlap so I had a guide to work with.
I made a ton of circles.  Seriously, there were a lot of them.  I made them from a pretty pink fleece. 
I didn't use a template.  I just cut them freehand.

I cut each circle into a spiral. I left a circle at the end of each spriral. 
It becomes the base of the rosette.

I took the slim end and rolled.  I used hot glue every now and then to secure the rosette.
A little hot glue and a little more rolling.
Here's what the rosette looks like at the end.  See the base?
I plopped a lot of hot glue on the base.
I then pressed the flower to the base. This is how they turned out.  Cute, huh?
I glued a zillion of these on to the burlap base. I used the heart I traced as my guide.

I then hot glued trim around the entire project and put a bow in each corner. 
The bow adds a little femininity and hides the awkward turn on each corner.

...and it's done.
I love it!  I didn't buy anything for this project.  YEAH!
GraciAnn used a rosette and a white satin ribbon to make a necklace.  It was really cute!

Related Posts Plugin for WordPress, Blogger...

Monday, January 23, 2012

A "Love" Sign-A Tutorial

This is something I created last year. I just love it! It's a perfect post for today because today's my youngest daughter's third birthday. Happy birthday, Sweet Mariella!

I needed a craft fix.  I wanted to do something that I could finish in a reasonable amount of time (Something I could finish in a night!). I wanted to do something I hadn't seen before.  Finally, I wanted another Valentine's Day decoration.  I love what I came up with!


I got a black from at WalMart for $3.  It was for 2-4x6" photos.  I used a piece of red scrapbooking paper.  It says LOVE on it.  I got some flowers from a scrapbook store that look like they were made from pages out of a book.  I used distressing ink and a blender stamp.  I had black fuzzy vinyl and transfer tape.  My tools were my paper cutter, a glue gun, and my Silhouette.

First, I cut the scrapbook paper to fit the entire frame.

Then I cut, "Daughters" out of my black fuzzy vinyl. I used the font, "Waterfalls" 170pt. I pulled away the excess vinyl so I was left only with the word I needed.

I used transfer tape to lift the vinyl.  This does not work as well with fuzzy vinyl.

I placed the transfer tape, in position, on the scrapbook paper and peeled it away. The letters were attached to the scrapbook paper.

Here's a close up of the print on the scrapbook paper.

I went around the edges of the paper with the distress ink.  I put the ink on with the blender pad and lightly distressed it.

I put the paper in the frame.  I just discarded the mat that was included with the frame.  I hot glued 2 flowers directly on the frame.

It's done! My daughters make me think of love so it's all relevant to me!  I love it!

Related Posts Plugin for WordPress, Blogger...

Thursday, January 19, 2012

A Gorgeous Valentine's Day Wreath

I'm going to share some posts from last year that have wonderful Valentine's Day ideas. Here's the first one! 

I FINISHED IT!
Isn't it beautiful?

The pictures do not do it justice.  The felt is a great velvety red.

I've temporarily placed it on my mantle since it's too cold to go outside and put it on my door.

I LOVE my new heart wreath!

Do you want to make one?  Well, this was a copy craft. Let me give you a few pointers. There are more than 300 three inch circles on my wreath.  It took over a yard and a half of felt.  The original crafter said she used 3/4 of a yard.  I'm thinking I put my circles a little too close together.  Oh well.  I think it looks fantastic and the blisters on my scissor hand will heal soon.  Just kidding.  I didn't get blisters but that did make for a lot of cutting.  I did double up the felt so I was cutting two at a time.  That helps! Also, love all my friends and my Mommy but I won't be making anymore of these this year.  As glad as I am that I made it, I'm circled out.  This is not a mass crafting recommended project.

Here's the link to the creator: http://www.theidearoom.net/2010/01/felt-heart-wreath.html Kudos to her for creating such an amazingly beautiful wreath.

We're still facing freezing conditions and icy roads.  GraciAnn solved the dilemma of how to warm up after playing in the snow....

A BUBBLE BATH!

I'm so glad Jill shared her "recipe" for bath paints.  My girls adore bathtime and paint. We'll be making those soon.  So, since we're iced in again tomorrow, I'll be working on another project in the works, "THE PLAYROOM!"  Yikes!  Wish me luck!
Related Posts Plugin for WordPress, Blogger...

Wednesday, November 30, 2011

Making a Photo Board-A Tutorial

Do you want a super, easy, inexpensive way to display your pictures?
This makes a great holiday decoration too!
My Santa Photo Board

You will need:
A wooden board... whatever size you'd like.  Mine is about 11x18". 
Background Paper
Vinyl (I cut mine on my Silhouette)
Mod Podge
Paint
2 foam brushes (one for painting and one for Mod Podge)
Ribbon (I used two sizes. One for the main bow and a smaller one for the bows on top.)
Wire
A Drill
You favorite picture or pictures to post
Double Sided Tape for Posting
Sandpaper or a belt sander

Step 1-Sand the edges of your board smooth.


Step 2-Paint the edges and the border of the front of your board.  Let it dry completely.  There's no need to paint the entire board since it will be covered with your background paper.

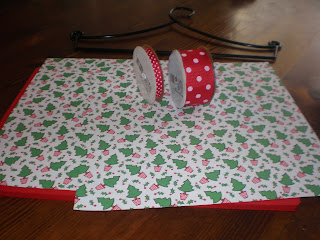
Step 3-Choose your background papers and cut them to size.  Most papers are 12x12.  Since my board was longer than one piece, I neatly tore the second sheet to overlap the first sheet.  I really like the way this looks.
Step 4-Spread a heavy layer of Mod Podge onto your wooden board. It should be thick enough where it looks white but not clumpy.

Step 5-Carefully place your background paper on the board.  Using your hands, smooth the paper down as much as possible.  When you are done, you may want to use a roller, (I use my Pampered Chef one) to get out as many wrinkles and bubbles as possible.

Step 6-You may want to place a book or piece of wood on top of the board to minimize lifting and bubbles.  Let it dry about 30 minutes.  Going onto the next step before letting it dry will cause more wrinkling in the paper.

Step 7-Apply a thick coat of Mod Podge over the entire surface of the background paper.  Let it dry thoroughly.

Step 8-Sand the edges, where the board and paper meet, with an electric sander, sanding block, or piece of sand paper.  This helps the edges blend in.


Step 9-Drill holes on either side of the board, large enough to slip your wire through.

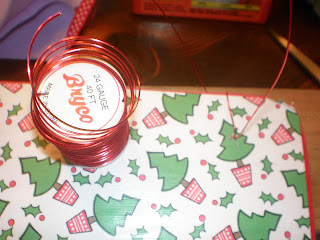
Step 10-Insert your wire through either side, having the excess come through to the front of the board.  I wrapped mine around the top of the board, to attach a ribbon later. Leave about 3 or 4 inches of excess on either side.  Wrap the excess around a pencil or glue stick to make a spiral shape.


Step 11-Tie your small bows around the top wires.  Tie your large bow around the middle of the board.  I did it about 2/3rds down.

Step 12-Remove all the vinyl around your words until all you have left is what you actually want on the board.  Take a piece of transfer tape and put it on the vinyl.  Rub the transfer tape with a too.  I have one that came with my Silhouette.  You can also use your Pampered Chef stoneware scraper, like Jill did, or a popsicle stick would work too.  Place the words, on the board, where you want them. I chose the bottom right corner. Rub the transfer tape again. Gently peel away the transfer tape.  Sometimes, I've had to use the tool to hold the vinyl letters away from the transfer tape, so they go on smoothly.  The more you do this, the better you get.

Step 13-This is your lucky step. You're almost done!  Using double sided tape, attach your favorite picture or pictures to the board.  I plan to add more in a random pattern.


Congratulations!  You're done!  In an earlier post, I showed how I made a similar board for Thanksgiving.  I plan on making one of these for every holiday.  They are easy to make, fun, and inexpensive.

Related Posts Plugin for WordPress, Blogger...
Ebates Coupons and Cash Back