Welcome!
Thanks for visiting! Please leave us a comment as we love your feedback.
See where we are partying at the bottom and on the sidebar.
Showing posts with label traditions. Show all posts

Sunday, January 29, 2012

Last Year's Valentine's Day Post is Full of Great Ideas

It's Valentine's Day! I hope you all are having a wonderful one.  What does this mean to us?  Well, we're almost done with pink, red, and hearts and we'll be moving on to rainbows, leprechauns, and pots of gold.

I LOVE traditions.  I have many.  I really don't have any Valentine's Day traditions though.  Any suggestions?

I definitely try to spend the day letting others know how grateful I am for them. So, let me start with our followers.  I am so grateful for you.  You give our crafting addictions a purpose.

Speaking of crafting and cooking... I have a few more Valentine's Day things to share with you before we move on to the next holiday.


Do you remember the birthday door mat tutorial I did? http://www.oursevendwarfs.com/2011/01/happy-birthday-welcome-mat-tutorial.html Here's my Valentine's Day version.  We're conversation hearts.  I used regular acrylic paint on the mat and fabric paint to paint on our names.  I just free handed the hearts. Super easy and even cheaper.  This is one of those thirty minute crafts.  I LOVE quick crafting!
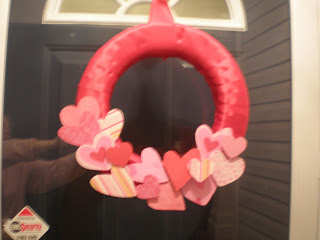
My friend Amy and I saw a great wreath on Oopsey Daisy http://oopsey-daisy.blogspot.com/2011/02/3-dimensional-heart-wreath.html.  We were inspired.  As always, when we copy craft, we take their thing and do our own thing to it.  So, instead of copying the entire wreath with the hearts, we did a partial cover. I'll be honest, there were three reasons we did this. First, we bought two stores out of hearts.  Secondly, that would have taken a lot more time.  Finally, we really liked the look of the satin ribbon on the wreath so we wanted ot show some of it.  This is my wreath above.

This is Amy's wreath.  Amy claims to be noncrafty.  She's a crafty chick in denial.  Her wreath is gorgeous.  Also, if I'm going to be completely honest.  She made all of my wreath too.  The only thing I did was arrange the hearts, hot glue them on, and get a huge blister to prove I used a hot glue gun! Thanks, Amy!


Here's my entry way with the wreath and doormat.


After crafting, I did some cooking. I made these amazing meringue cookies.  I got the recipe from http://www.thestoriesofa2z.com/2010/02/meringue-ice-cream-cone-valentines.html she made them into adorable ice cream cones.  I decided not to do that.  First, my kids don't eat the cones. Secondly, my kids don't eat cake, just icing, and thirdly, meringue cookies, even with M & Ms are pretty low fat.  I'm thinking that's a great dessert to make.  These are delicious.  I used 1T of freshly squeezed lemon juice.  The chocolate and lemon combination are surprisingly amazing.  I will make this recipe again and again.  YUM!

I also made these Martha Stewart cookies.  http://www.marthastewart.com/recipe/chocolate-cookie-cutouts-love-bug-cookies The first time I made these cookies was for my daughter's first birthday party.  It was ladybug themed and I made the cute ladybug cookies.  Well, this cookie base is simply delicious... cocoa and cinnamon...so good.  So, I've made them a couple of times since.  These aren't decorated yet but pretty soon they'll have Royal Icing and a varitey of sprinkles. 
...GraciAnn decorated these!  Cute, huh?

Then there's the homemade card I made my husband.  I used red felt to make the rosettes. http://www.oursevendwarfs.com/2011/02/valentines-day-celebrated-with-burlap.html Here's a tutorial for the rosettes I did on an earlier project.  It's simple, sweet, and special. I like it much better than any of the cards I looked at to buy.

Here's wishing you a lovely day on this Valentine's Day!
Related Posts Plugin for WordPress, Blogger...

Thursday, December 8, 2011

Our Christmas Traditions

I love traditions and have done my best to start my own with my girls. 

I believe live trees are one of the greatest Christmas gifts you can give your family.  Going to buy a tree, each year, is something I remember ever so well from my childhood.  Unfortunately, my husband was not raised the same way. Plastic and wire trees with silver icicles dangling were what he remembers.  Somehow, I have convinced him that the mess of a real tree is ever so worth it. (Probably because I'm usually the one that cleans most of it up.) I know they are expensive.  I say it's a worthwhile splurge! I also know they smell terrific and look genuine.  What's more fun than walking through a tree farm seeking out the ever so perfect tree for your family?  Live Christmas trees are one place I can stand imperfections. An occasional stray branch adds charm.  It's whimsy, not messy! 

This year we ventured about 30 miles to Jack's tree farm.  Here the girls chose their "perfect" tree.  Was it the tree I would have chosen?  Not at all!  It is small for our living room that has 2 story high ceilings. It's also a little thin for my liking; however, they say it's perfect and so in our living room it is!


Something my mom started was collecting ornaments, from places we travel, to put on the tree. Our tree is adorned with ornaments that represent memorable vacations in our lives.  Every ornament has a special tale.  We talk about where each ornament came from, when we hang it on the tree.

A tradition we didn't have as children was the tattle tale elf. We were blessed with an "Elf on the Shelf" three Christmases ago.
On November 30th, we read the book and discuss the elf's job: reporting to Santa. GraciAnn has named our elf  Dobbo.  I'm pretty sure that wasn't his name two years ago, but since known of us remember exactly, I think Dobbo will work just fine.  The story goes the elf reports the children's behavior to Santa.  Since he leaves each night, while the kids are sleeping, to visit Santa, he finds a new place in the house to reappear.  The fun is, the kids get to find his new location everyday.  Plus, he really needs to be high so our little gals can't be tempted to touch him.  The rest of the story is if he gets touched, he loses his magical powers to fly to Santa each night.  Well, we don't want him to lose that magic.  It comes in handy to remind the girls that Dobbo will tell Santa if they make bad choices.  I have seen many people online that have done wonderfully clever things with their elves.  I do think the elves are getting a little too naughty for their own good... but it's all in good fun and you can certainly keep your elf out of trouble, if you'd like.  Here are some elf adventures I saw today. You may also want to check out pinterest.  I hear there are some great ones there too!


Another tradition we have is a count down calendar. I invested in the great pottery barn advent tree I mentioned in an earlier post. Santa leaves the girls notes each night. For the past three years, he also left them chocolate.  My girls have inherited my love of chocolate so this is definitely their favorite part; although, they pretend to love the notes as well. My five year old daughter gleefully bounds down the stairs, each December morning, to see what Santa's left while she slept.  It's so great to see GraciAnn reading her own Santa notes this year. She'll even read Mariella's to her.

Another big tradition we have is sending out Christmas cards. We have family pictures taken and cards made. We then send them to family, friends, and my husband's customers.  We send out nearly 250 a year.  It's a big undertaking but well worth it.  We love to share an annual family picture with others. John and I just got back from a 7 day cruise. (I'd never been away from my girls for more than a day before this!) Anyway, we're super behind on everything, includng our Christmas cards.  We're going to try to fit these in next week.  I see a lot of late nights in my future... yawn.... The above picture is from last year.

The good news is I have taken my kids to see Santa.  Each year we visit the Santa that comes to our local Country Store. The Santa is a great country Santa. Don't you think?
Our Christmas decorating is behind where I'd like it to be the beginning of the second week of December too.  We've had two cold and rainy days so I haven't finished the outdoor decorating at all.  I've lacked motivation so I haven't finished the indoor decorating either.  I do have a deadline set for myself though!

Are you looking for easy Christmas decorations? Here's a link to an ever so cute Christmas subway art. This is the same lady who created the Thanksgiving one I included in an earlier post.  She did all the work for us!  All you need to do is put it in a frame!  Voila!   Christmas Subway Art

Don't worry, Jill and I will continue to share holiday decorating ideas, traditions, and recipes.
By the way, I am ALWAYS looking for ideas! Please share your decorating suggestions, ideas, and your holiday traditions by commenting on this post.We look forward to learning from you!


Related Posts Plugin for WordPress, Blogger...

Wednesday, November 30, 2011

Making a Photo Board-A Tutorial

Do you want a super, easy, inexpensive way to display your pictures?
This makes a great holiday decoration too!
My Santa Photo Board

You will need:
A wooden board... whatever size you'd like.  Mine is about 11x18". 
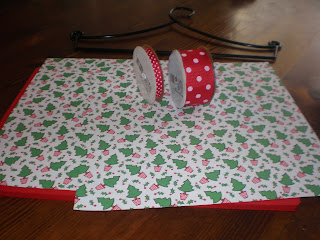
Background Paper
Vinyl (I cut mine on my Silhouette)
Mod Podge
Paint
2 foam brushes (one for painting and one for Mod Podge)
Ribbon (I used two sizes. One for the main bow and a smaller one for the bows on top.)
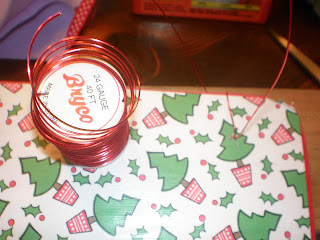
Wire
A Drill
You favorite picture or pictures to post
Double Sided Tape for Posting
Sandpaper or a belt sander

Step 1-Sand the edges of your board smooth.


Step 2-Paint the edges and the border of the front of your board.  Let it dry completely.  There's no need to paint the entire board since it will be covered with your background paper.

Step 3-Choose your background papers and cut them to size.  Most papers are 12x12.  Since my board was longer than one piece, I neatly tore the second sheet to overlap the first sheet.  I really like the way this looks.
Step 4-Spread a heavy layer of Mod Podge onto your wooden board. It should be thick enough where it looks white but not clumpy.

Step 5-Carefully place your background paper on the board.  Using your hands, smooth the paper down as much as possible.  When you are done, you may want to use a roller, (I use my Pampered Chef one) to get out as many wrinkles and bubbles as possible.

Step 6-You may want to place a book or piece of wood on top of the board to minimize lifting and bubbles.  Let it dry about 30 minutes.  Going onto the next step before letting it dry will cause more wrinkling in the paper.

Step 7-Apply a thick coat of Mod Podge over the entire surface of the background paper.  Let it dry thoroughly.

Step 8-Sand the edges, where the board and paper meet, with an electric sander, sanding block, or piece of sand paper.  This helps the edges blend in.


Step 9-Drill holes on either side of the board, large enough to slip your wire through.

Step 10-Insert your wire through either side, having the excess come through to the front of the board.  I wrapped mine around the top of the board, to attach a ribbon later. Leave about 3 or 4 inches of excess on either side.  Wrap the excess around a pencil or glue stick to make a spiral shape.


Step 11-Tie your small bows around the top wires.  Tie your large bow around the middle of the board.  I did it about 2/3rds down.

Step 12-Remove all the vinyl around your words until all you have left is what you actually want on the board.  Take a piece of transfer tape and put it on the vinyl.  Rub the transfer tape with a too.  I have one that came with my Silhouette.  You can also use your Pampered Chef stoneware scraper, like Jill did, or a popsicle stick would work too.  Place the words, on the board, where you want them. I chose the bottom right corner. Rub the transfer tape again. Gently peel away the transfer tape.  Sometimes, I've had to use the tool to hold the vinyl letters away from the transfer tape, so they go on smoothly.  The more you do this, the better you get.

Step 13-This is your lucky step. You're almost done!  Using double sided tape, attach your favorite picture or pictures to the board.  I plan to add more in a random pattern.


Congratulations!  You're done!  In an earlier post, I showed how I made a similar board for Thanksgiving.  I plan on making one of these for every holiday.  They are easy to make, fun, and inexpensive.

Related Posts Plugin for WordPress, Blogger...

Tuesday, June 28, 2011

Birthday Decorations

It's birthday week at our house!  My husband's big day is right around the corner.  I get our birthday decorations out a week before each birthday. Here are the decorations I have, so far... I'm always on the lookout for more to add to my collection!
This is a photoboard I created. I'll stick birthday pictures, of the birthday person, on the board the week of their birthday.
Here's a tutorial for making a photoboard:

Here's the balloon wreath I created last year, thanks to HowDoesShe! I have no idea how they made their beautiful wreath with only 144 balloons. I used more than twice that.
Here's the tutorial for the birthday wreath:


This is another HowDoesShe birthday decoration. It's a countdown to the birthday board. You simply pop a balloon for each day before the birthday.  As a bonus, you add a slip of paper to each balloon, with a special treat for the day. For example: a stop at the ice cream shop.
Here's the tutorial for the birthday board:

Yet another great HowDoesShe birthday decoration. This is a fantastic way to celebrate your birthday all week!
Here's their tutorial:

Here's a door mat I made with a 99 cent IKEA door mat.
This is the simple tutorial:

Birthdays are BIG deals that should be celebrated as such.  If you have any fabulous birthday ideas, please share them with us!
Related Posts Plugin for WordPress, Blogger...

Friday, April 22, 2011

Our Easter Traditions

The Bunny does come to our house!  We leave a plate with a carrot (or a few) and this year, since my four year old is writing, we're going to leave the fuzzy guy a note to go along with it.  We also leave the girls' empty Easter baskets in high hopes he will fill them up!

When we get up in the morning, we see the Bunny's footprints from our front door, to the baskets, and back again.  He's a messy guy with great smelling feet!  His footprints smell like baby powder (which they are).  I've cut templates before to leave perfect little baby powder footprints, but honestly, I think just little squirts of powder work just as well. We also make sure the bunny eats most of his carrot(s).

The Bunny also hides eggs throughout our house, and if the weather is warm, maybe even in the yard!  He always leaves a special book in each basket and just a couple of other things.  For example, GraciAnn is a puzzle fanatic. She'll get a puzzle.  Mariella loves to practice writing.  She'll get some new bath crayons.  We try to limit how much "stuff" they get.  Especially when it comes to the junk (chocolate) we all love.

After our "Bunny Find" we get ready for Easter dinner.  Here's what's on the menu:
HoneyBaked Ham-I buy this two times a year, Easter and Christmas.
Green Beans or Sugar Snap Peas-Sugar Snap peas are definitely preferred.  I lightly steam them so they're still very crunchy and delicious!  I don't add anything to my beans or sugar snap peas. They are perfect plain.
Sweet Potatoes-Baked sweet potatoes are delicious and healthy. I usually just bake them and serve them with fresh ground cinnamon, brown sugar, and real butter.
Corn Pudding-See the recipe below
Easter Bread-See the recipe below
Cherry Jello-See the recipe below

Corn Pudding-This is a really great side dish. 
2 T Sugar
1 1/2 T Cornstarch
1/3 cup milk
3 eggs beaten
1 can cream style corn
2 T melted butter
1/2 tsp salt
freshly grated nutmeg

Mix sugar and cornstarch, add milk gradually. Stir until smooth.  Add eggs, corn, butter, and salt; mix well.  Turn into greased, 1 quart baking dish in pan of hot water.  Grate a small amount of nutmeg on top. Bake at 300 degrees for 1 1/4 hours.

Cherry Jello
1 can dark pitted cherries
1-3 ounce box cherry jello
6 ounces of crushed pineapple
1/2 cup sugar
1/2 cup pecan pieces (optional)

Put can of cherries, box of jello, sugar, and pineapple in a saucepan.  Bring to a boil.  Make sure all ingredients are dissolved.  Take it off the stove.  Add pecans, if you want.  Pour in a dish and refrigerate until firm.

Easter Bread-This is a must make for Easter.  It could even be served for breakfast as a coffee cake.
1 pack of dry yeast
1/4 cup shortening
1/4 cup warm water
1/2 cup milk
1/4 cup sugar
1 tsp. salt
3 cups flour
1 slightly beaten egg
shredded coconut
green food coloring
powdered sugar icing (and food coloring to color as you'd like to decorate basket and 6 eggs)
jelly beans and/or other decorative candies

Soften yeast in warm water.  Scald milk.  Stir in sugar, shortening, and salt. Cool to lukewarm.  Add 1 cup flour.  Beat until smooth. Add yeast and egg and beat well.  Add 2 cups of flour to make soft dough.  Knead 8-10 mins on floured surface until smotth and elastic. Place in greased bowl.  Turn once. Cover. Let rise in warm place until double (about an hour).  Punch down.  Divide in thirds. Cover. Let rise 10 minutes. Using one third of the dough, shape into six eggs.  Use the other two thirds to form 2-26" ropes.  Twist the ropes together.  Coil around the eggs (to form a basket). Cover and let rise-1 hour.  Bake at 375 degrees for 15-20 minutes.  Let cool.  Use green food coloring to tint coconut green. Set aside. Ice eggs and basket in colors of your choice.  Sprinkle with coconut, to give grass effect.  Sprinkle with jelly beans or other candy for an extra decorative touch.  So cute.

Do you have great Easer traditions?  If so, please share them with us.  If not, I hope our traditions give you the incentive to create some of your own.
Related Posts Plugin for WordPress, Blogger...

Friday, February 11, 2011

Valentine Subway Art Mailboxes

I wanted to make my kids mailboxes for a new Valentine's Day tradition.  I want to leave them special love notes and goodies.  I found plain red mailboxes at Target for $1 each.
I started to design a few words to put on the mailbox, when I came across Kaysi's subway art design for a mailbox on her blog Keeping it Simple.  I asked her if she would share her file and she was nice enough to send it to me!  She is super nice and did a fantastic job with the design!  I completely believe you should work smarter not harder.  Why not utilize the talents of others versus racking your brain trying to do it yourself.  Thank again, Kaysi!

Once I had the vinyl cut out, I applied transfer tape and scraped it good so the letters would adhere.
Then I peeled off the paper backing and applied it to my mailbox.  Scrape it good so you can peel off the transfer tape

Here are my finished mailboxes.  I personalized each mailbox for my kids.  I also added a heart to the lid so that it would be decorative from all sides.
I can't wait to write my little sweeties a love note for Valentine's Day!  I hope they enjoy a new tradition!


Please vote for us!
Related Posts Plugin for WordPress, Blogger...
Ebates Coupons and Cash Back