Welcome!
Thanks for visiting! Please leave us a comment as we love your feedback.
See where we are partying at the bottom and on the sidebar.

Tuesday, January 4, 2011

"Happy Birthday", Welcome Mat-A Tutorial

What can you do with a door mat that cost $1?


This was so easy!
Materials Needed:
A doormat-I bought mine at IKEA for $1, seriously!  I bought a few so be on the lookout for some more mats.
Paint-I used fabric paint because I thought it would be more durable
A piece of chalk-any color that will show up on the mat
Paintbrushes


Step 1-Using your chalk, draw whatever images and words you'd like on your mat.

Step 2-Using your paint, paint over the images you drew.

I used paint that was easy to squirt out of the bottle so I could literally write with the paint.

For the balloons, I painted a thick ridge on the outside, but smoothed out the paint on the inside.

I like the dimension the outer ridge gives the balloon.

All four balloons are done.

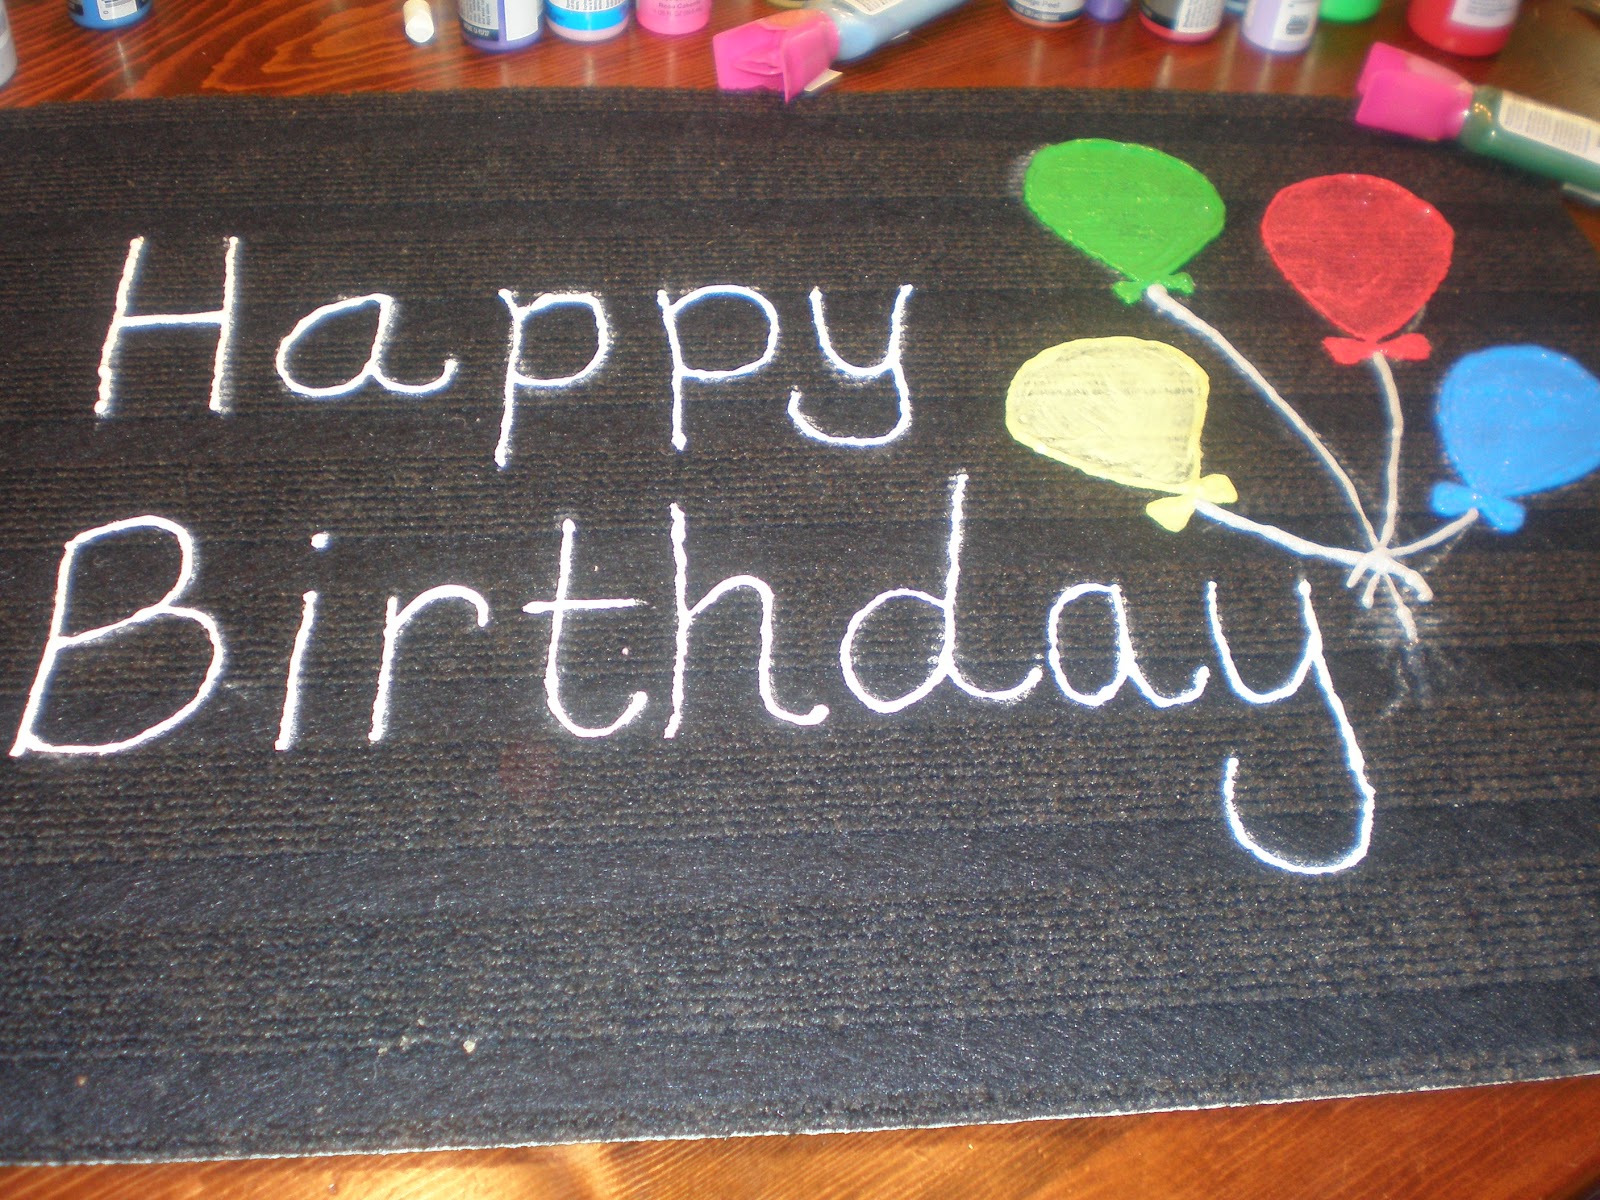
Well, almost.  I had to paint in the strings.

As soon as the paint dries, I'll dust off the extra chalk, beneath the balloon strings, and set it out with the rest of the birthday decorations, to prepare for my baby's 2nd birthday on January 23rd.

I'm sort of guessing, you'll see a couple more of these doormats, in the future!
Related Posts Plugin for WordPress, Blogger...

Menu Planning: Determining your Menu

Hopefully, you have followed my steps so far on Menu Planning (Setting up a Food Inventory, Making the most of your cookbooks,  and organizing your menu).  Now you are ready to determine your menu and then go shopping!

Using your basic food list, organized cookbooks, budget, grocery ads and a calendar or a fun Menu Board, let's determine this week's menu!

Determine your Menu
  • Looking at a week at a time, choose a meal for each day.  Write these on your calendar or Menu Board.
  • Don't forget to include side dishes, breads and dessert (if you choose). 
  • If you have a day that is particular busy, make it a Crock-pot meal.
  • Include a leftover meal if you don't use those up for lunches.
  • Remember if the week gets hectic, switch meals around!
Here is my menu plan for this week:

Sunday:  Mom's Beef Barbecue on buns, leftover sides
Monday:  Grilled Kielbasa, seasoned noodles, green beans
Tuesday:  Henri's Crock-pot Beef Roast with mushrooms served on egg noodles, broccoli, homemade sourdough bread (rising as I write)
Wednesday:  BBQ Chicken Pizza leftovers from freezer (it's just the kids and I for dinner)
Thursday:  Chicken Fried Rice with peas & carrots mixed in
Friday:  Ham slice, macaroni and cheese, peas, cornbread
Saturday:  Easy Teriyaki Chicken with oriental vegetables and pineapple over rice

Go Grocery Shopping:
  • Make your list and stick to it!  All those extras that aren't needed will bust your budget.  It is okay to buy items for stocking up, just make sure you plan on those before going!
Enjoy a week filled with meals that are planned and save you money!

I hope you enjoyed this series on menu planning.  Share your thoughts, tips and this week's menu!  We love hearing from our readers!   

Happy Menu Planning!

Related Posts Plugin for WordPress, Blogger...

Menu Planning: Organizing your Menu

The cost of food is probably one of the most expensive items on your monthly budget.  You can drastically cut the cost of your food budget by Menu Planning.

Menu Planning should be fun and easy.  It is a chance to make your favorite foods or try out some new recipes.  If you take the steps I have provided (setting up a Food Inventory and making the most of your cookbooks), then the next steps will be an easy process.

Before we get started, grab some supplies:  paper, pencil or pen, calendar, your food inventory list, your recipe files and a couple of cookbooks.

If this is your first time organizing a menu, then I highly suggest you start with just one week.  Don't try to make a menu for the whole month.  It will seem like an insurmountable task.  Start small and go from there.

Basic Meal list
  • On your paper, jot down basic meals that your family frequently eats, i.e (Spaghetti, grilled chicken, soups, etc).  Don't forget to include side dishes and desserts (if you like).  Having a list of basic meals will be your starting point.
Meeting your budget needs
  • If you are on a tight budget, I suggest that you try to eat out of your food on hand.  This is where your Food Inventory can really come in handy.  Choose meals that use up as much of your pantry, refrigerator and freezer items.
  • If money isn't an issue this month, stock up on items that you use frequently (cream of mushroom or chicken, soups, baking goods, rice, assortment of noodles, etc).  
  • Buy in bulk.  I use a Foodsaver and buy my meats in bulk.  The Foodsaver helps me store my food flat in the freezer (huge space saver) and keep it fresh longer.
  • Plan meals based on what is on sale.  Check the grocery ads before making your menu plan for the week.  This will save you money and allow you to stock up on inexpensive items.
Determine your food budget
  • Look at your grocery bills from last month.  Add them all up and then divide them by 4.  You can estimate that cost per week for this month.
  • Choose a set amount per week and stick to it!  Use cash, you will spend less and when the money is gone so is the opportunity to buy more that week.
  • Reward yourself for going under your food budget.  If you have money leftover at the end of the week, you can put it towards next week,  use it for something fun like craft supplies or save up for something you want in the future.
Planning the menu
  • Start small.  Just plan your dinners for one week.  If you need to plan breakfast and lunch meals add those the following week, after you've had a successful week.
  • Utilize leftovers.  I put leftovers on the menu for at least one night or for a lunch. If you have enough for another meal, freeze it for another week's menu.  I group all our leftovers and make another meal of the combination.  This is a great meal for a busy day when you don't feel like cooking.  If you don't want another dinner of leftovers, use them up for lunch throughout the week. Putting leftovers in the garbage is throwing away your money!
  • Don't be afraid to move around your meals throughout the week.  You aren't stuck making soup on Tuesday if it is a warmer day.  Switch it for another day.
  • Plan ahead.  If you are making something that a meat needs to be thawed, put it in the refrigerator the night before or early in the morning.  Nothing deters cooking more than not having your supplies ready.
  • Make a menu board.   You can write all your meals on this and it will be in an easy place to remind you.  Plus, it's just pretty! This can be hung on the wall or put in a pretty wrought iron holder. 
     
    On to Determining your Menu...

Related Posts Plugin for WordPress, Blogger...
Ebates Coupons and Cash Back