Welcome!
Thanks for visiting! Please leave us a comment as we love your feedback.
See where we are partying at the bottom and on the sidebar.

Friday, January 14, 2011

From Blah To TaDa... with just a little vinyl!

I love all things personalized!
Well, almost all.  I just think it makes otherwise boring things, special.  Here are a few things I personalized, with vinyl.

These were the crates I loaded with gifts for GraciAnn's teachers' Christmas presents.

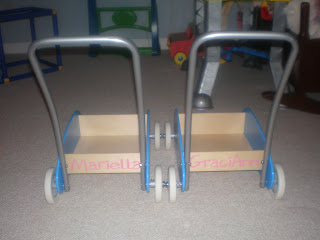
These are pushcarts, we got from IKEA for the girls.

A little side bling.

...and the front view. We've learned it works best to by two identical items and put their names on them. Mariella, not quite two, recognizes her name and knows it's best to stay away from her sister's!

This is GraciAnn's trashcan for her room.  I purchased it at IKEA too. It has a flap lid and was about $8. 
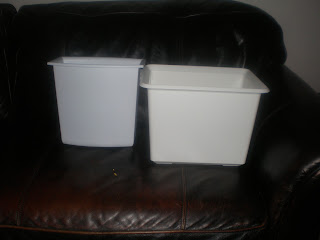
Before:
This was last night's project.  The bin on the left is a trashcan I picked up at Publix for $2.  The one on the right we use as a hamper. I got it at IKEA for about $3 or $4. These go in the girls' bathroom. 

The hamper front  "After".  The teacher in me wants to provide a print rich environment for my kids, so I wanted to clearly label the hamper with what we put in it: laundry.  I decided to do a plain font.

Side view of laundry hamper.

...and other side.

The finished trashcan.

Side view of finished trashcan.

Other side of trashcan.

Vinyl colors, up close.

I chose 3 different colors of vinyl.  All coordinate well with the bathroom. I used my Silhouette to cut the vinyl out.  I was pretty random about how I stuck the flowers and leaves on. Voila... an hour later, I was finished. So, for less than $10, we have a laundry hamper and a trashcan that match perfectly!  This morning, when GraciAnn saw them, she said, "I love the trashcan and laundry basket you made, Mommy. They are beautiful!"  Well, maybe not beautiful but darn cute in my book!
Related Posts Plugin for WordPress, Blogger...

Sourdough Cinnamon Rolls

For all of you who have enjoyed the Sourdough Starter & Recipe, I have another use of the starter for you.  How about some delicious Sourdough Cinnamon Rolls?


Here is the recipe and instructions:

Sourdough Cinnamon Rolls

Using your 1 cup of sourdough starter, make the dough per the directions for making sourdough bread.  Allow it to rise and then continue with this recipe.  Here is a picture of the dough that has risen:

Prepare the Cinnamon Filling.  Mix well.
1 cup sugar
4 tablespoons Cinnamon
8 tablespoons melted butter 

Turn dough onto floured surface and roll into a rectangle. Spread cinnamon filling over dough till covered. 
Roll up the dough.
 Cut into pieces about 1 1/2 to 2 1/2 inches and place into 1-2 greased 9x13 pans. (depends on how thick you cut them.) Place in pans side by side but not touching.
As you can see, I should have rolled my dough tighter.  There are some big cinnamon filling areas.

Place in a warm spot to rise with a towel over it or plastic wrap. Let rise overnight or for at least 2-3 hours.  The rolls should double in size. Bake for 20-25 minutes in a 375-degree oven. As soon as rolls come out of oven brush tops with butter. 
Prepare icing:
2 cups powdered sugar
1 tsp. vanilla
Milk to desired thickness

Mix sugar, vanilla and liquid to form a thick syrup. Can thin by placing in the microwave.  (The next time I make this I will probably attempt a cream cheese frosting and compare how I like it.  Who doesn't love cream cheese frosting!) Drizzle over rolls. 
 Put one (to start with at least) on your plate and enjoy!

I made these these the morning of our big snow here in Atlanta.  It made being snowed in that much more enjoyable!

I would love to hear from those of you who have attempted the starter and bread!  I think it is very simple and easy if you have the patience.  After you feed your starter again, try this recipe out!  My next use of my starter will be pizza dough.  I'll let you know what my family thinks!

Enjoy!


Related Posts Plugin for WordPress, Blogger...
Ebates Coupons and Cash Back