Do you want a super, easy, inexpensive way to display your pictures?
This makes a great holiday decoration too!
My Santa Photo Board
You will need:
A wooden board... whatever size you'd like. Mine is about 11x18".
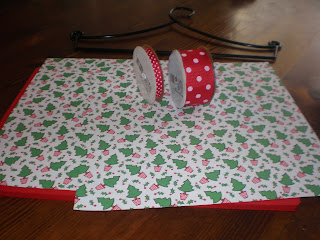
Background Paper
Vinyl (I cut mine on my Silhouette)
Mod Podge
Paint
2 foam brushes (one for painting and one for Mod Podge)
Ribbon (I used two sizes. One for the main bow and a smaller one for the bows on top.)
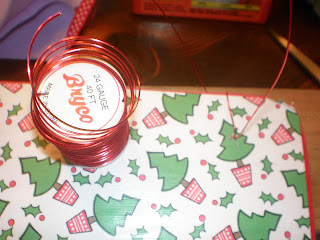
Wire
A Drill
You favorite picture or pictures to post
Double Sided Tape for Posting
Sandpaper or a belt sander
Step 1-Sand the edges of your board smooth.
Step 2-Paint the edges and the border of the front of your board. Let it dry completely. There's no need to paint the entire board since it will be covered with your background paper.
Step 3-Choose your background papers and cut them to size. Most papers are 12x12. Since my board was longer than one piece, I neatly tore the second sheet to overlap the first sheet. I really like the way this looks.
Step 4-Spread a heavy layer of Mod Podge onto your wooden board. It should be thick enough where it looks white but not clumpy.
Step 5-Carefully place your background paper on the board. Using your hands, smooth the paper down as much as possible. When you are done, you may want to use a roller, (I use my Pampered Chef one) to get out as many wrinkles and bubbles as possible.
Step 6-You may want to place a book or piece of wood on top of the board to minimize lifting and bubbles. Let it dry about 30 minutes. Going onto the next step before letting it dry will cause more wrinkling in the paper.
Step 7-Apply a thick coat of Mod Podge over the entire surface of the background paper. Let it dry thoroughly.
Step 8-Sand the edges, where the board and paper meet, with an electric sander, sanding block, or piece of sand paper. This helps the edges blend in.
Step 9-Drill holes on either side of the board, large enough to slip your wire through.
Step 10-Insert your wire through either side, having the excess come through to the front of the board. I wrapped mine around the top of the board, to attach a ribbon later. Leave about 3 or 4 inches of excess on either side. Wrap the excess around a pencil or glue stick to make a spiral shape.
Step 11-Tie your small bows around the top wires. Tie your large bow around the middle of the board. I did it about 2/3rds down.
Step 12-Remove all the vinyl around your words until all you have left is what you actually want on the board. Take a piece of transfer tape and put it on the vinyl. Rub the transfer tape with a too. I have one that came with my Silhouette. You can also use your Pampered Chef stoneware scraper, like Jill did, or a popsicle stick would work too. Place the words, on the board, where you want them. I chose the bottom right corner. Rub the transfer tape again. Gently peel away the transfer tape. Sometimes, I've had to use the tool to hold the vinyl letters away from the transfer tape, so they go on smoothly. The more you do this, the better you get.
Step 13-This is your lucky step. You're almost done! Using double sided tape, attach your favorite picture or pictures to the board. I plan to add more in a random pattern.
Congratulations! You're done! In an earlier post, I showed how I made a similar board for Thanksgiving. I plan on making one of these for every holiday. They are easy to make, fun, and inexpensive.


