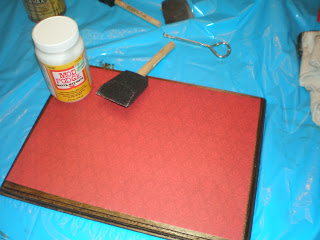
1. I started with a wood board. Usually, I get my husband to cut scrap wood for me. This time I picked up a plaque from Wal Mart for $4.
2. I lightly sanded the board.
3. I stained the edges and a couple of inches all the way around (the rest would be covered with paper).
4. I picked out the perfect paper for the project and cut it to the size of the board. I suggest cutting it slightly smaller than the board. It will make it easier to blend it nicely.
5. I spread mod podge on the board generously. I made sure to be careful to make it smooth.
6. I placed the paper on top of the mod podge.
7. I used a roller to smooth the paper out as much as possible. I then place boards on top of the board to keep the paper as flat as possible. I let it dry completely (at least thirty minutes).
8. I removed the boards and spread a coat of mod podge on top of the paper. Make sure you use enough to make a smooth finish, without using too much. Too much will make it lumpy. Let it dry completely. The wet product goes on white. It dries clear.
9. Once the board is dry, use a belt sander, or a piece of sand paper, to sand the edges and blend the paper into the board. Then, apply stain to the project. This will also help blend the paper into the board.
10. While the stain is drying, work on your vinyl lettering. I have a Silhouette. I chose to do every name in a different font and arranged them in a "free" way.
11. I cut the vinyl and carefully removed any vinyl I wouldn't use on the sign.
12. I put transfer tape on top of the vinyl and transferred it to the sign.
13. Honestly, sometimes it's a challenge to get the vinyl off the transfer tape. Be patient. The end product is worth it. I removed the transfer tape and voila...almost finished.
.
14. I drilled two holes in the top of the board.
15. I cut a piece of wire to hang the board.
16. I used a pencil to twist the wire ends around to give it a little design.
17. I had a completed project I can treasure for years!


0 comments:
Post a Comment
Thank you for commenting! We read every comment and try to respond back if we can. Thank you for making us feel special with your thoughts!