
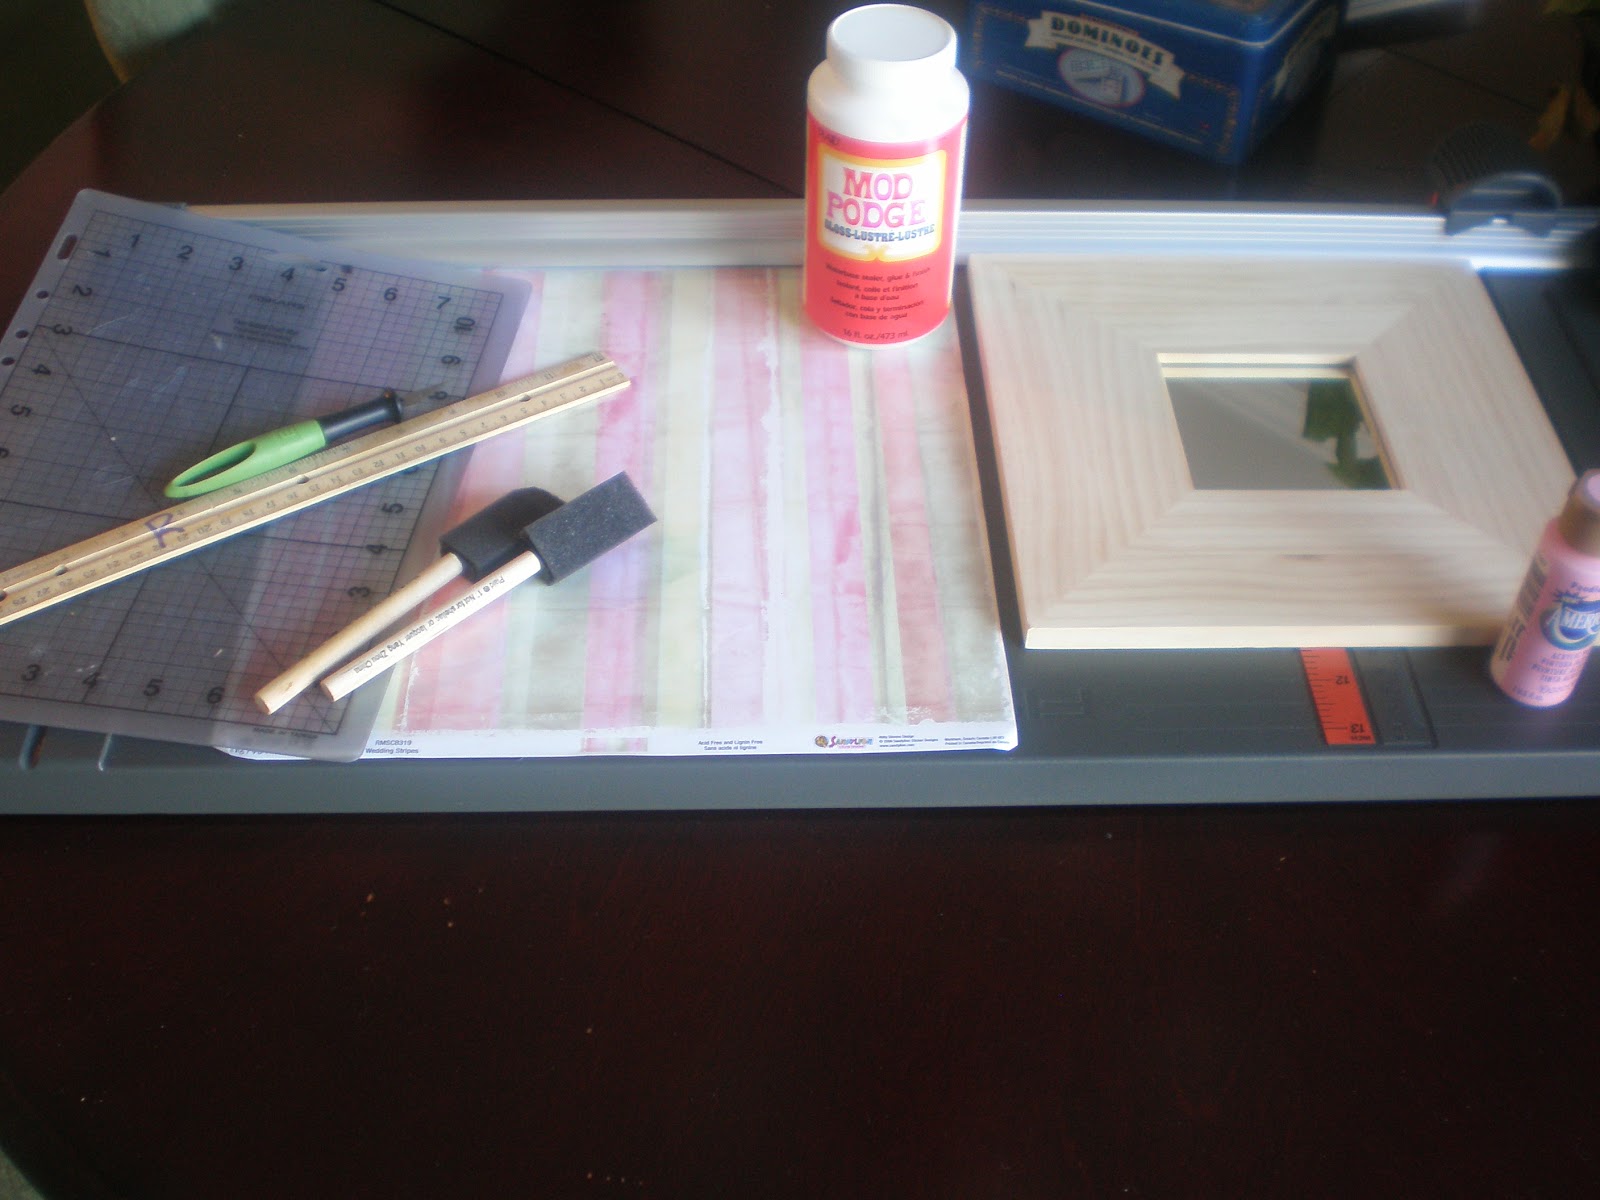
I gathered my supplies, 2 paintbrushes, Mod Podge, paint, 1 piece of printed paper, the mirror, paper cutter, an exacto knife, a cutting mat, and a ruler.

First, I painted the sides and an inch border on the frame of the mirror.

Then I cut the paper to size (10x10"). I carefully measured the square, for the mirror, and cut it out with an exacto knife.

I Mod Podged the paper on. I forgot to take a picture. Woops. Just remember a smooth coat of Mod Podge. Make sure you completely cover the surface to be Mod Podged. Not too much, but not skimpy either. The area should look white. Carefully place your paper on top of the Mod Podged surface and rub the paper on to the surface. You can use a rolling pin, if you'd like. I did this one with my fingers. The thicker the paper, the less bubbles. The smaller the area being Mod Podged, the fewer bubbles. No matter how many times I've done this, I still get a few bubbles sometimes. Let the Mod Podge dry before doing the top coat! I let this dry about 30 minutes.

This is before I put the top layer of Mod Podge on. There are very few bubbles, or creases in this project!

I Mod Podged the top. I used glossy Mod Podge for this project.

In about 30 minutes, it's dry!

I wanted to add a fabric rosette to the mirror. I used a piece of fabric that coordinates with Mariella's bedding. It's about 22x4". The only other things I needed were thread, a needle, and scissors.

I folded the fabric in half (right side up).

I hemmed the ends.

I stitched the entire length of the fabric.

...and stitched... and gathered as I was stitching.

I gathered it tightly and then began to roll it together.

I stitched the back to keep the flower together.

Tada! This is the finished flower.

I stapled a ribbon to the back as a decorative hanger.

I hot glued the fabric flower in place.
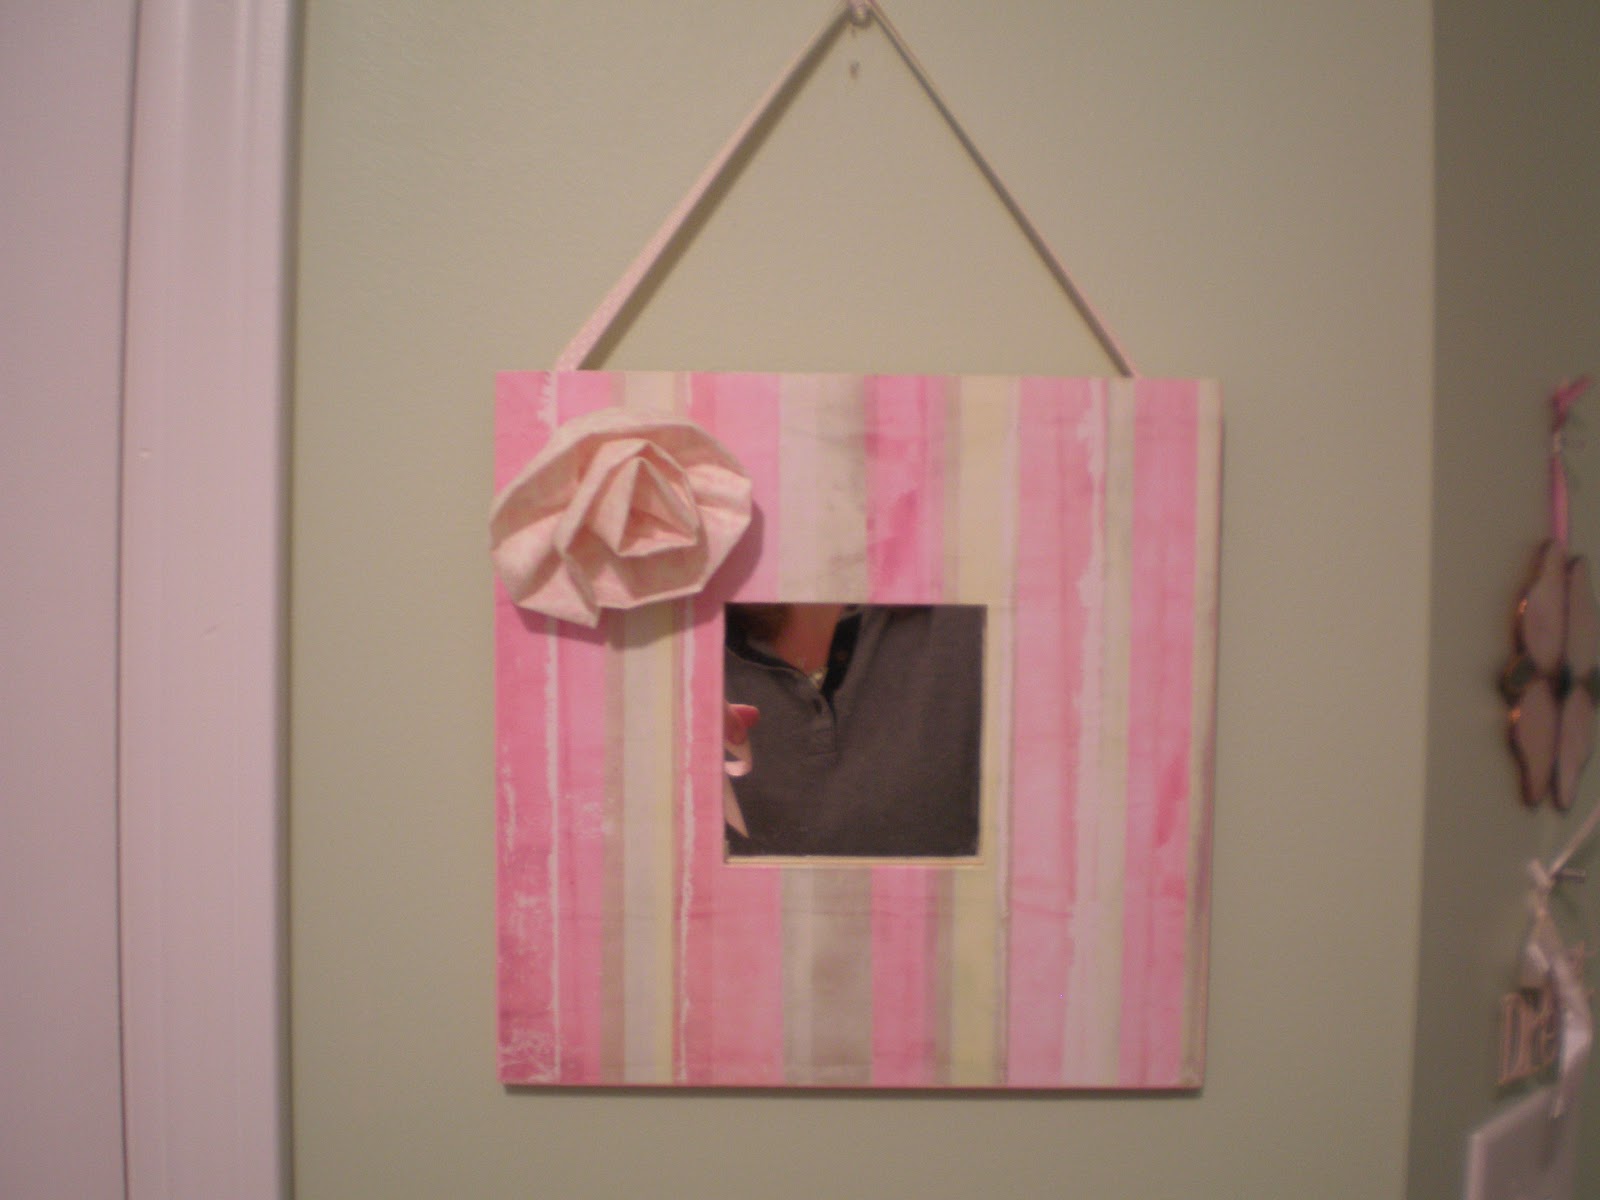
I hung it on Mariella's green wall. So... pretty and she LOVES her mirror!


Very CUTE! I have 3 girls who would love this! One trick with the modge podge, get an old credit card and use it to smooth the paper out. I never have bubbles!
ReplyDeleteThank you for the tip, Stacy! I will definitely try that. Goodness knows I Mod Podge frequently enough!
ReplyDeleteI love it and Mariella deserves every chance she can to see herself. Did you see my friend Mary McAdory's comment on FB that she had tried to leave a comment on the blog and couldn't. Maybe it is something about us old gals.
ReplyDeleteBeautiful transformation. I'm impressed that you could see all that "promise" in the mirror. I wish I had that skill. I love the embellishments that you are doing. Keep it up!
ReplyDeleteMariella does like to check out her pretty face! Dana, thank you! Come to GA for a visit and craft with us soon!
ReplyDelete