
Right after I had Ryan, a friend of mine who just had a baby as well came over and she got out her nursing cover when it was time for her to feed her son. I asked her what she was using and where I could get one. She told me she got it online and that it was about $40. I was deflated. I could not swing spending $40 on a nursing cover when I just quit my job to stay home with Ryan. I asked my friend if I could look at her nursing cover. After closer inspection, I found that nursing covers are very simple and would be easy to make.
Even if you use fancy fabric, it shouldn't cost more then $10 to make. The first one I made cost less than $4 with some inexpensive fabric. Below is my handsome little man Evan being a good sport and modeling one I made.

Let me share with you how easy it is to make a nursing cover for yourself or as a gift.
Supplies Needed:
- 1 yard of fabric (the lighter weight the better to be breathable, just make sure it isn't see through)
- 1/2 yard of terry cloth for inside corners (optional, but nice to wipe up any spit up)
- 1 foot of boning (like what is used in corsets) see below
- Two D-clips. (These usually come in a four pack).
- scissors
- iron
- sewing machine
- matching thread


1. Unfold your yard of fabric. Cut a 3 inch strip of fabric off the bottom of your fabric lengthwise. This will be your strap and strap holder.

2. Fold your 3 inch strip in half with the right side of the fabric inside. Iron it down to give it a crisp edge.

2. Fold your 3 inch strip in half with the right side of the fabric inside. Iron it down to give it a crisp edge.


4. Now cut off a 4 to 5 inch piece from the end that is not sew up. This will become the portion that you will add the D-rings to. See picture (ignore fabric below it).

5. Take the both strap pieces and work them inside out so that the right side of the fabric is showing.

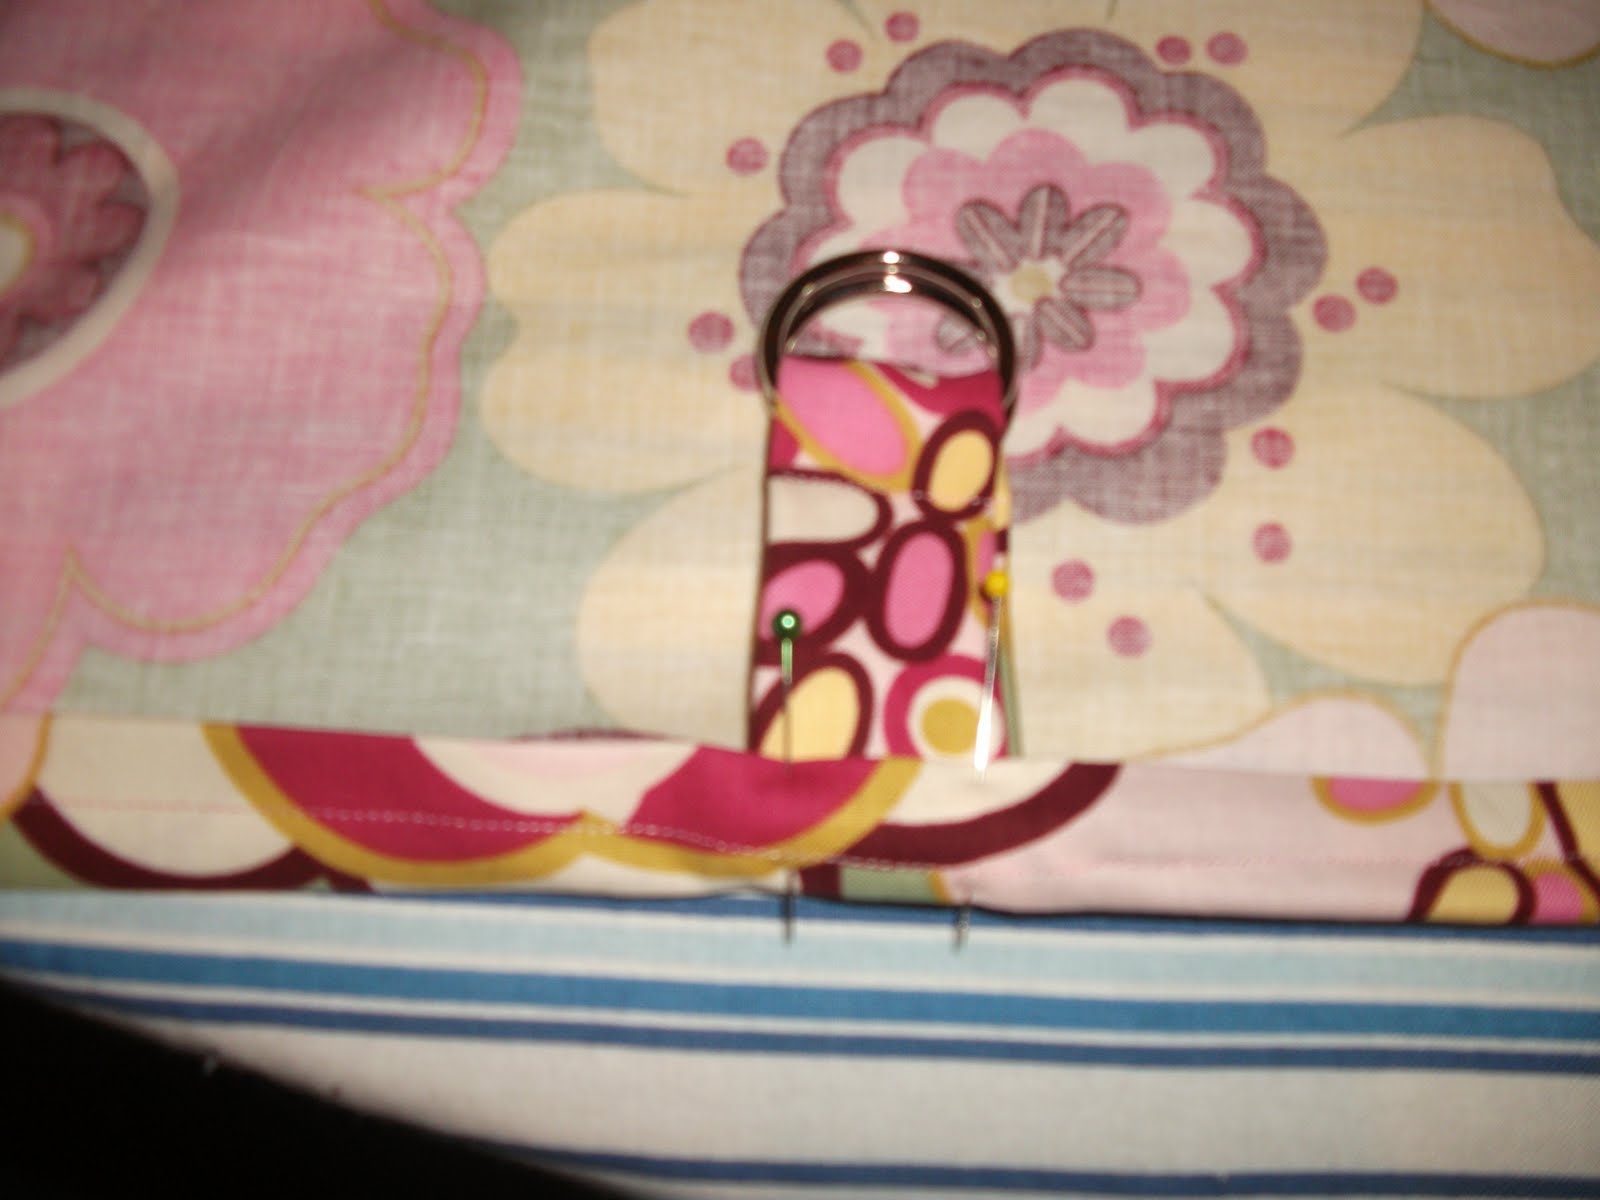
6. String two D-rings onto the small piece and fold over.

7. Sew a line directly below the D-rings so they don't move when the nursing cover is being used.

8. Put both of these straps to the side for now.
9. Take your remaining big piece of fabric and fold the two shorter sides and one longer side in a 1/4 of an inch and press with the iron. Then fold it in another 1/4 of an inch and press with the iron again. This will give a clean edge to the inside.


10. Cut a 4 to 5 inch square out of the terry cloth. The larger you make the square the larger your corner pockets will be. Then fold over each square. Check to make sure they fit well in the corners you just pressed down. If they do, place them inside the corner, with the finished folded edge overlapping the terry cloth. (see below).


11. Pin the terry cloth to the fabric edges and sew up the each of the folded edges to include the terry cloth triangles.

12. Now to finish up the remaining long edge. Fold over this edge a 1/4 of an inch or larger depending on the width of your boning. Press with the iron. Fold it another 1/4 of an inch and press with the iron again, then unfold this portion back.

13. Place the boning under this folded edge in the center of the fabric, with the curve facing down. (This will allow the curve to face in toward the person when finished). Pin the boning to the fabric. Sew the portion where the boning is to attach the boning to the fabric.

14. Fold over the fabric another 1/4 of an inch (you previously ironed it to this point). Place your rough edge of your strap to the side of the boning and pin down.

15. Place the small strap with the D-rings on the other side of the boning and pin down.
16. Sew the length of the fabric to secure the final edge. Make sure that both straps are securely sew into the edge.
17. Fold over both straps and sew again so they are facing up when the nursing cover is worn.


It may seem like a ton of steps, but a nursing cover is very easy to make. I wanted to be thorough and not leave out anything for even the most novice of seamstress. The terry cloth corners are a nice touch to the nursing covers as you can use it as a pocket to tuck a tissue or bra pad. Plus, it is nice to have something close to wipe the baby's mouth.
I'm sorry I don't have a better picture, my model was asleep and I forgot to take another picture before I gave it as a present.

In a few days, I will have one more easy sew baby gift to share with you, but I need to make it first so that I have pictures for the step-by-step tutorial. If you've ever wanted to make a baby sling, you won't want to miss that tutorial.


I love your idea of the terry cloth corners. Brilliant!!! I am thinking of making me a new one now that is light weight for summer. Thank you!
ReplyDeleteI have made my own nursing covers too- without the boneing and they work just as good- maybe a little more tricky to latch your kid on but it still works:) Just thought I would through that out there for anyway who had misgivings about finding the boneing (like me!) :)
ReplyDeleteDelina
dewthis.blogspot.com
Great, great tutorial! I'm going to pin this to use sometime ;) Thanks for sharing!
ReplyDeleteSwing by my blog to see how to make healthy ice cream, no ice cream maker required!
-MJ @ MD School Mrs
Thanks for posting this! I was just thinking about how I could make a few of these. If I don't get any for baby shower gifts, I'm definitely going to try this. Thanks!
ReplyDeleteI have been making these for my daughter and was planning on writing a post about it this week..she loves them! Mine are a bit different but same idea...good job.
ReplyDeleteGreat idea with the terry cloth!
ReplyDeleteJust made one of these using sheer lining I think it was, but I wanted it light and airy for my baby due in the heat of July, I am going to make another as I have leftover boning and as you say the D rings came in a four pack, I like your tutorial better so I am going to use it instead. Thanks The only thing different in the other tutorial is one of the corners was a square pocket and I liked that cause you can fold it into itself for storing in the diaper bag. Thanks again for putting this together.
ReplyDeleteSweet! This is so helpful!
ReplyDeleteI would love to have you share this at our kids & family themed link party :: PLAYDATE.... http://beneaththerowantree.blogspot.com/2011/06/playdate-link-party-in-summer-13.html
Cheers,
Lori
www.beneaththerowantree.com
The terry cloth is a brilliant idea! I would love it if you would link up to my Tuesday Confessional link party going on now: http://www.craftyconfessions.com/2011/06/tuesday-confessional-link-party.html. I hope to see you soon!
ReplyDelete~Macy
Thanks for all the great comments and ideas! I really appreciate it! I hope this tutorial was helpful to everyone!
ReplyDelete~jill
So cute!! And I sooo need another of these!
ReplyDeleteOne tip for anyone who's making one of these, use your zipper foot to sew the boning in. After one broken needle and a lot of headache it helps to keeping the boning straight.
ReplyDeleteThank you so much for the tip. I am not experienced with using a zipper foot so I appreciate the advice. I need to try the zipper foot! Thanks for taking the time to leave me a comment! ~Jill
DeleteWhere do you buy boning at? Is it totally necessary?
ReplyDelete