

Saturday, November 12, 2011
Grand Opening of Jill's Etsy Shop!
After much research into opening shops, taxes, business licenses and such, I am excited to tell you that I have FINALLY opened up an Etsy Shop!
The Best Cranberry Relish
My Mom makes the best Cranberry Relish! I look forward to it every year. Three years ago, I started making it myself and have gotten many requests for the recipe.
This is not a gel-like cranberry sauce. That is all my husband will eat. This recipe is chunky, fruity and a great mix between the flavor of natural cranberries and the sweetness of fruit. If you try this recipe, please leave me a comment and tell me how it worked for you! I hope this will become one of your family's favorites for many years to come!

This is not a gel-like cranberry sauce. That is all my husband will eat. This recipe is chunky, fruity and a great mix between the flavor of natural cranberries and the sweetness of fruit. If you try this recipe, please leave me a comment and tell me how it worked for you! I hope this will become one of your family's favorites for many years to come!

Friday, November 11, 2011
Stella and Dot-Blogiversary Giveaway 3 ENDED

Our friend, Jennifer, has recently joined the Stella and Dot team as an independent stylist.
Designed in New York and San Francisco by award winning trend-setters who also create jewelry for Marc Jacobs, Prada, Chanel, Kate Spade, Banana Republic, Neiman Marcus and Fred Segal. Our boutique style jewelry has been featured in top fashion magazines like InStyle, Lucky Magazine and even Ladies Home Journal. It is also worn by celebrities like Kelly Ripa, Oprah, Penelope Cruz and many others.
The pieces arrive at your door within 3-5 days in gorgeous boxes that are perfect for gift giving. Leave a personal wish list with me, and I’ll be happy to pass along some gift giving ideas to your special someone!
With 50% of the line under $50, many pieces are as affordable as they are irresistible!
Sella & Dot is simply fun, fashionable jewelry and accessories. Our Trunk Shows are a great way to mingle with friends in a cocktail party type atmosphere while shopping together……NO sales pitch, NO presentation and NO games…….just jewelry, accessories, girlfriends and fun!!
Check out the Holiday Collection Stella & Dot just released. I LOVE the new Rose Gold trend….it is so delicate yet dramatic. Third Time’s A Charm Necklace, like many Stella & Dot pieces, has a nice mix of different metals, you can truly wear it with anything.
Click on the link to see how much fun a Trunk Show really is!!
http://stylewatch.stelladot.com/content/videos/trunk-show/
Let me know how I can meet your needs!
Jennifer Allred
Stella and Dot, Independent StylistJennifer has generously donated a $30 gift certifcate, for one of our followers.
This is one of my favorite pieces!

The Avery Necklace-isn't it beautiful?
Visit Jennifer's Website and leave us a comment telling us your favorite Stella and Dot piece.
Like Jennifer's Stella and Dot facebook page and leave a comment telling us you do.
Like Our Seven Dwarfs on facebook and leave a comment telling us you do.
You have until December 4th to leave your comments. Using random.org, we'll choose and announce the winner on December 5th. Good luck to you all.

A Couple More Fantastic Thanksgiving Decorations
This is another repost from last year. From what I understand, makia creations no longer exists; however, you can still easily create these great projects! I hope you are as inspired as I was!
One of my favorite crafty blogs is http://howdoesshe.com/ I must admit, I am a follower of this one. I have been inspired by their ideas, so many times! Two of the girls that created the blog have started a business, selling craft kits for their projects. This is a fabulous idea!
For one of their projects, I ran to a dozen stores looking for the necessary materials. It was at the beginning of my crafting frenzy and I didn't realize that it was okay to substitute. Save yourself the trouble. Substitute when necessary! Anyway, their site was my inspiration for the "Turkey Feather Photo Stand" and "Truly Thankful" board I copycatted. http://www.makiacreations.com/thanksgiving_kits Because they are selling the kits, they don't offer tutorials. Because it's a copycat craft, I didn't set up a tutorial either; however, it's pretty simple.


I free handed the turkey body and turkey head on mdf. My lovely husband cut them out with his jigsaw. He also made little triangles for the waddle part. I used his belt sander to smooth all the edges. (Have I mentioned how wonderful it is having a supportive husband with all the right tools?) I picked out the perfect papers (this is a time consuming task for me). I mod podged them on. When they were dry, I re-sanded to blend in the edges. I stained the edges to better blend. I wood glued them all together with that wonderful Elmer's wood glue. After it was dry, I drilled 9 holes to the top of each turkey. I cut 9 pieces of six inch wire for each turkey. I bent the top of each wire with pliers so they would act as photo holders. I then wood glued the tips into the holes I drilled. I probably didn't need to wood glue them because they fit pretty tightly; but, decided to anyway to keep from losing them when I pack the Thanksgiving stuff away each year. I made two different turkeys. One for me, and one for my mom. Now, I just need to take some pictures to put in these little guys.


Now for the "Truly Thankful" boards. I made two different ones that are very much alike! That darling husband of mine cut scrap wood into 11x16 pieces for me. The wood was already eleven inches wide, so we went with that. I chose 16 inches because I like the torn paper look on the edge of the board and I think it makes a great wall hanging size. I sanded the wood and rounded the corners, using that belt sander. I selected my paper (another tedious task!). I had to use two sheets since the paper comes in 12 inch squares and I needed 16 inches. I tore the second piece to give it that rugged finish. I mod podged it and let it dry. I re-sanded it and stained it to blend in the edges. (Do you see the mod podging pattern?) I drilled the holes on top for hanging. I decided on cranberry vinyl to give it a punch of color. I spent forever picking out what I thought were the perfect fonts. I cut the words on my Silhouette SD. Jill and I both have a Silhouette so you'll notice we use them on many of our projects. They are HUGE time savers! I applied the vinyl using transfer tape. I added the ribbon around the wood and through the holes to add a little girly touch. I then attached handles for hanging. You will notice that each frame hangs differently. Lesli got a steal of a deal on the hanger style one and picked it up for me. I only had one. So, I improvised on the second hanging (again for my mom) and used a piece of the wire I used for the photo feathers. I twisted the edges around a pencil to give it the spiral look and worked the ribbon around it. I think it turned out nicely too. Voila! Two more copycat crafts completed!
Thursday, November 10, 2011
Thanksgiving Advent Calendar
This is a project we shared last year. It's up again in our house. Some things are too good not to share (or share again)!
Advent calendars are great teaching tools for our children. Santa leaves notes to my daughters, in our Pottery Barn advent calendar. http://www.potterybarnkids.com/products/telluride-advent-calendar-new/ My older daughter really got the concept of "Counting down to Christmas" using this calendar. I've decided it's important to do this with other holidays too. We found an Thanksgiving advent calendar that reminds us to be grateful for the things in our life. Another wonderful lesson for our children. http://jellybeanjunkyard.wordpress.com/2010/10/12/tuesday-tutorial-give-thanks-gratitude-board/ This is adorable, reusable, and not accomplished in two and a half hours like she says. At least not for me. I'm thinking it's more of a four hour project. Of course, maybe I was hung up too much on the font and paper choices. Could be! A couple of hints. I used vinyl for the title and the numbers. It works wonderfully and you get to skip the gluing on step. I recommend putting the numbers on last. I mod podged mine. When you mod podge paper, it tends to warp a bit. Because the vinyl was on, it shriveled in some places. It still turned out well, but would have been better if I applied the vinyl at the end. I also decided to make bows on mine instead of just the ribbon ties. Something that helps, keep all the bows in the same place, is making a template. I just decided where the holes worked best, punched them in the template, and used the template 30 times to punch the holes in all the cards. Since I am not good at eyeballing, it kept everything in the same place and was easy! You could use this idea for every holiday.

Advent calendars are great teaching tools for our children. Santa leaves notes to my daughters, in our Pottery Barn advent calendar. http://www.potterybarnkids.com/products/telluride-advent-calendar-new/ My older daughter really got the concept of "Counting down to Christmas" using this calendar. I've decided it's important to do this with other holidays too. We found an Thanksgiving advent calendar that reminds us to be grateful for the things in our life. Another wonderful lesson for our children. http://jellybeanjunkyard.wordpress.com/2010/10/12/tuesday-tutorial-give-thanks-gratitude-board/ This is adorable, reusable, and not accomplished in two and a half hours like she says. At least not for me. I'm thinking it's more of a four hour project. Of course, maybe I was hung up too much on the font and paper choices. Could be! A couple of hints. I used vinyl for the title and the numbers. It works wonderfully and you get to skip the gluing on step. I recommend putting the numbers on last. I mod podged mine. When you mod podge paper, it tends to warp a bit. Because the vinyl was on, it shriveled in some places. It still turned out well, but would have been better if I applied the vinyl at the end. I also decided to make bows on mine instead of just the ribbon ties. Something that helps, keep all the bows in the same place, is making a template. I just decided where the holes worked best, punched them in the template, and used the template 30 times to punch the holes in all the cards. Since I am not good at eyeballing, it kept everything in the same place and was easy! You could use this idea for every holiday.

Wednesday, November 9, 2011
Mamachee Patterns Giveaway! ENDED
It's Day 2 of our 12 days of Giveaways! We are thankful to have Mamachee Crochet Patterns for another fabulous giveaway! Tara Murray is the creative mind behind Mamachee Patterns.

Here is a little about Tara:
"My name is Tara, I'm a wife and a mother of four. I grew up in Alaska (the beautiful and the cold) and I'm pretty sure this is where my family will grow up too. I love to crochet, design, and craft. I absolutely LOVE being able to share everything with you via this blog, I hope you enjoy it as much as I do!
Story behind the names:
Mamachee (actual spelling: Mamatschi) I have German Heritage and so I grew up listening to German music and my favorite songs were from Heintje who sang a song named Mamatschi (you can you tube this if you want to listen to it). Heintje was just a young boy that always song about his Mom and Grandmother....which is what I probably would have sung about too if I had a singing voice. I adore my Mama!

First, visit Mamachee Crochet Patterns on Etsy and leave a comment here telling us your favorite pattern from her shop.
Next, visit Tara's blog Easy Make me Happy and become a blog follower, then leave a comment here telling us you do.
Finally, like Our Seven Dwarfs on facebook and leave a comment here telling us you do.
That's a total of three comments you can leave! You have until December 2nd to enter. We will pick the winning comment using random.org. The winner will be announced on December 3rd. We wish you all the best of luck and once again want to thank Tara of Mamachee Patterns for giving our readers an opportunity to own some of your beautiful crochet patterns! We know that many amazing creations will come from these patterns!
Here is a little about Tara:
"My name is Tara, I'm a wife and a mother of four. I grew up in Alaska (the beautiful and the cold) and I'm pretty sure this is where my family will grow up too. I love to crochet, design, and craft. I absolutely LOVE being able to share everything with you via this blog, I hope you enjoy it as much as I do!
Story behind the names:
Mamachee (actual spelling: Mamatschi) I have German Heritage and so I grew up listening to German music and my favorite songs were from Heintje who sang a song named Mamatschi (you can you tube this if you want to listen to it). Heintje was just a young boy that always song about his Mom and Grandmother....which is what I probably would have sung about too if I had a singing voice. I adore my Mama!
Easy Makes Me Happy Blog
This doesn't have much behind it besides a love for instant gratification. Patience is not a word that would accurately describe me (I'm working on it) and my attention span is a bit low as well....My favorite is EASY! "
This doesn't have much behind it besides a love for instant gratification. Patience is not a word that would accurately describe me (I'm working on it) and my attention span is a bit low as well....My favorite is EASY! "
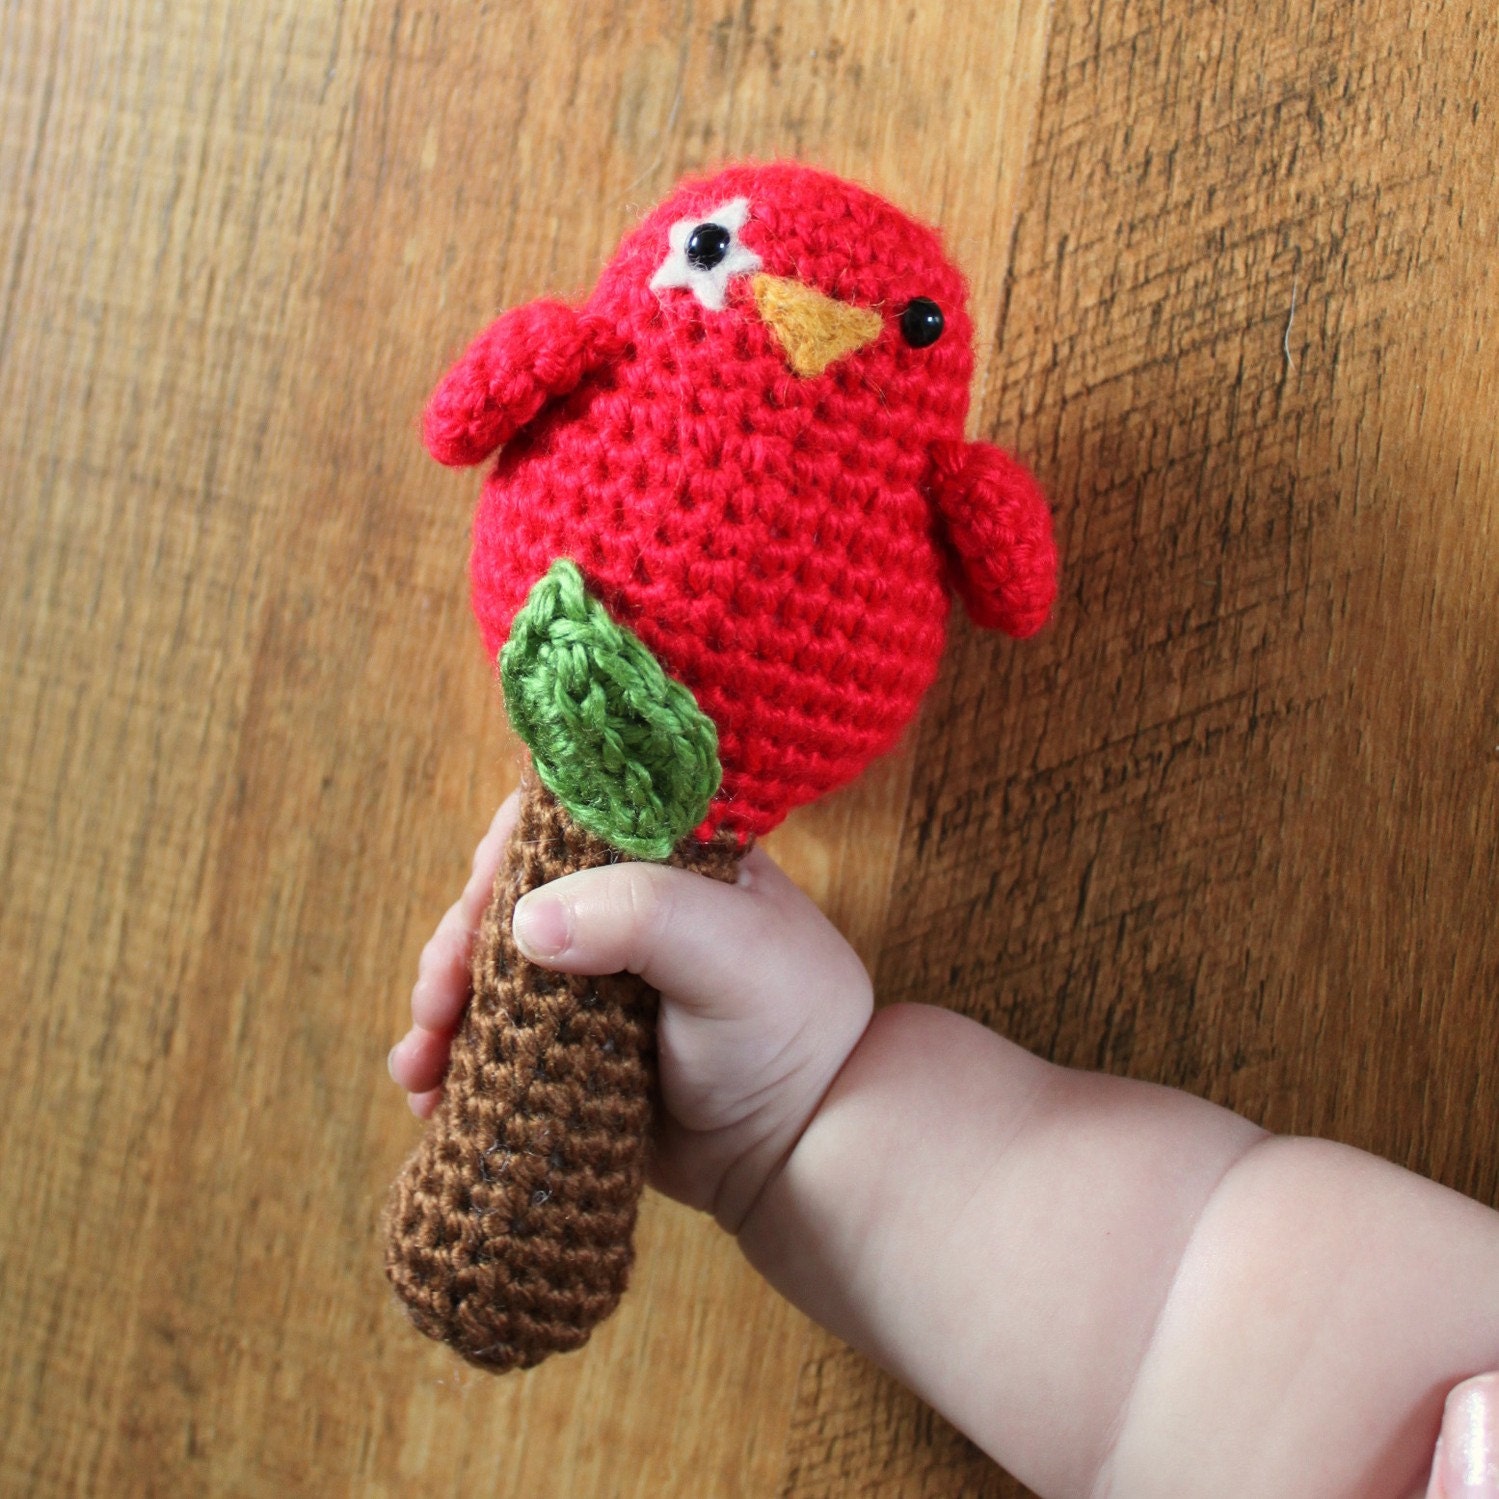
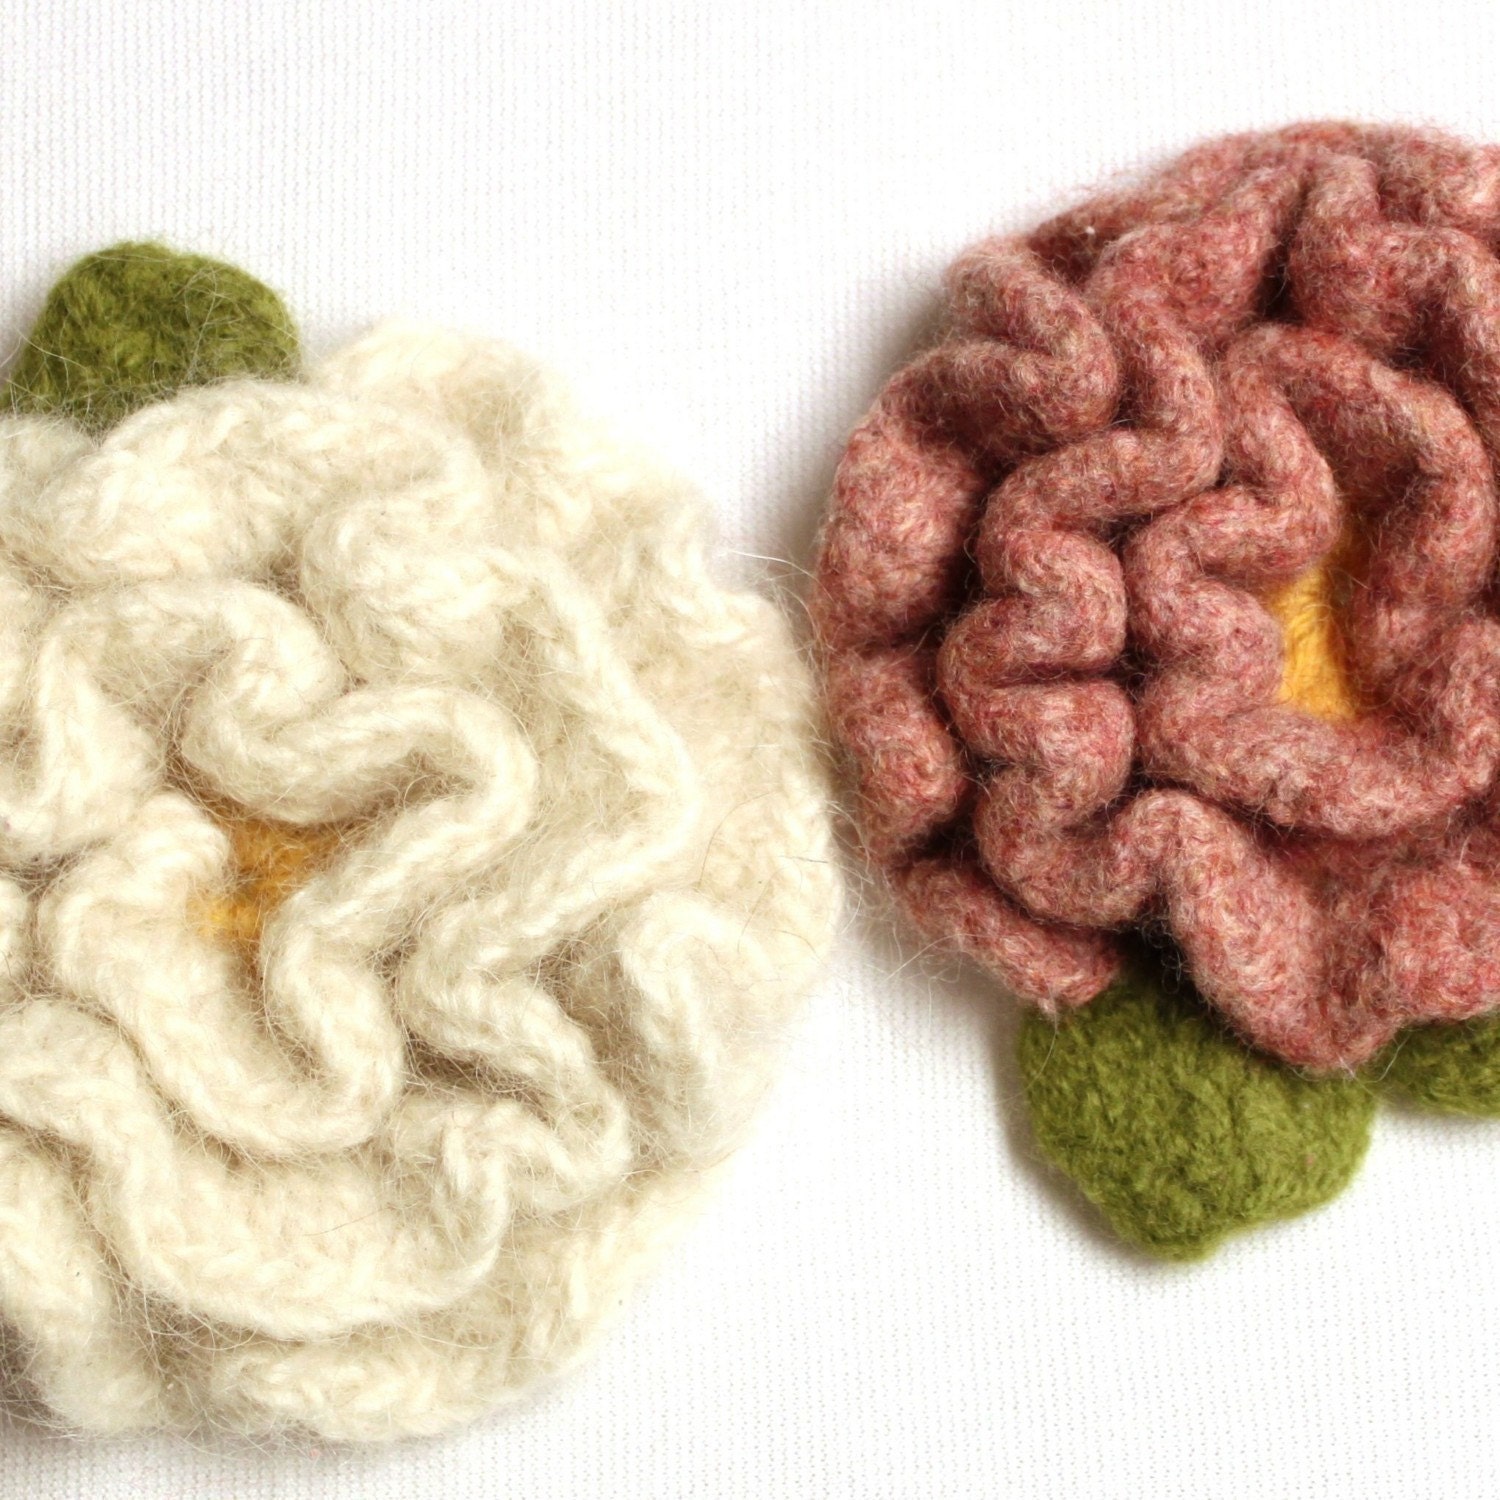
Tara recently offered a deal on Belle Chic and Jill was able to score some great patterns. Here are a few of her new favorites!
Angela Hat with Flower
Birdie Rattle Toy
The Laila Flower
There are three main ways to connect with Tara: Etsy Shop, Facebook, Easy Makes Me Happy Blog. Send her some love and tell her we sent you!
***
Tara is giving away 3 patterns. We will choose 3 winners to each win 1 pattern. That way more people can experience these wonderful crochet patterns! We've made entering super simple!First, visit Mamachee Crochet Patterns on Etsy and leave a comment here telling us your favorite pattern from her shop.
Next, visit Tara's blog Easy Make me Happy and become a blog follower, then leave a comment here telling us you do.
Finally, like Our Seven Dwarfs on facebook and leave a comment here telling us you do.
That's a total of three comments you can leave! You have until December 2nd to enter. We will pick the winning comment using random.org. The winner will be announced on December 3rd. We wish you all the best of luck and once again want to thank Tara of Mamachee Patterns for giving our readers an opportunity to own some of your beautiful crochet patterns! We know that many amazing creations will come from these patterns!
Tuesday, November 8, 2011
Thanksgiving Printables!
Fire up the printer for some fabulous Thanksgiving printables. From your favorite food to true thankfulness, you can find it all!

Monday, November 7, 2011
Elijah's Attic Giveaway ENDED

"We are a husband and wife team who have a passion for creating and decorating with unusual items. We love to repurpose and recycle every day items into something unusual and interesting. We love to shop junk yards and thrift stores to find interesting and vintage articles. I guess you can say we needed to turn this passion into a business because we ran out of room to display all the items we created. So we bring you Elijah's Attic to share our passion with others. Elijah is our beautiful son."
Chris and Jennifer are giving away a $25 gift card to their etsy shop. We've made entering super simple!
First, visit Elijah's Attic and leave a comment telling us your favorite item in their shop.
Next, like Elijah's Attic on facebook and leave a comment telling us you do.
Finally, like Our Seven Dwarfs on facebook and leave a comment telling us you do.
That's a total of three comments you can leave! You have until November 30th to enter. We will pick the winning comment using random.org. The winner will be announced on December 1st. We wish you all the best of luck and once again want to thank Elijah's Attic for giving our readers an opportunity to own some of your beautiful, repurposed, artwork!
Subscribe to:
Posts (Atom)


