Welcome!
Thanks for visiting! Please leave us a comment as we love your feedback.
See where we are partying at the bottom and on the sidebar.

Wednesday, November 30, 2011

Making a Photo Board-A Tutorial

Do you want a super, easy, inexpensive way to display your pictures?
This makes a great holiday decoration too!
My Santa Photo Board

You will need:
A wooden board... whatever size you'd like.  Mine is about 11x18". 
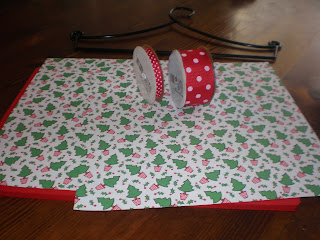
Background Paper
Vinyl (I cut mine on my Silhouette)
Mod Podge
Paint
2 foam brushes (one for painting and one for Mod Podge)
Ribbon (I used two sizes. One for the main bow and a smaller one for the bows on top.)
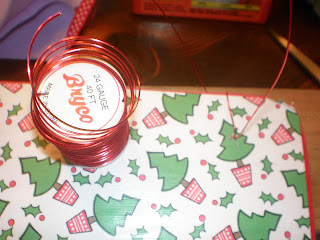
Wire
A Drill
You favorite picture or pictures to post
Double Sided Tape for Posting
Sandpaper or a belt sander

Step 1-Sand the edges of your board smooth.


Step 2-Paint the edges and the border of the front of your board.  Let it dry completely.  There's no need to paint the entire board since it will be covered with your background paper.

Step 3-Choose your background papers and cut them to size.  Most papers are 12x12.  Since my board was longer than one piece, I neatly tore the second sheet to overlap the first sheet.  I really like the way this looks.
Step 4-Spread a heavy layer of Mod Podge onto your wooden board. It should be thick enough where it looks white but not clumpy.

Step 5-Carefully place your background paper on the board.  Using your hands, smooth the paper down as much as possible.  When you are done, you may want to use a roller, (I use my Pampered Chef one) to get out as many wrinkles and bubbles as possible.

Step 6-You may want to place a book or piece of wood on top of the board to minimize lifting and bubbles.  Let it dry about 30 minutes.  Going onto the next step before letting it dry will cause more wrinkling in the paper.

Step 7-Apply a thick coat of Mod Podge over the entire surface of the background paper.  Let it dry thoroughly.

Step 8-Sand the edges, where the board and paper meet, with an electric sander, sanding block, or piece of sand paper.  This helps the edges blend in.


Step 9-Drill holes on either side of the board, large enough to slip your wire through.

Step 10-Insert your wire through either side, having the excess come through to the front of the board.  I wrapped mine around the top of the board, to attach a ribbon later. Leave about 3 or 4 inches of excess on either side.  Wrap the excess around a pencil or glue stick to make a spiral shape.


Step 11-Tie your small bows around the top wires.  Tie your large bow around the middle of the board.  I did it about 2/3rds down.

Step 12-Remove all the vinyl around your words until all you have left is what you actually want on the board.  Take a piece of transfer tape and put it on the vinyl.  Rub the transfer tape with a too.  I have one that came with my Silhouette.  You can also use your Pampered Chef stoneware scraper, like Jill did, or a popsicle stick would work too.  Place the words, on the board, where you want them. I chose the bottom right corner. Rub the transfer tape again. Gently peel away the transfer tape.  Sometimes, I've had to use the tool to hold the vinyl letters away from the transfer tape, so they go on smoothly.  The more you do this, the better you get.

Step 13-This is your lucky step. You're almost done!  Using double sided tape, attach your favorite picture or pictures to the board.  I plan to add more in a random pattern.


Congratulations!  You're done!  In an earlier post, I showed how I made a similar board for Thanksgiving.  I plan on making one of these for every holiday.  They are easy to make, fun, and inexpensive.

Related Posts Plugin for WordPress, Blogger...

Tuesday, November 29, 2011

Crochet Dreamz Pattern Giveaway

Today marks the last of our 12 days of Giveaways!  Do not fear, we have another great giveaway to finish off our 12 fabulous giveaways!  We've are so thankful to all our wonderful sponsors for the fantastic giveaways.  I hope that you have enjoyed them as well!

Today's giveaway is from Crochet Dreamz Patterns.  Shenaaz is the creative crochet shoe-master behind Crochet Dreamz.  She has more than shoes, but she is one talented lady when it comes to making all these fabulous shoes!


Related Posts Plugin for WordPress, Blogger...

Monday, November 28, 2011

Jill's Etsy & Paying it Forward Announcement

As many of you know, I recently opened up an Etsy shop.  I am very excited to get more listings up and to expand the items that I am creating.


I'm not sure what I was thinking opening up a shop so close to Christmas.  I realize now that I have missed out on some key business, but I also realized that I may overload myself at one of the busiest times of the year.  I'm not worried though, I would best under pressure.  My sister says it is my preferred method.  It probably is, but of insanity!

I finished up a few local orders and then opened up my shop.  Then I got a flood of local orders again.  I am very thankful for the business locally and on Etsy as it helps to pay for Christmas gifts and my yarn addiction!

I was incredibly happy when I got my first official Etsy order last week!  Woo hoo!  I was excited.  Plus, it was from someone in Canada!  Yippee, I've gone international to start.  I can't wait to see where future orders will come from.

I share all of this information to let you know that I have a big announcement about my shop.  Let me give you the background first.  My husband is an avid reader. (I just read beach novels and Francine Rivers).  He recently read Entreleadership by Dave Ramsey (he passed along many business tips to me from this book) and Start Something that Matters by Blake Mycoskie.  If you aren't familiar with Blake Mycoskie, you might know him better as the creator of the TOMS brand of shoes.  TOMS shoes started a program that for every pair of shoes that is purchased another pair will be given to a deserving recipient in South America.

Both of the books have been wrestling in my husband's mind for the last few weeks.  After I opened up my shop, he came to be with an idea, which I loved. He said to me, "What if for every hat that is purchased on etsy you make another hat or item that goes to charity or the NICU."  I told him that his idea was perfect!

In the past I had always thought of making blankets for Project Linus, but blankets are very time intensive and I didn't have that much time.  A hat I can do though.  I know local hospitals need many hats for all the babies, especially those in the NICU. That is where I want to make an impact.  I love giving to others and I want to give to God's little gifts the most!

Therefore...

With the opening of my shop, I want to announce that for every hat that is purchased, I will make a special hat that will be donated to NICU babies in local Atlanta hospitals. 

I will regularly post my stash of hats that I make for this pay it forward part of my shop here on the blog. I won't be making boring little hats, but the cute ones like the ones that you see in my shop.  Every baby deserves something special and I want to help keep them warm and know that they are loved.

The next time you want to buy a handmade gift, please consider my shop.  You'll be giving a gift twice!

I would love it if you would share my shop and mission to pay it forward with others.  I know it might not be something huge, but every little bit makes a difference.


Related Posts Plugin for WordPress, Blogger...

Snowball Hat with Earflaps

I've been making some new hats lately and wanted to share them with you.  We've had a few cool days here in Georgia, even though last week it was close to 80 degrees!

I wanted to make my kids a cute earflap hat to keep them warm while we do some holiday activities outdoors.  I love the little snowball that is multi-colored on top as well.

Related Posts Plugin for WordPress, Blogger...

Sunday, November 27, 2011

The 11th Giveaway of our 12 Days of Giveaways-Little Me Tea

Little Me Tea is a drink, for children, that's caffeine free, all organic, with no added sugar. I know we're not used to buying "Tea" for our children; but, just look at the benefits and you may just change your ways.

Little Me Tea has two flavors of tea. Julia's Tropical Tea is a unique combination of organic, caffeine-free white and Rooibos teas  blended with hibiscus and chamomile, then sweetened with organic tropical fruit juices and vegetable juices. Zane's Grape Tea is unique combination of organic, caffeine-free white and Rooibos teas blended with hibiscus and chamomile, then kicked up with organic red grape juice and vegetable juices.

The chart above shows how Little Me Tea compares to other available children's drinks. 
Not only will your child's health benefit from drinking Little Me Tea, your child will enjoy it. It's tasty!

Would you like to try it for your child or for yourself as so many adults have been reporting how much they like it and the benefits they're seeing from drinking it?  Little Me Tea is shipping 5 of our followers a winning prize pack. Each prize pack contains a carton of Julia's Tropical Tea and Zane's Grape Tea.  This one is easy to enter and you have great odds!

Here's what you need to do to enter.  Remember, leave a separate comment for each entry!
Related Posts Plugin for WordPress, Blogger...

Copy Cat Christmas Crafts: Coffee Filter Tree

Thanksgiving is over so it's time to get going on Christmas decorations.  Here's one I made last year.

How cute is this?  I made it for $2.50.  I used coffee filters I had left over from my coffee filter fall wreath.  I used crystals from the bouquet I carried in my friend Mandy's wedding. I used a pack of ribbon roses, I already had.  I used the wood cut from the bottom of our  Christmas tree as a base.  The only thing I bought was the green foam cone which was $2.50.  This didn't take long at all to make and is oh so cute!


Check out where I got the idea as well at Crafts by Amanda


Related Posts Plugin for WordPress, Blogger...

Saturday, November 26, 2011

Cookie Swap Recipes from 2010

This was a post from last year.  I'm going to this same swap on December 3rd of this year. Does anyone have the perfect cookie swap recipe for me? I want to blow my friends away with my mad cookie making skills! 

I thought some of you may need some great holiday cookie ideas.  Here's what I've got to share! 

Cookie swaps are so much fun. I went to one last week.  There were 11 of us. We each brought 4 dozen cookies.  There were some for sampling, and then each person took home four of every cookie. What a great way to get a variety of great cookies!  I wanted to share some of these great cookie swap recipes with you, as well as some of my favorite holiday cookie recipes.  You can add these to Jill's and bake away!

The recipe I brought was for Heath Cookies.  These sound plain, are easy to make, and taste incredible!

Heath Brickle Cookies

1 pack Heath brickle (this can be found in a brown bag, near the chocolate chips)
1 1/2 tbsp oil
6 tbsp flour
(mix in bowl and set aside)
1/2 cup butter
6 tbsp. sugar
6 tbsp. brown sugar
1/2 tsp. vanilla
1 egg
1/2 tsp. salt
1/2 tsp. soda
1 1/4 cup plus 2 tbsp. flour
Cream butter, sugar, and vanilla. Add egg. Blend until smooth. Add everything else, flour last. Fold in Heath crumbles. Bake 375 degrees 10-12 minutes.

*****
This was a recipe shared by my friend, Linda Hunt.  It's an unusual cookie recipe but mighty tasty.  If you like cheesecake, you'll like these.

Cheese Fingers
2 - 8 oz. pkgs. cream cheese at room temp.
2 pkgs. crescent rolls
1 egg (separated)
1 tsp lemon juice
1 tsp vanilla
3/4 cup sugar

Grease 9 X 13 pan.  Lay 1 package of crescent rolls in bottom of pan.  Seal perforations with fingers.  Add egg yolk, lemon juice, vanilla & sugar to cream cheese.  Mix for 5 minutes.  Spread over crescent rolls.  Unroll second pacakage of crescent rolls and put on top of cream cheese mixture.  Seal perforations with fingers.  Beat egg white and spread on top of rolls.  Bake at 350 degrees for 30 minutes.  Let cool overnight.  Dust with powdered sugar or colorful sugar for the season.

*****
Justine Tobin, the host of the cookie swap, made these yummy peanut butter balls.  If you're like us and have a house member allergic to peanuts, try substituting almond butter or sunflower butter.
Peanut Butter Krispy Balls

1-18 ounce jar of peanut butter
2 cups Rice Krispies Cereal
1 1/2 cups powdered sugar
1/4 teaspoon vanilla extract
1 cup chocolate chips

In a double boiler, over low heat, melt chocolate and set aside.
In a medium sized bowl, combine all other ingredients.
Blend well until the mixture forms a dough.
Roll into 1 inch balls.
Using a toothpick or fork, dip the balls into the chocolate until well coated.
Place onto a cookie sheet lined with wax paper.
Refrigerate for 30 minutes.

*****
Jeanie Collin brought delicious Mexican Wedding Cookies.  She said that it was her favorite as a child.  They are easy and adaptable.
Mexican Wedding Cookies

1 cup of margarine
1/2 cup powdered sugar
1 3/4 cup plain sifted flour
1/2 tsp. vanilla
1/2 cup ground pecans

Cream margarine with sugar. Blend in vanilla, flour, and pecans. Chill. Roll dough into balls. Bake on ungreased cookie sheet for 15 minutes at 350 degrees.
When slightly cooled, roll in powdered sugar.

*My daughter's school had an International night this week.  We were supposed to bring an international food item. I made these.  I did make a few adjustments. Instead of margarine, I used butter.  (I think butter is ALWAYS better) I also omitted the pecans.  I was worried that someone may have a nut allergy so I wanted to make sure it was safe for everyone.  To add a little more flavor, I added 1/2 tsp. almond extract.  Yum!  They turned out delicious. They flattened a little so they weren't perfect balls, but they were pretty and I added sifted powdered sugar on top.

*****
Jamie Newman made Peanut Butter Blossoms. They were absolutely delicious. You could substitute almond butter or sunflower for the peanut butter too.

Peanut Butter Blossoms

48 Hershey Kisses
3/4 cup Reese's Peanut Butter
1/3 cup packed light brown sugar
2 Tablespoons milk
1 1/2 cups all purpose flour
1/2 tsp. salt
1/2 cup shortening
1/3 cup sugar
1 egg
1 tsp. vanilla extract
1 tsp. baking soda
granulated sugar

Heat oven to 375 degrees. Remove wrappers from chocolates. Beat shortening and peanut butter in large bowl until well blended. Add 1/3 cup granulated sugar and brown sugar; beat until fluffy.  Add egg, milk, and vanilla; beat well. Stir together flour, baking soda, and salt.  Gradually beat in peanut butter mixture.  Shape dough into 1 inch balls.  Roll in granulated sugar.  Place on ungreased cookie sheet.  Bake 8 to 10 minutes or until lightly browned.  Immediately press a chocolate into center of each cookie. Cookie will crack around the edges. Remove from cookie sheet to wire rack. Cool completely. Makes about 4 dozen cookies.

Krissy Lyell made Paula Dean's Chocolate Gooey Butter Cookies
Paula Dean's Chocolate Gooey Butter Cookies

1 teaspoon vanilla extract
confectioner's sugar for dusting
1-18 ounce box moist chocolate cake mix
1-8 ounce brick cream cheese, room temperature
1 egg
1 stick of butter, room temperature

Preheat oven to 350 degrees F.  In a large bowl, with an electric mixer, cream the cream cheese and butter until smooth.  Beat in the egg.  Then beat in the vanilla extract.  Beat in the cake mix.  Cover and refrigerate for 2 hours to firm up so that you can roll the batter into balls.  Roll the chilled batter into tablespoon sized balls and then roll them in confectioner's sugar.  Place on an ungreased cookie sheet 2 inches apart. Bake12 minutes.  The cookies will remain soft and gooey.  Coll completely and sprinkle with more powdered sugar.

*****
These were my favorite cookies at the swap.  They are called Seven-Layer Cookie Bars. Kathy Gosman brought them.  They are rich and DELICIOUS.  So many yummy flavors all in one cookie.

Seven-Layer Cookie Bars

3/4 cup unsalted butter
2 cups graham cracker crumbs
1-12 ounce package semisweet chocolate chips
1-12 ounce package milk chocolate chips
1-12 ounce package butterscotch chips
1 1/2 cups flaked coconut
1 cup chopped pecans
2-14 ounce cans sweetened condensed milk

Directions:  Preheat oven to 350 degrees.  In a small saucepan, over medium heat, melt butter.  Spray sides of 9x13 inch pan with cooking spray.  Pour butter into pan. Sprinkle crumbs evenly on butter, then pat them down to even out.  Sprinkle semisweet, milk chocolate, and butterscotch chips evenly over crumbs.  Sprinkle with coconut, then nuts.  Pour milk over layers. Bake25 to 35 minutes or until mixture bubbles and browns on top.  Let cool on a rack; cut into squares.

****
Here's another great peanut butter and chocolate cookie from our friend and follower, Elizabeth Garbin.
Recipe: Double Chocolate Peanut Butter Bars
From the kitchen of: Elizabeth Garbin

1 cup firmly packed brown sugar
1/2 cup margarine, softened
1/2 cup chunky peanut butter
2 eggs
1 teaspoon vanilla
1 3/4 cups all purpose flour
1/2 teaspoon baking powder
1/4 teaspoon baking soda
1 cup mini real semi-sweet chocolate chips
2 tablespoons sugar
35 milk chocolate candy kisses

-Heat oven to 350.  Line 13x9-inch baking pan with aluminum foil, extending foil over pan edges.  Set aside.
Combine brown sugar, margarine, and peanut butter in large bowl. Beat at medium speed, scraping bowl often, until creamy. Add eggs and vanilla. Continue beating until well mixed.  Reduce speed to low; add flour, baking powder, and baking soda.  Beat until well mixed.  Stir in chocolate chips.
Pat dough into prepared pan. Sprinkle with sugar.  Bake for 20 to 22 minutes or until golden brown.  Immediately press evenly spaced chocolate candies into warm bars. Cool completely.
Remove bars from pan using edges of foil.  Cut into bars, cutting between candies.
Yield 35 bars

*****
 These cookies were so different and so good.
Recipe: Rolo Cookies
From the Kitchen of: Marianne Martin

2 ½ cups All Purpose flour                                              
2 eggs
¾ cup unsweetened cocoa                                                
1 cup chopped pecans
1 teaspoon baking soda                                                    
48 Rolos, unwrapped (9 oz pkg)
1 cup sugar                                                                        
1 teaspoon sugar
1 cup firmly packed brown sugar
1 cup butter, softened
2 teaspoons vanilla
Heat oven to 375°.  Lightly spoon flour into measuring cup; level off.  In small bowl, combine flour, cocoa and baking; blend well.
In large bowl, beat 1 cup sugar, brown sugar and butter until light an fluffy.  Add vanilla and eggs; beat well.  Add flour mixture; blend well.  Stir in ½ cup of the pecans.  For each cookie, with floured hand, shape about 1 tablespoon dough around 1 Rolo, covering completely.
In small bowl, combine remaining ½ cup pecans and 1 tablespoon sugar.  Press one side of each ball into pecan mixture.  Place, nut side up, 2 inches apart on ungreased cookie sheets.
Bake at 375°F. for 7-10 minutes or until set and slightly cracked.  Cook 2 minutes; remove from cookie sheets.  Cool completely on wire rack.
Makes 4 dozen cookies.

*****

Recipe: Italian Christmas Cookies
From the Kitchen of: Candace White

Cookies:
1 cup butter, softened
2 cups sugar
3 eggs
1 carton (15oz) ricotta cheese
2 tsp vanilla
4 cups flour
1 teaspoon salt
1 teaspoon baking soda

Frosting:
1/4 cup butter, soft
3-4 cups powdered sugar
1/2 teaspoon vanilla extract
3-4 tablespoons milk
colored sprinkles

In a large bowl cream butter and sugar. Add eggs, one at a time, beating well after each addition.  Beat in ricotta and vanilla.  Combine flour, salt, and baking soda.  Gradually add to creamed mixture.  Drop by rounded teaspoon 2 inches apart onto greased baking sheets.  Bake at 350 degrees for 10-12 minutes or until lightly browned.  Remove to wire racks to cool.  In a large bowl cream butter, sugar, and vanilla.  Add enough milk until frosting reaches spreading consistency.  Frost cooled cookies and immediately decorate with sprinkles. Store in fridge.

*Oops... I didn't store these in the fridge.  They actually got better the longer I had them (a week).


Related Posts Plugin for WordPress, Blogger...

Friday, November 25, 2011

Stringbean Creations Giveaway

Are you ready for giveaway 10 of our 12 days of giveaways? We very excited to share Stringbean Creations with you!  Stringbean Creations features creative designs for your little one!


Jill's friend, Loria is the crafty lady behind Stringbean Creations.  Loria creates beautiful banners that are great for photo props, celebrations or room decor.

Related Posts Plugin for WordPress, Blogger...

Thursday, November 24, 2011

Happy Thanksgiving


We want to wish you a very Happy Thanksgiving!  

We are thankful for each and every one of our followers.  Thank you so much for following our blog and interacting with us.  We love reading your comments and getting your feedback. 

Take time today to spend with those you love.  Please think and pray for all the military members and their families today as they are away from one another.  They give up and risk so very much to allow us to live a life of freedom.  We are thankful for their sacrifices!

HAPPY THANKSGIVING!


Related Posts Plugin for WordPress, Blogger...

Pinterest Picks of the Week 11/24

Happy Thanksgiving!  I hope that you are enjoying yummy food and the love of family and friends.  Remember your blessings this Thanksgiving!  Here is a bit of pinning enjoyment while you get your gobble gobble on! No food today, I figured you were getting your fill! (click the picture for more details)

Great tutorial for making your own DIY Photo Canvas
Related Posts Plugin for WordPress, Blogger...

Wednesday, November 23, 2011

The 9th Giveaway of our 12 days of Giveaways Feltjar


A little less than a year ago, I bought a wonderful set of felted hearts off etsy.  The shop was called Feltjar.  I adore my little hearts.  Laura, the owner of the shop, sponsored one of our first giveaways and gave away a beautiful felted rabbit.  Well, she's teamed with us again.  This time, she's giving one lucky follower 5 felted acorns in red and green shades.

Aren't they precious?
Related Posts Plugin for WordPress, Blogger...

Coffee Filter Wreath

I saw an adorable coffee filter wreath on a blog, http://thelittlebrownhouse.us/2010/04/08/frugal-friday-coffee-wreath/ and decided to put my own spin on it.  I think this is adorable but I wanted a fuller wreath.  I folded the coffee filters in quarters, put three filters together, and attached them to the foam wreath using a straight pin.  I tried the u-shaped pins but that was a craft fail for sure.  The coffee filters fell out.  The pin works much better.  After I tightly packed the filters in, I fluffed them. 
I added a ribbon, before completing the wreath, so it was nicely hidden by the filters.  My favorite part of the wreath is the flower rosettes. I will be doing a tutorial on making them soon.  Believe me, I am no seamstress. These were easy and are adorable! I think the end result is wonderful!
Related Posts Plugin for WordPress, Blogger...

Tuesday, November 22, 2011

Easy and Cheap Decorating with Branches - A Tutorial

I am all about making seasonal decorating easy and cheap.  I have a Lenox vase that I've had for years and have had no idea what to do with it.  It's neutral so very practical. This spring, inspired by my blooming cherry tree, I decided to get some branches and glue cardstock leaves and pink blossoms to them.  It looked fabulous! I've decided to make it a habit to seasonally change the vase.  It's fall... so guess what... I have leaves, in fall colors, hot glued to branches.

1.  First, I gathered branches, from my yard.  The best thing about this is they were free!
2.  Then, I took 6 different pieces of cardstock in Autumn colors.

3.  I found a variety of leaves in the online Silhouette store and added it to my library.
4.  I cut the leaves.
5.  I hot glued them on to the branches.
6.  I added the branches to the vase.
This was an easy, quick project.  Now, I realize that my branches are very unrealistic.  I know one branch doesn't have 6 different leaves.  I just liked the way it looked so I went with it. If you want to be my naturally correct, keep the same kinds of leaves on each separate branch.  I am already thinking about the branches for my winter vase!  Holly maybe?

Related Posts Plugin for WordPress, Blogger...

Monday, November 21, 2011

Blissful Sewing Giveaway ENDED!

It's Giveaway #8 of our 12 days of Giveaways! We are thankful to introduce Blissful Sewing Patterns to you!  If you are in Pinterest, I am sure you have seen these adorable designs!

Blissful Sewing Patterns was created by Surayya from a love of sewing.  She has beautiful designs that are perfect for any little girl that wants to look extra special.

Related Posts Plugin for WordPress, Blogger...

Sunday, November 20, 2011

Yams to die for!

Do you like super simple yet delicious recipes?  I know I do!  Today, I have a family favorite of ours.  It is a great one for fall and even for Thanksgiving!

My Mom makes the best yams.   Many of my friends who came over for dinner at my parents' house while I was growing up, begged for these.  I have a few friends now, who have this on their requested list from me!  Now, I can't wait to share the recipe with you!
This picture doesn't do it justice.  These are creamy, sweet and absolutely delicious!

Related Posts Plugin for WordPress, Blogger...

Saturday, November 19, 2011

The 7th Giveaway of our 12 days of Giveaways-Moonpig.com ENDED

Originally started in the UK in 1999, Moonpig.com was launched in the USA in 2010 as a site where people can go to create personalized greeting cards for all occasions. Customers have the chance to make cards all the more personal by changing the text to bear their recipients name or by uploading their pictures into photo upload cards. Moonpig is most known for its humor ranges, but has cards for everything you could possibly imagine. With over 7,000 card design templates available on the site, Moonpig users will be spoiled for choice by this mind-boggling selection of cards. Once the cards are made, we use our printers in New Jersey to print our cards in the highest quality around and we then ship and mail cards. Orders placed before 2PM will be dispatched on the same day. There are many great features on Moonpig including the chance to pre-pay and get an additional 20% of credit in their account, as well as the all too convenient birthday and event reminder calendar where you can set reminders for Moonpig to email you before all your special occasions to ensure that you have all the cards you need for your important moments.

Moonpig is offering the winner a $50 credit to their site.  That is awesome!  I received a beautiful thank you card, from a wonderful friend, and the quality was simply amazing.
Related Posts Plugin for WordPress, Blogger...
Ebates Coupons and Cash Back